Bokeh is a rather popular word in photography and videography! It's an effect that creates soft light orbs blooming in the background as the main focus stays sharp. It's often used in videos and pictures for artistic purposes but can also be a film narrative tool.
Today, we’ll discuss the Bokeh effect: a blurry, dreamlike, and aesthetically pleasing look used in videos and photography. We’ll start by learning what it is and how photographers achieve this with a camera lens. Then, I’ll guide you in recreating the bokeh effect in your videos using Adobe Premiere Pro and plug-ins in post-production.
Let’s dive in!
What is the Bokeh Effect?
The Bokeh effect is a creative and aesthetic look in which the background lights of an image appear as out-of-focus, creating light effects. This effect creates a sense of shallow depth of field, as the lights seem to be at a greater distance in the blurred background, which also helps the subject stand out in the foreground.
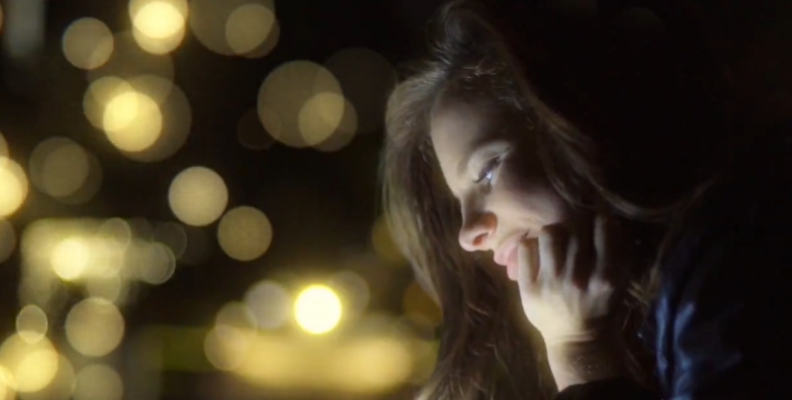
Bokeh derives from the Japanese word boke, which means blur. The word can have other meanings that express confusion or haze. In films, bokeh can create dreamlike scenes, depicting a person in an out-of-focus state of confusion. Bokeh can also be used creatively to showcase night city lights and draw the viewer’s attention to the main character in the scene.
Photographers use different types of lenses and camera settings to create the bokeh effect. A fast lens is preferred because a wide aperture provides a shallower depth of field, which is essential for bokeh.
Types of Bokeh Effects
You can achieve different bokeh effects depending on the lenses, the aperture setting, or the plug-ins used in your photo or video editing software. Here's a list of the most common types of bokeh used in films and bokeh photography.
Smooth Bokeh
Smooth bokeh is a soft and gradual blend between the out-of-focus background and foreground. It's one of the most commonly used bokeh types because the effect does not distract from the subject.
Harsh Bokeh
Contrary to smooth bokeh, harsh bokeh looks more chaotic and can distract from the subject. Although the sharp edges of harsh bokeh may look poor in some cases, they can be used creatively to create an interesting look in your videos.
Swirly Bokeh
The swirly bokeh generates an out-of-focus spiral background around the subject. It adds a stylistic effect to your videos and can be used for dream and surreal sequences.
Bokeh Shapes
Other types of bokeh are names for the shape. There’s the usual circular-shaped orb, but you can create oval, triangle, and cat-eye bokeh. These effects will depend on the lenses and their aperture, but many plug-ins in post-production allow you to replicate the iris shape, too.
Create a Video Bokeh Effect in Premiere
Let’s create a bokeh effect for your videos in Premiere Pro.

Step 1: Import Media
Import your video clips and photos to Premiere Pro and drag them to your timeline to establish your sequence.
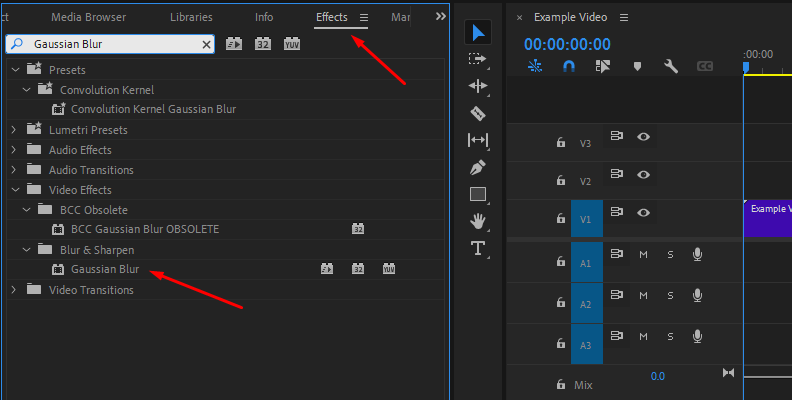
Step 2: Add Gaussian Blur
Go to your Effects panel, search for the Gaussian Blur effect, and add it to the clip in the timeline where you want to add the bokeh effect.
Step 3: Create the Bokeh
Go to the Effects Controls panel and adjust the subject in the clip. Use one of the shapes or the Pen Tool on top of the Gaussian Blur controls to create the mask for the focus. If the subject is moving, you'll need to keyframe the mask to ensure the subject stays focused all the time.
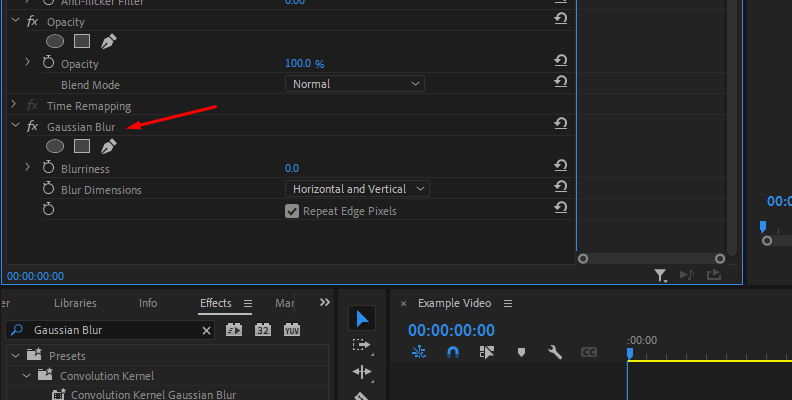
Check the Inverted box under the Mask parameters to add the Gaussian Blur effect to the image except for the mask created. Play with the mask feather and expansion settings to blend the mask with the image.
Now, adjust the blurriness and preview the result in the viewer. Use higher values for a stronger bokeh effect. You can start around 70 and increase or decrease the blurriness value until you find your desired look.
Create a Video Bokeh Effect with Sapphire's S_BokehLights
The effect S_BokehLights is a Sapphire plug-in from the Lighting category that generates random, defocused light orbs moving around the image. In the following guide, I’ll show you how to set S_BokehLights to create a stunning video bokeh effect.
First, you must download and install the Sapphire version for your host. You can install the free trial and follow this tutorial before purchasing a license.
We're going to use Premiere for the example, but the plugin works nearly the same in all hosts.
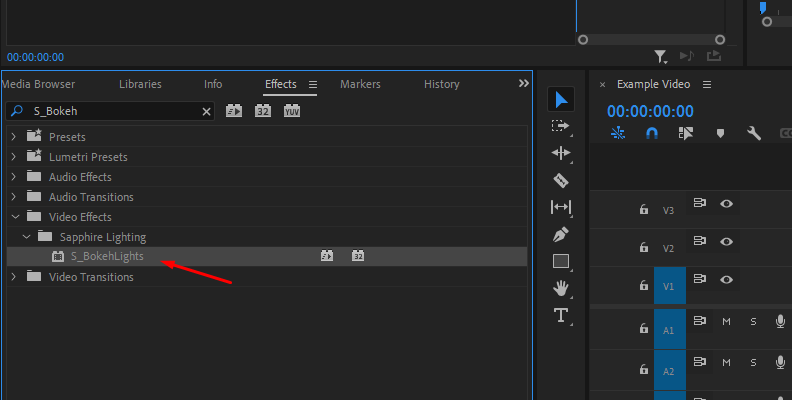
Step 1: Add S_BokehLights to Your Video
Open your project or import a new video file to your timeline to create a new sequence. Go to your Effects panel and search for the S_BokehLights effect. It is in the Sapphire's Lighting category. Drag S_BokehLights to the desired video clip to add a bokeh effect.
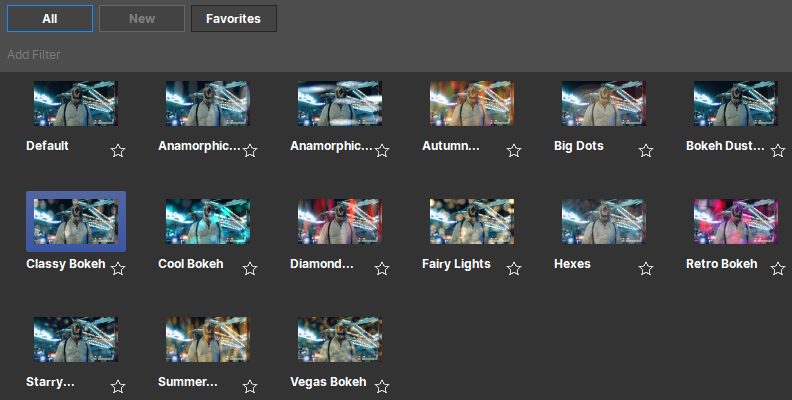
Step 2: Bokeh Presets
Go to the effect controls panel and click the Load Preset button. It will launch the Sapphire Preset Browser for the S_BokehLights effects.
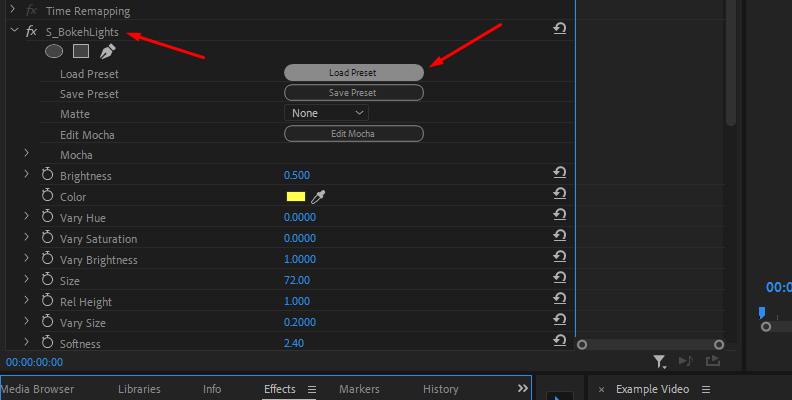
Here, you can explore a library of preinstalled presets to use. Click Load to use a preset. You can modify every preset to suit your needs.
Step 3: Shape the Video Bokeh Effect
Your first parameter in the Effect Controls panel is brightness. Increase the value to make the bokeh lights brighter, or decrease it to make them duller.
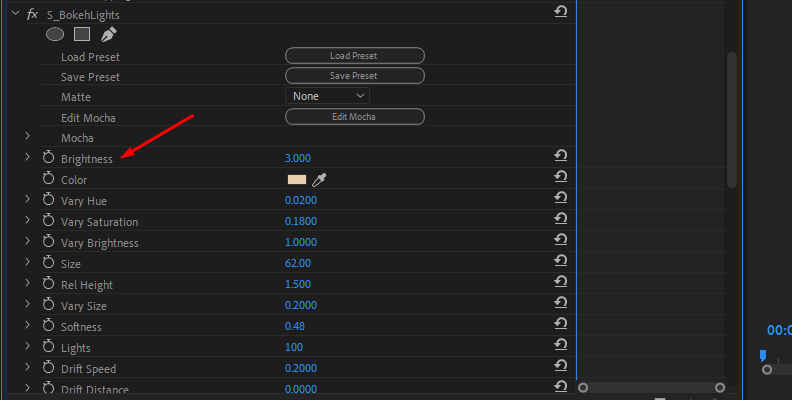
Change the color of the bokeh lights by clicking the color box and choosing a different color from the color window. Vary Hue causes the hue of each light to change. Lower values will stay within the range of the selected color, while higher values will generate colorful rainbow lights.
Vary Saturation and Vary Brightness control the saturation and brightness of each light in the image randomly. Play with these settings to alter the randomness of the bokeh lights.
The Size parameter adjusts the shape and size of the bokeh lights. Rel Height stretches or squishes the lights, and Vary Size randomly changes the size of each light in the image to make them appear one light farther than others and add more depth of field.
The Softness parameter adjusts how blurry or sharp the bokeh lights look. To add more lights or reduce their amount, increase or decrease the Lights parameters.
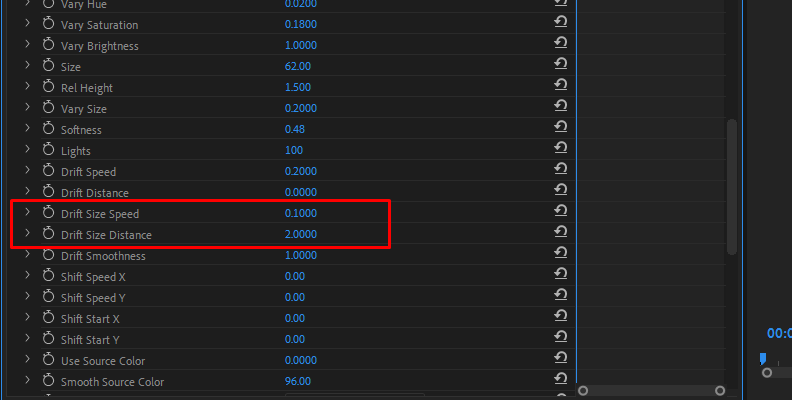
Step 4: Adjust the Bokeh Effect Movement
Use the Drift Speed and Drift Distance settings to adjust the speed and maximum distance at which the lights will move around the screen. Drift Size Speed and Drift Size Distance control the speed and distance at which the lights change their size, while Shift Speed and Shift Start adjust the direction of the bokeh lights.
Step 5: Change the Bokeh Shape
To change the shape of the bokeh, choose from the dropdown menu. "Circle" makes the bokeh light circle shape, "3 sides" make a triangle bokeh, "4 sides" a square, and so on. You can get creative and try different shapes for a more appealing bokeh effect.
Under the Shape Details parameter, you can play with the roundness to further modify the lights' shape. You can rotate and soften the iris' shape with Rotate and Bokeh. Play with these settings and use keyframes to animate the rotation of the bokeh for a more dynamic video bokeh background.
Use the Chroma Distort and Color Fringing settings to add chromatic aberration around the edges of each bokeh light, resulting in an RGB-like pattern.
Step 6: Final Touches
S_BokehLights features Mocha for masking and tracking objects in your video to restrict the effect to certain areas in the scene. You can adjust the Mocha mask settings in your host, such as feathering, blurring, or inverting the mask.
Final Words
Bokeh is an effect that can be used even if you don’t have multiple camera lenses to experiment with. Thanks to plug-ins such as Sapphire S_bokehLights, you can create a bokeh effect to use in your videos and make bokeh presets for your visual projects in Premiere Pro and other popular video editing software.
Get Sapphire, practice with S_bokehLights to create unique bokeh effects and enhance the aesthetic quality of your works.
Good luck!