Many video editors overlook displacement maps, a technique and feature in Adobe After Effects that can provide plenty of ways of adding texture and distortion to images and video footage.
This step-by-step tutorial will teach you how to create displacement mapping in After Effects with the BCC Turbulence effect included in Continuum.
Let’s dive in!
What Does a Displacement Map Do?
A displacement map is a technique that creates distortion effects in an image or video. It works by distorting a layer and displacing its pixels. Displacement map effects allow you to adjust the horizontal and vertical displacement and the geometrics of the displacement map layer.
It’s commonly used to create appealing and useful distortion effects in video footage and images and for visual effects.
How to Do a Displacement Map in After Effects with BCC Turbulence?
BCC Turbulence is a displacement map effect that produces an auto-animating monochrome texture layer and adds multiple layers of noise to the displacement map layer, creating a gel-like distortion to the source image or video. The texture of the displacement map layer and the noise layers can be customizable to craft unique distortion effects in your final image.
Though this tutorial is for Adobe After Effects, BCC Turbulence and all Continuum effects can be used in all major video editing software.

Step 1: Download Continuum for After Effects
Go to the Boris FX Continuum website to download the Boris FX Hub. Install and sign in with your account or create a new one. Once you log in, choose Continuum from the list and select the After Effects installation. If you don't have a license yet, you can use the free trial to learn how to use BCC Turbulence. The free trial is fully featured, but your videos will have a watermark.
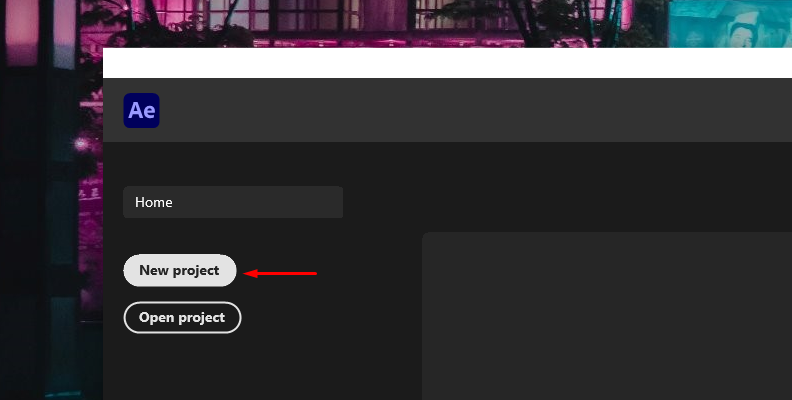
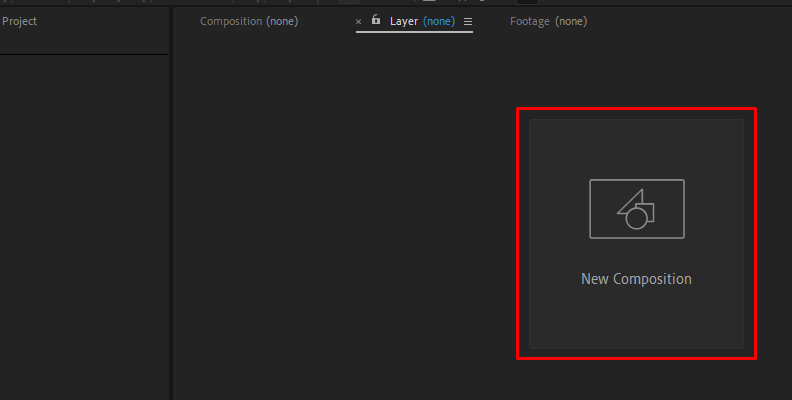
Step 2: Start a New Project and Composition
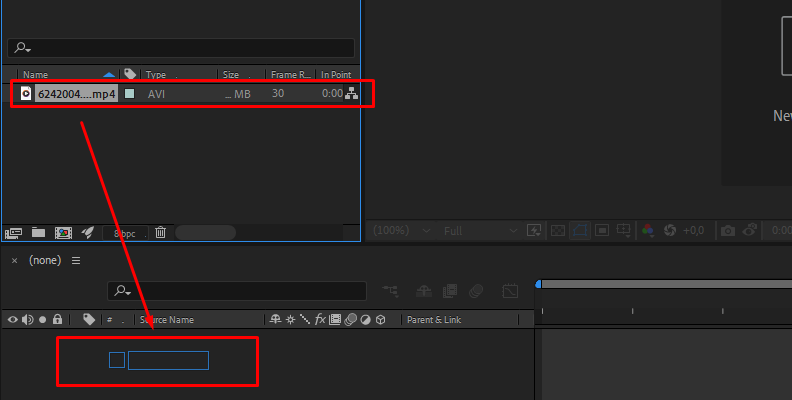
Import the footage or an image to which you want to add the displacement map and drag it to the composition area. For best results, edit and organize your layer until the output image is ready before distortion.
Step 3: Add the BCC Turbulence Effect
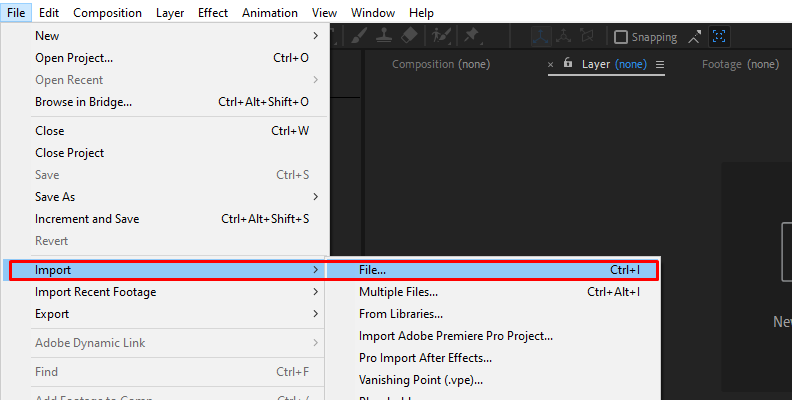
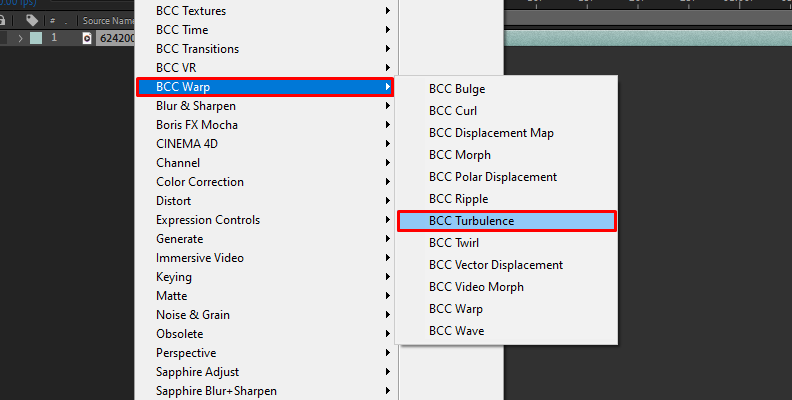
Select the layer where you want to apply the effect and go to the menu Effect > BCC Warp > BCC Turbulence. If you have multiple layers you want to be affected by the BCC Turbulence effect, place an adjustment layer on top of the layers you wish with distortion.
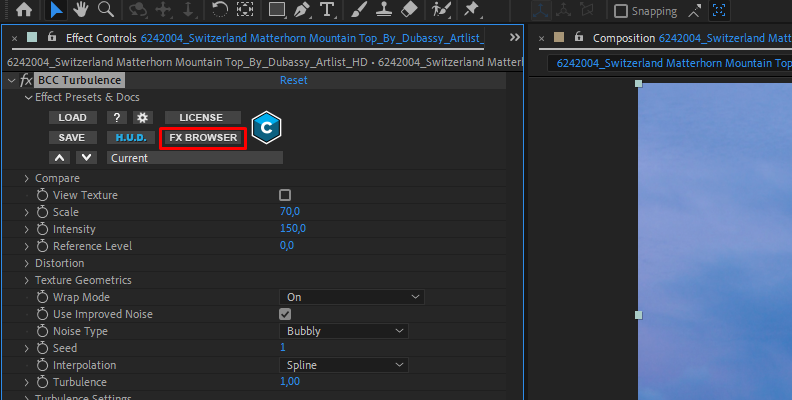
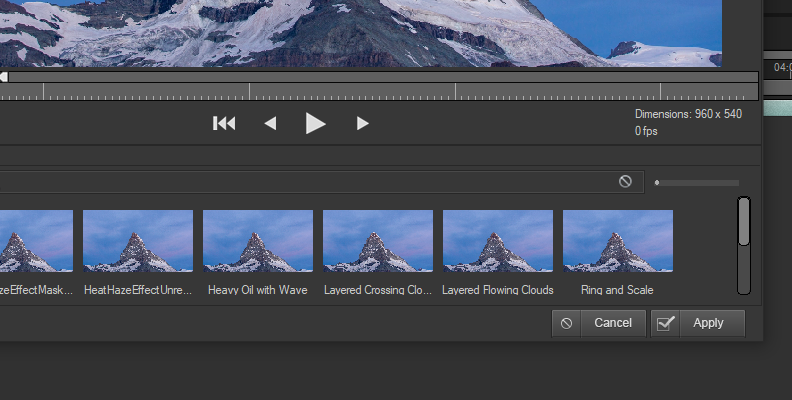
You can preview the BCC Turbulence effect's default settings, create settings from scratch, or choose from over 30 presets pre-installed with it. To access the presets, click on the FX Browser icon at the top of the parameters in the Effect Controls panel.
Click one preset and preview it. You have static and auto-animated presets to explore. You can select one as a starting point and modify it back in After Effects. Click Apply to exit the FX Browser.
Step 4: Create a Displacement Map from Scratch
Let’s create displacement maps with BCC Turbulence from scratch. You have a few controls to adjust and tweak, which may seem confusing or repetitive at first, but it becomes easier once you understand what each parameter does.
The first step is to create the texture layer. It's best to enable View Texture, which will render the noise map texture so you can see exactly how you are modifying it.
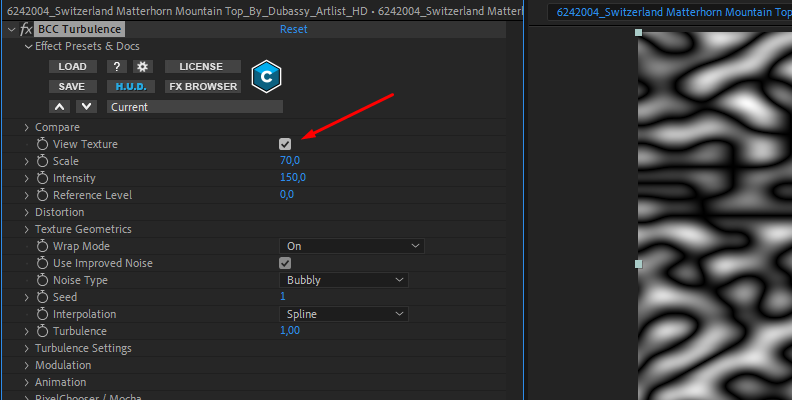
Start by adjusting the scale. It scales all the layer noise to the displacement map. After creating the noise layers, you can return to set this parameter. Adjust the Intensity, Reference Level, and Warp Mode to control how the displacement map is rendered.
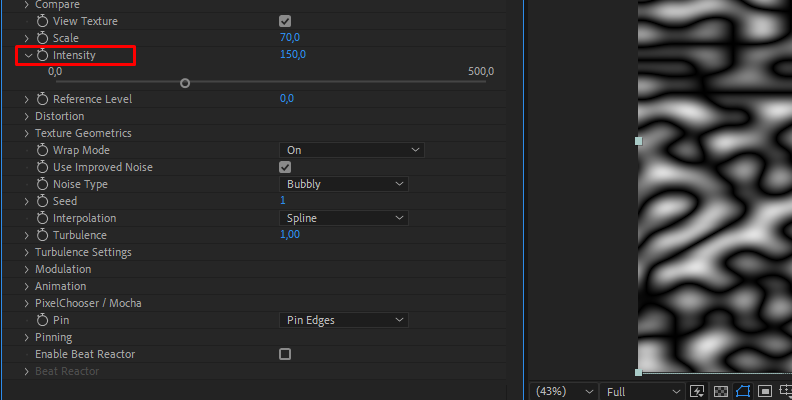
The Warp Mode lets you choose how the black and white areas are created. With the maximum displacement, you'll have a more complex effect with an Intensity above 100. If turned off, the displacement map will have more extreme pixel values. Alternatively, you can set it as positive or negative for more black or white relative to the established intensity.
Experimenting will be key here to understand how these parameters react.
Step 5: Build Distortion
The following parameters are for the distortion effect. If you display this group, you'll find some options to process the distortion:

You can set it to only process on the alpha channel.
Master control for the scale of the X and Y displacements.
X and Y displacements to set how much the noise pixels are pushed vertically and horizontally.
X and Y Reference Levels.
Step 6: Adjust Texture Geometrics
For now, you only adjusted the texture layer. Now, let’s set the geometry of the first noise layer of the displacement map.
Select the Noise Type. You have three options: Smooth, Bubbly, and Stringy.
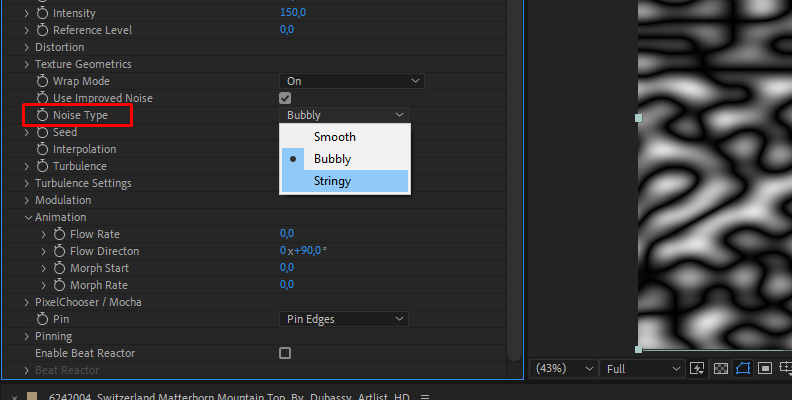
Set a random seed value.
Select an interpolation mode: spline, quadric, cubic, quadratic, or linear. Try them all to find the best for your image or video.
Adjust the Texture Geometric Group. This group provides settings to change the aspect, X and Y offset, rotation, and anchor point.
Step 7: Noise Layer and Turbulence
Add layers of noise with the Turbulence parameter. Increasing the Turbulence will make the noise effect complex, but it will take longer to render, so adjust it carefully based on your equipment.
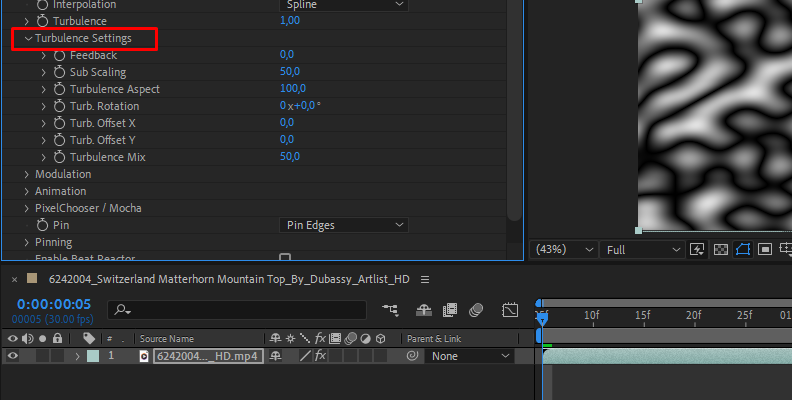
Once you set the number of layers of noise with the control layer, display the Turbulence Settings group to adjust the noise for each layer. The Turbulence Settings group works by setting one of the parameters (scale, aspect, rotation, etc.), automatically increasing the values for each consecutive layer. The more layers, the more complex the noise and the more processing power your computer will require.
Step 8: Modulation Group
This group is for more advanced users who'd like to explore everything the effect can do. It allows you to add more than one source to modulate the texture of the displacement maps. Modulation 1 enables you to choose a shape or a source layer, and Modulation 2 allows you to choose only a second source layer.
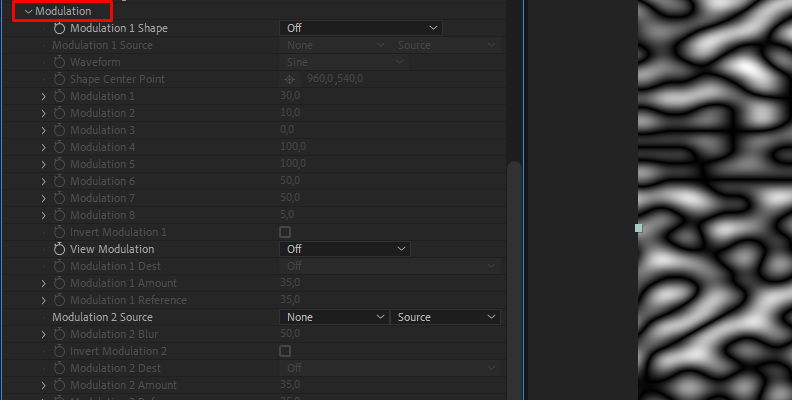
Each Modulation option has its own settings you can alter. Once again, experimenting is crucial.
Step 9: Animate the Distortion
If you want to create an animated distortion effect for your videos, display the Animation parameter group. Adjust the Flow Rate and Flow Direction to make the noise move through the image in any direction. If you want to add 3D space to the animation, adjust the Morph Start to set the initial Z position and the Morph Rate to animate it.

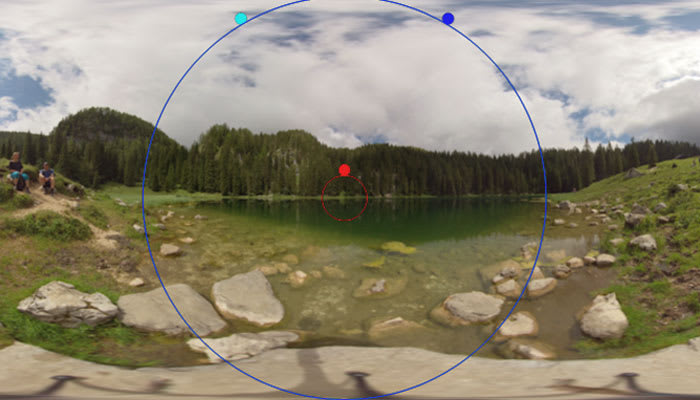
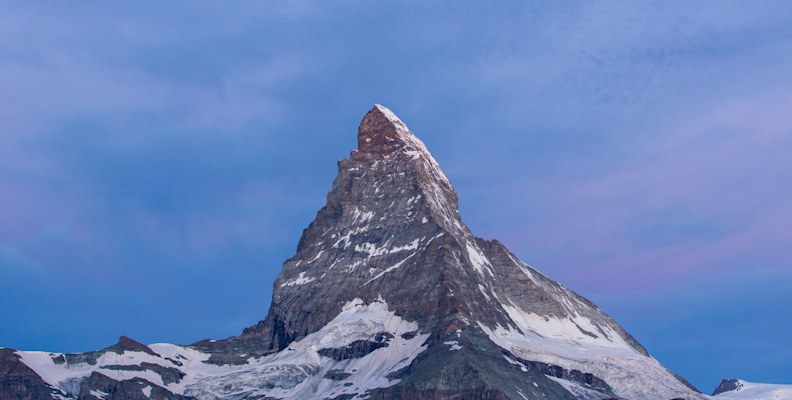
This is our BEFORE image:
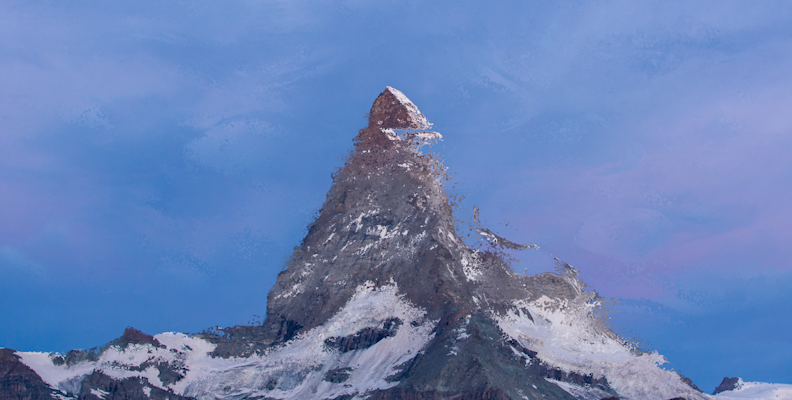
This is our AFTER image:
Final Words
Displacement mapping in After Effects is a great way to create dynamic and visually striking effects by using one layer to distort another. All you have to do is master those effects to bring the most realistic effect to life.
For instance, applying a "Screen" or "Overlay" blending mode can help merge the displacement effect with the background, making the distortion appear more natural. Using Gaussian Blur on your displacement map can soften the transitions and reduce harsh edges, giving a more polished and professional look.
For this and more, BCC Turbulence can be a lifesaver for your project. You can easily add a displacement map using a preset or the default settings, or you can customize the effect based on the image and the nature of the project.
Download BCC Turbulence and experiment with its wide array of options. Combine it with other filters and effects from Continuum to improve your video editing skills.
Good luck!