A Lens flare is one of those effects that you either love or hate. The effect looks pretty and artistic, but it doesn't always work: distracting lens flares can ruin a composition when you're aiming for clarity and a clean photo. So, today you'll learn how to remove lens flare in Photoshop.
Let’s dive in!
What is a Lens Flare?
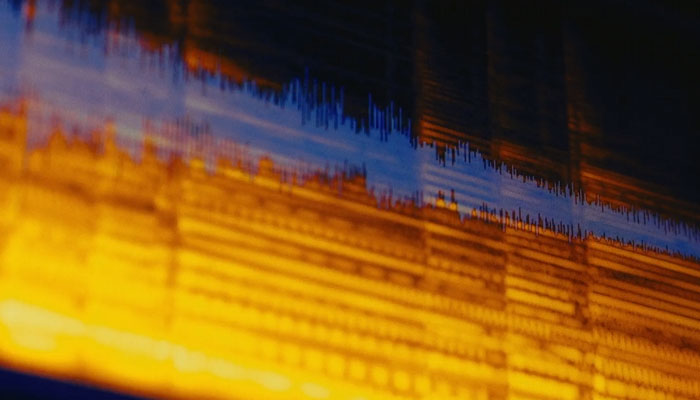
A lens flare is an optical effect in photography that appears in the image as big or small circles, streaks or spots of light scattered across the frame or in the corners. It's often used to add an artistic look to the photo, creating a nostalgic, warm, and dreamlike vibe.
Many photographers and filmmakers try to capture this phenomenon or recreate it digitally in post-production for creative purposes, but it's not always an ideal effect to add, especially in corporate or real estate photography.
What Causes Lens Flare?
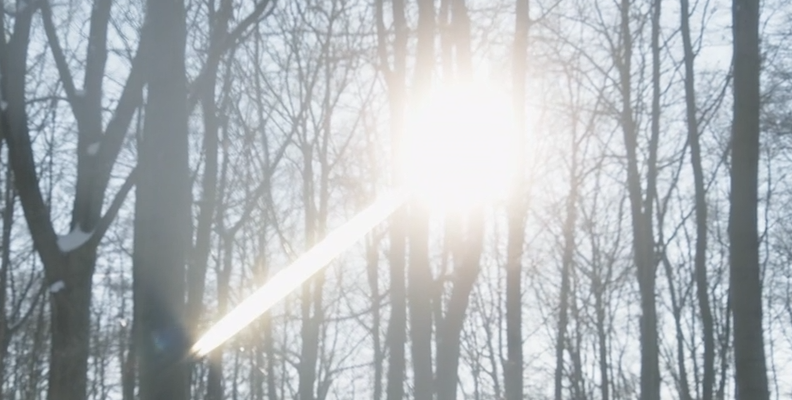
Naturally a lens flare is caused by strong, bright light sources like the sun, lamps, or the moon. When light hits the camera lens or shines directly into the camera, it causes glare that reflects across the image in the form of streaks and circles.
Other causes of lens flare include using an old camera with no anti-reflective coating or lens flare protection (the reason why many photographers use old cameras to achieve the effect).
Different Types of Lens Flare
Lens flare can be categorized into different types depending on how it’s scattered in the image, the shape of the light streaks, and the look of the final image.
-
Veiling Flare
The veiling lens flare is characterized by haze and glare. The light is more washed out, and the haze covers most of the image, reducing its contrast and saturation. This lens flare type is caused when the bright source is outside of the frame but still shines into the lens at a certain angle.
-
Ghosting Flare
The ghosting lens flare is one of the most common, with artifacts such as rings of light and streaks pointing towards the light source. This type of lens flare occurs when the light source is reflected between the glass in the lens and the aperture blades. Because the shapes of the artifacts can be circles or polygons, they can be distracting in certain images.
-
Starburst
The starburst flare, as its name suggests, is caused when shooting directly into the light source, making it look like a star. The star shape is the result of the small aperture blades when shooting with a small aperture.
-
Anamorphic Flare
The anamorphic flare shows a wider horizontal streak of lights that covers the entire image. This effect is commonly used in films and is achieved with anamorphic lenses.
How to Remove Lens Flare in Photoshop

Select the lens flare spots you want to get rid of, and use the Spot Healing Brush Tool to merge those areas with the nearby pixels. Do this for all the lens flare spots in your picture.
For a more detailed process, in the next section you’ll learn how to use the Clone Stamp tool to hide the lens flare and refine it with the Content-Aware Fill feature.
-
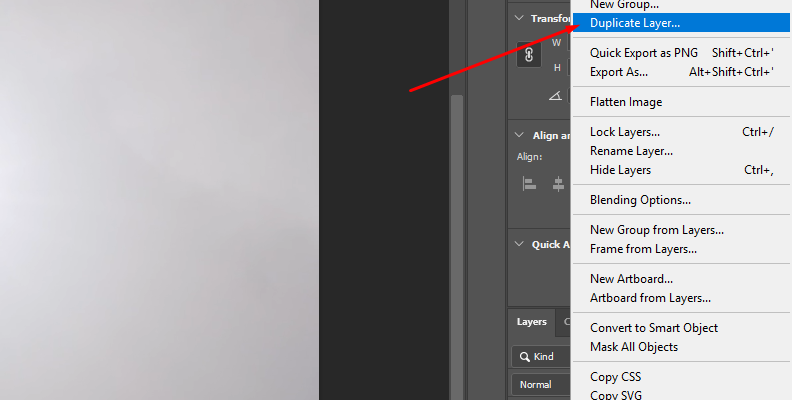
Step 1: Open Your Image in Photoshop
Find the photo with lens flare on your computer and open it in Photoshop. Duplicate the background layer to avoid making changes to the original file.
-
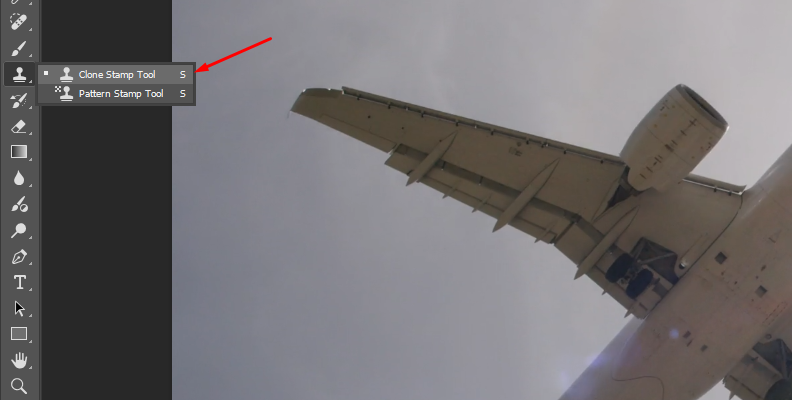
Step 2: Sample Clean Areas
The Clone Stamp tool allows you to copy pixels from other areas of the image and paint over the distracting lens flare to cover it.
Select the Clone Stamp tool from the toolbar or press S.
Hold the Alt or Option key and click a clean area without lens flare to clone the pixels from. Then, release the Alt or Option key.
-
Step 3: Remove Lens Flare
Now that you have a sample, click to paint over the lens flare area and adjust the brush size and hardness. Zoom in and out to blend all the distracting lens flare seamlessly. Select more samples to clone from the surrounding pixels to achieve better results.
-
Step 4: Handle Tricky Parts
In some images, the Clone Stamp tool may not be enough to remove lens flare. The Spot Healing and Patch tool can help you remove them.
The Spot Healing tool is helpful when there are small lens flare spots. Select the Spot Healing tool with the J key.
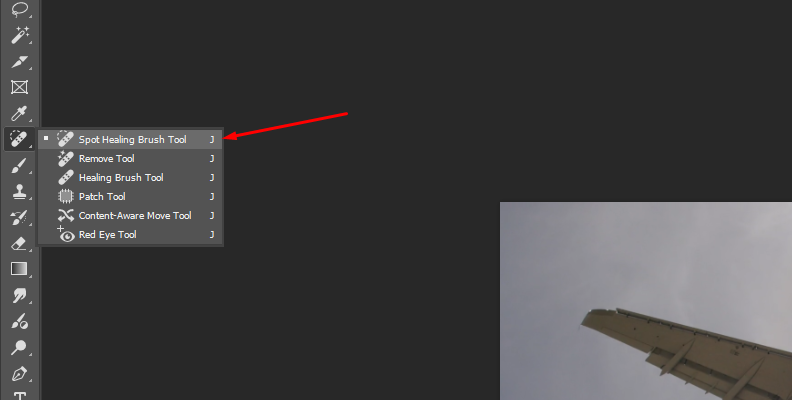
Adjust the size to be larger than the lens flare spots to cover all of them. Click to paint over the lens flare spots to remove. The tool automatically uses surrounding pixels to blend the area with the lens flare spots.
The Patch tool can help you with difficult lens flare spots. Select the tool and draw a selection around the lens flare area to remove. Click and drag the selection to find a clean area to replace the selected location. Let Photoshop blend the area automatically.
You may need to use the Healing Spot tool to clean a few blemishes that can be left after using the Patch tool.
-
Step 5: Refine Lens Flare Removal
For the final step, which involves cleaning up and refining the image after removing the lens flare, you’ll use the Content-Aware Fill feature.
Select the residual lens flare with the selection tool of your choice. You can press Shift to make multiple selections. Right-click the selection and select "Content-Aware Fill". Check the preview, click Apply, and then OK.
-
Step 6: Save Image
To export the image without the lens flare spots, go to File > Save As. Name the new file and choose the file format for exporting the image. Click OK.
How to Remove Lens Flare with Optics

This second method will show you how to remove lens flare with Boris FX Optics. While Optics is primarily designed for creative effects and adding custom lens flares, it offers tools to help you remove distracting lens flares from your images by blending and repairing the area.
-
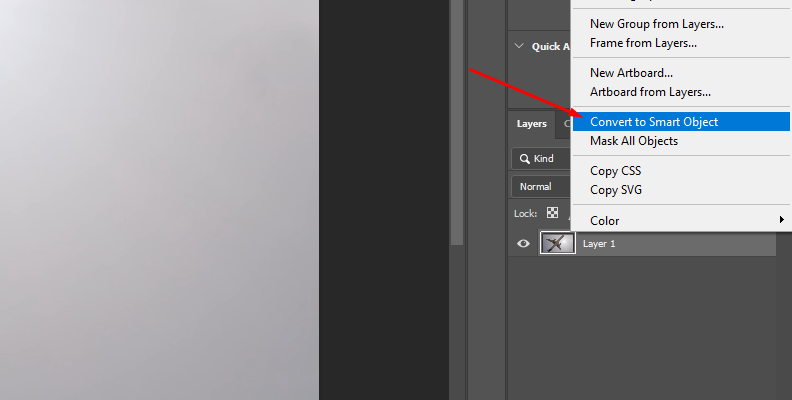
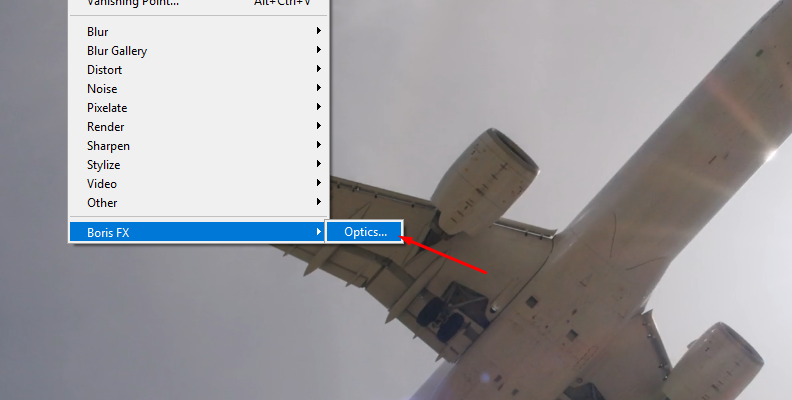
Step 1: Add the Optics Filter
Import the image with unwanted lens flare into Photoshop. Duplicate the layer and convert it to a smart object by right-clicking and selecting that option from the dropdown menu.
Then, select the duplicate layer and go to Filter > Boris FX > Optics. This will launch the Optics interface and import the image into the workspace.
-
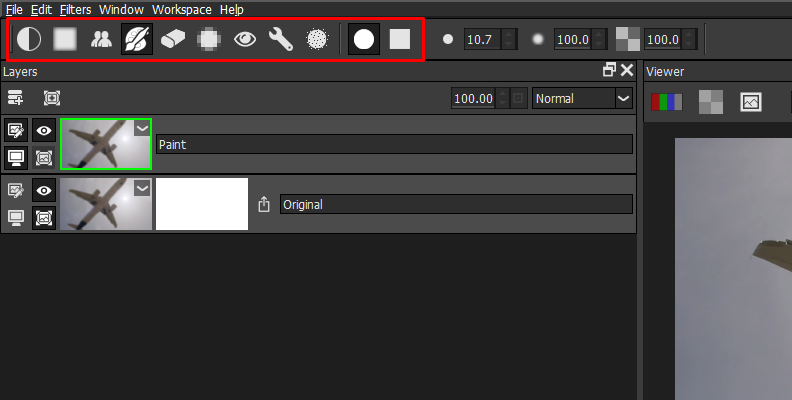
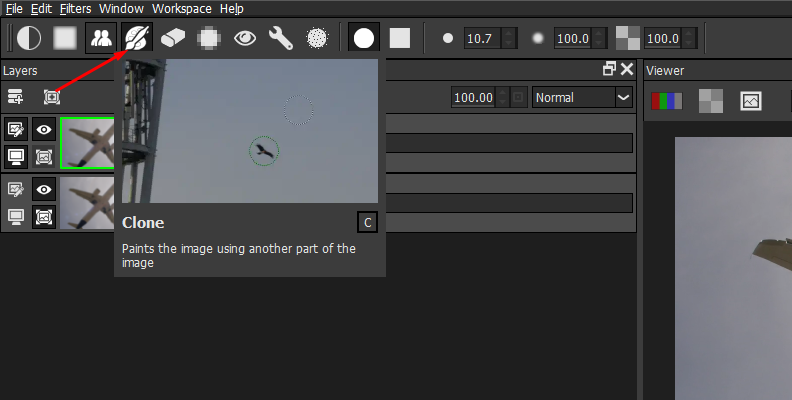
Step 2: Remove Lens Flare
Select the current layer and apply the Paint filter from the Image category or by using the search function (the magnifying glass icon).
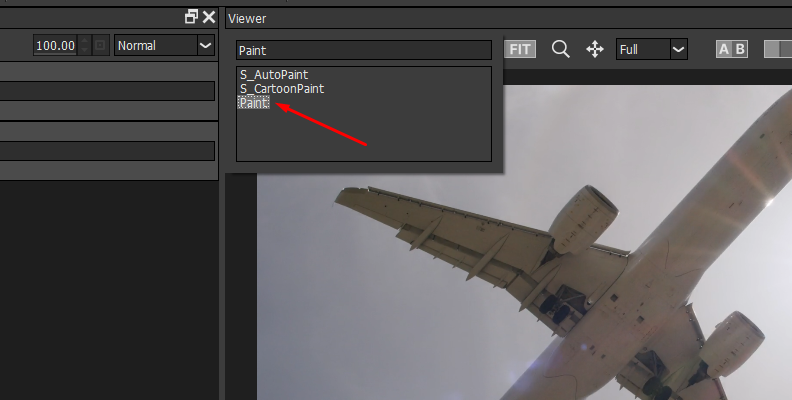
At the top bar, you'll find the brush tools, which includes the Black and White, Blur, Clone, Color, Mosaic, Red-Eye, Repair, and Scatter.
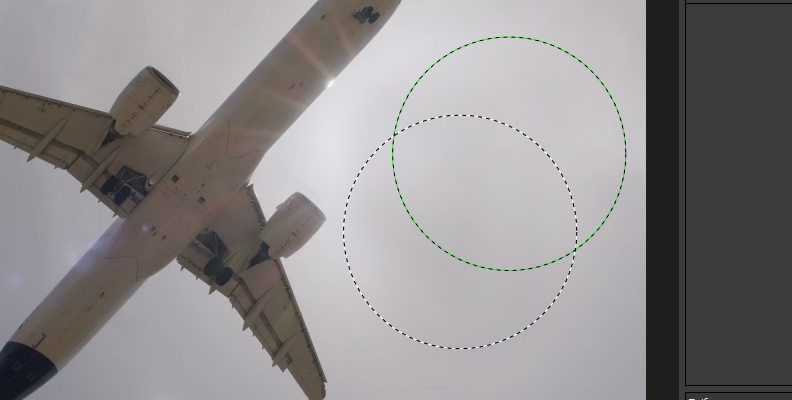
Select the Clone tool to copy samples from one part of the image to paint other parts. Press the shift key, click on the area to sample, and then drag the cursor to set the clone offset to the lens flare you want to remove.
Begin painting over the lens flare and use different samples from the surrounding areas to blend it successfully. You can use the repair tool to help you fix the blending pixels.
-
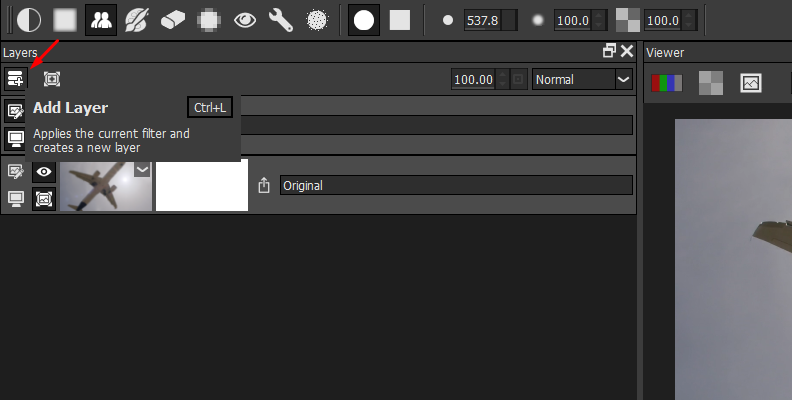
Step 3: Color Correction
Add a new layer and experiment with the Color Correct filter in the Color category.
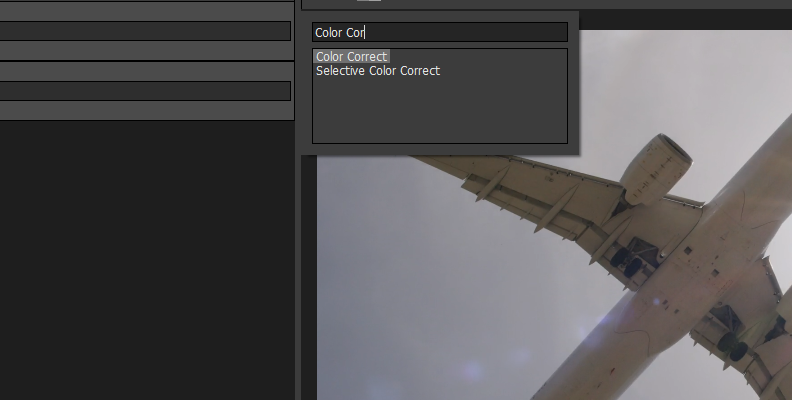
When you’re dealing with a veiling flare, adjusting the saturation and contrast can help with the washed-out look. Use masks if you want the filter to affect a specific part of the image affected by the lens flare. You can experiment with other light effects to counteract the lens flare.
-
Step 4: Export Image
When you finish removing the lens flare spots in Optics, simply click the Apply button in the bottom right corner to close the Optics window. Then, in Photoshop, go to File > Save As and choose the export format and folder for the new image.
123
Final Words
Unwanted and distracting lens flare shouldn't be a big issue. If you work in corporate or real estate photo editing, it is essential to get rid of lens flare.
Here are a few tips to avoid them:
- Clean your lenses.
- Block direct light with an object in the scene.
- Adjust the angle of your camera away from the strong light source.
- Use a lens hood to shield the camera lens or an anti-flare lens.
- Avoid shooting outdoors at times when the sun is stronger.
On the other hand, if you’re looking to add lens flare to different types of photos, Optics offers the S_LensFlare filter, which lets you create custom cinematic lens flares and gives you plenty of control to add unique flares during post-production.
Get Optics today and enjoy this, and many other Hollywood-grade filters, to enhance your photos.
Good luck!