


Adobe Premiere Pro is one of the most popular choices for video editing software, especially among newer editors looking for a user-friendly interface and a workspace that offers a fair learning curve.
Despite Premiere being developed by Adobe, a company that doesn't need much introduction, it still sometimes shows its imperfections, much like any other software in the complex world of computers, various configurations, versions, and whatnot.
In this guide, we'll talk about Adobe Premiere Pro and some possible technical issues that can arise while using it, such as a reduction in performance, playback lag, freezes, and more. It will be a more "technical" one, but we'll make sure to explain everything in as much detail as possible.
Here's what you need to know if Premiere Pro is lagging on your computer and how to go about fixing it.
Reasons Why Is Premiere Pro Lagging and How to Fix Them

Fixing technical software and PC issues, in general, is a process requiring a lot of trial and error. However, the more insight you have about the root of the problem, the less experimenting you'll need to do.
That's why, the best way to start is to give your best to identify the problem's cause.
The following section should help. These are some of the most common reasons Premiere Pro is lagging on your computer.
High-Quality Playback Resolution
One of the most common reasons users bring up is "stuttering" while playing back a video in Premiere Pro. This is due to using the highest possible option on the playback resolution setting.
Whether you're new to using Premiere Pro or you just haven't found out about this feature yet, it's a button right below the playback screen that allows you to adjust the resolution at which you preview videos.
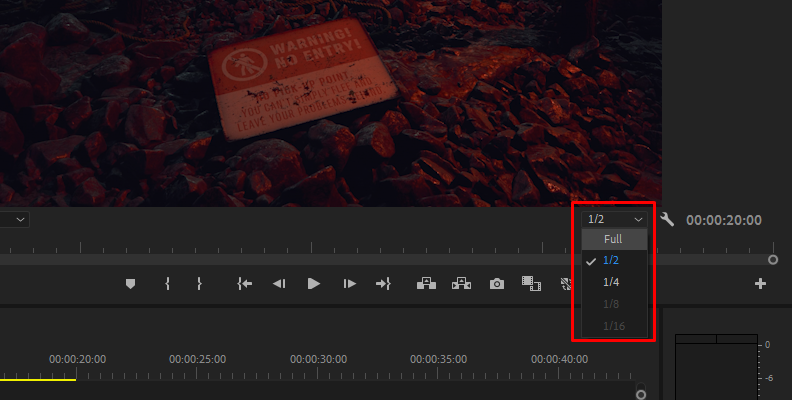
If this setting is set to "Full" it means you preview video material at the same resolution it was recorded at, which when working with high-resolution videos, like 4K or 8K, can be very demanding on your PC.
You've already recorded the video and therefore the details captured in it are already "locked" and won't change either way, so now your main focus is to edit, which doesn't have much to do with paying attention to small details on the screen.
You can make this whole editing process much smoother by simply changing the high-quality playback option to something lower, like one-half of the original resolution, or even a quarter. This will make sure you can go through your video timeline making edits without having to deal with laggy playback.
Please keep in mind that lowering the playback quality like this will not make your video have worse quality when you export it. This is only a way to lower playback resolution so that your system has an easier time playing back files while you need to constantly pause and play during editing to make cuts or add transitions at the right time.
A Large Pileup of Media Cache Files
Another common reason why Premiere Pro could be lagging is due to a buildup of media cache files. When you import files within Premiere Pro (other video editors too as this is not exclusive to Premiere) it creates media cache files.
These media cache files that Adobe apps and other editing software create are helpful as they make accessing the files they're associated with much quicker, but once you finish the project they're related with, they don't do any more good. In fact, they "clog up" the media cache file database, making the software have to look through more files each time it needs to utilize the ones you currently need.
So, as stated in this official media cache article by Adobe, clearing media cache files can maintain optimal software performance.
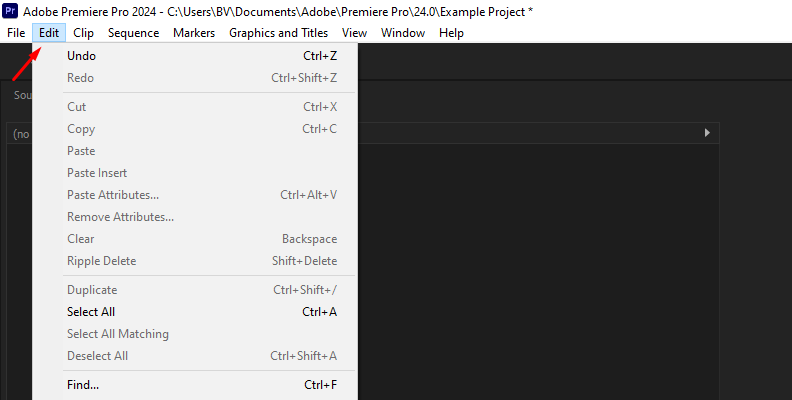
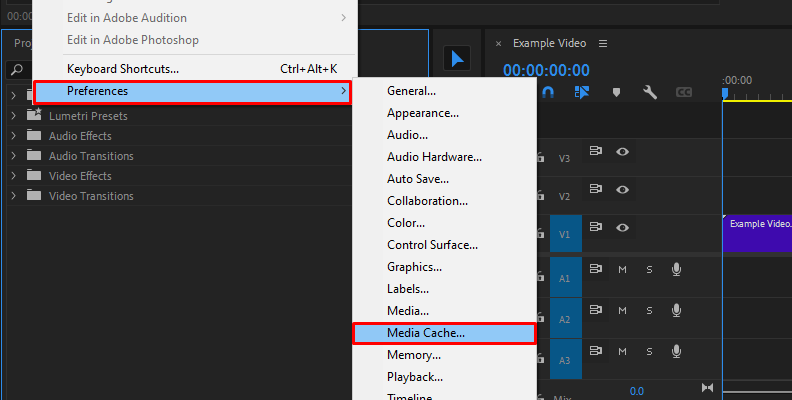
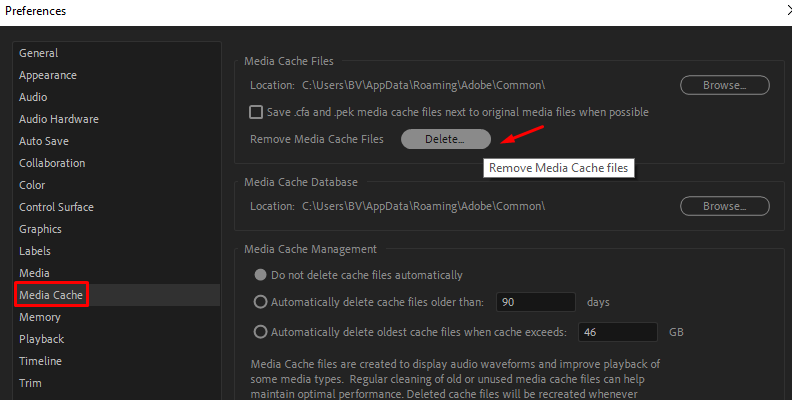
To do this, click on "Edit" within Premiere, then choose "Preferences" and "Media Cache" from the list of options, as shown in the images below. Then, click "Delete" or under the "Media Cache Database" section, click the "Browse" button to open the folder and manually choose which files to delete.
Under the "Media Cache Management" section, you can enable automatic deletion of cache files older than "X" days or when the database file size exceeds "X" amount of storage space on your disk.
This should help ensure optimal performance while editing in Premiere.
Using Original Video Files Instead of Proxy Files
Another very common "trick" experienced editors do, especially when working on more professional and complex projects that use high-res videos, is using proxy videos instead of originals. Proxy files are lower-resolution duplicates of the original files, and you can create them in Premiere Pro with just a few clicks.
Simply open your "Project" tab, select all the video files of which you need to make a proxy file, and right-click to open the menu. In the menu, choose "Proxy" -> "Create Proxies" as shown in the image below.
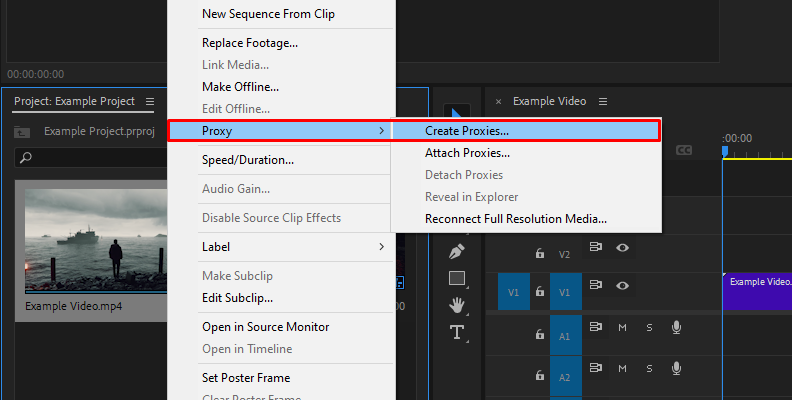
Choose your format, preset, and destination, then confirm the changes and create the proxies.
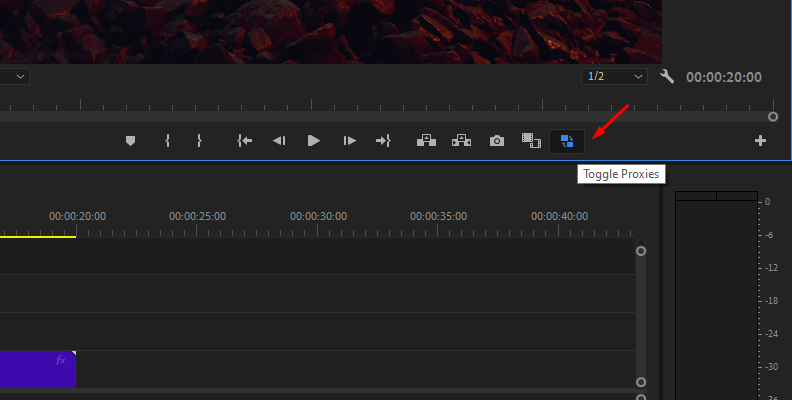
To make sure you're using proxies and not original files, enable the button editor, then select the proxy button and set it on your button bar.
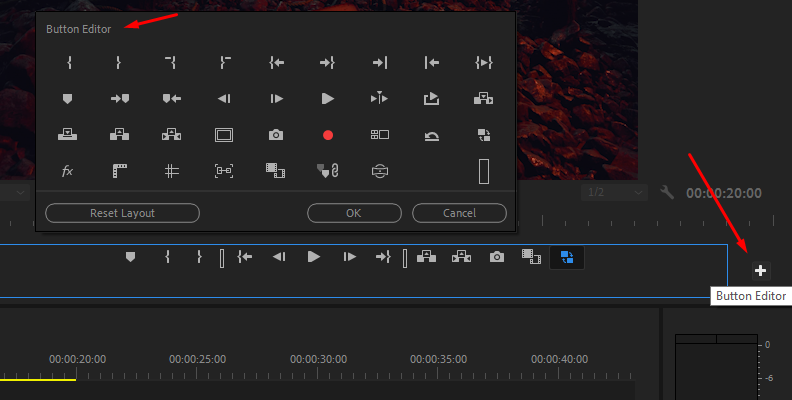
Then, click on it and it will become blue. When the proxy button is blue, you're using proxies and are good to go.
Just like the preview files setting (playback resolution) we talked about in the first section, this will only affect the quality within the preview window, not the quality of your final export, so don't worry about having a low-quality final product if you do this.
The latest versions of Adobe Premiere Pro allow you to enable a setting that will automatically convert your files to proxies, so you can use that too if you often work with high-resolution footage and are experiencing performance issues because of it.
Playback With Unrendered Video Effects or Effects in General
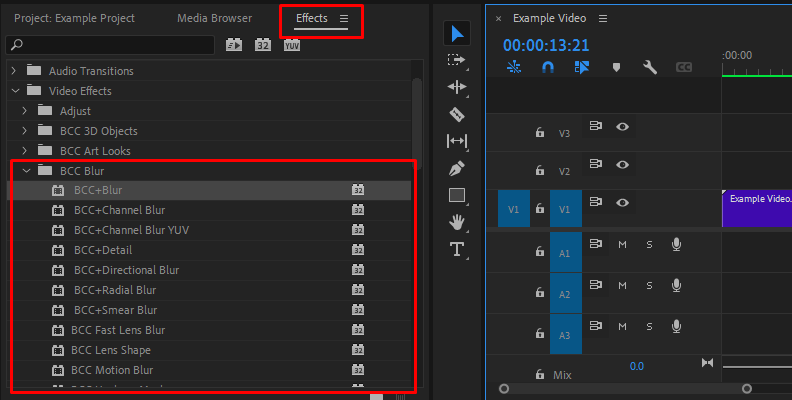
Premiere Pro is software compatible with many third-party plug-in packs, such as Continuum and Sapphire by Boris FX. Premiere Pro also offers a rich list of built-in effects and transitions that you can use to take your video from a basic one to something spectacular.
However, adding effects and transitions to your videos is a complex task for your computer, despite it being just a few clicks in Adobe Premiere Pro due to its friendly interface and simple workflow. The more effects you add, the "heavier" the video playback becomes, especially if the effects have the unrendered status.
So, you have two options to ensure your playback performance doesn't suffer when playing back videos you're editing in Premiere Pro. You can either render previews or use the mute FX visual button.
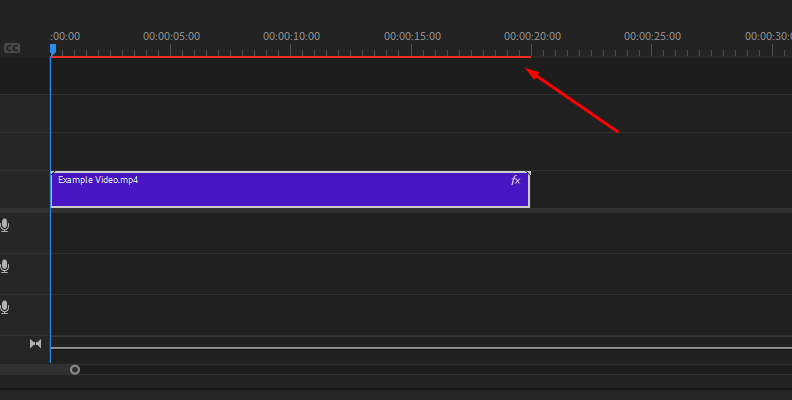
When you add a visual effect to a video on your timeline, you'll notice it has a red bar. This is because it isn't rendered yet. The same applies to audio effects as well, though they may take a slightly lower toll on playback smoothness and performance.
However, when you press the "Enter" key on your keyboard, you'll initiate a render.
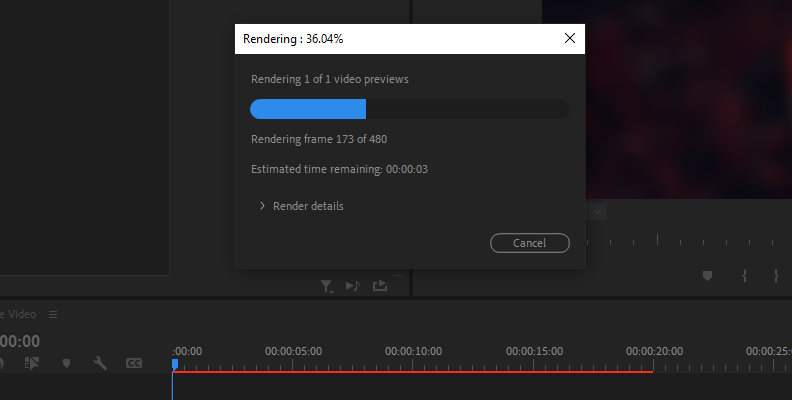
When the render is complete, you'll see that the red bar turned into a green bar.
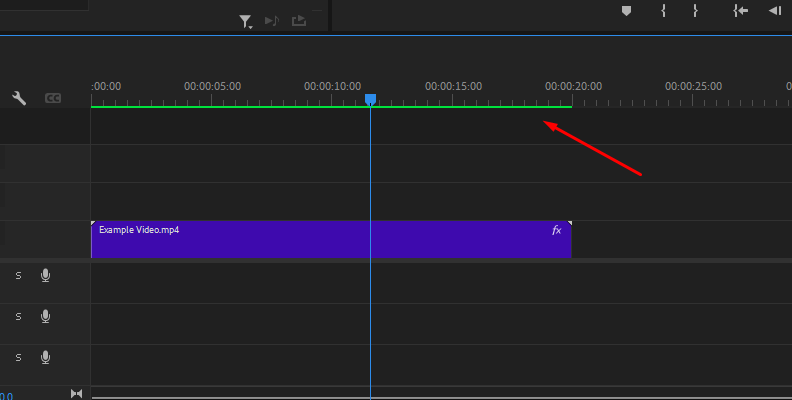
This means that the effect is now fully rendered, and you can playback the video without experiencing dropping frames or stuttering.
If you want to render only a specific part of your timeline, use the "I" and "O" buttons on your keyboard to set an input and output border and "mark" the part you wish to render.
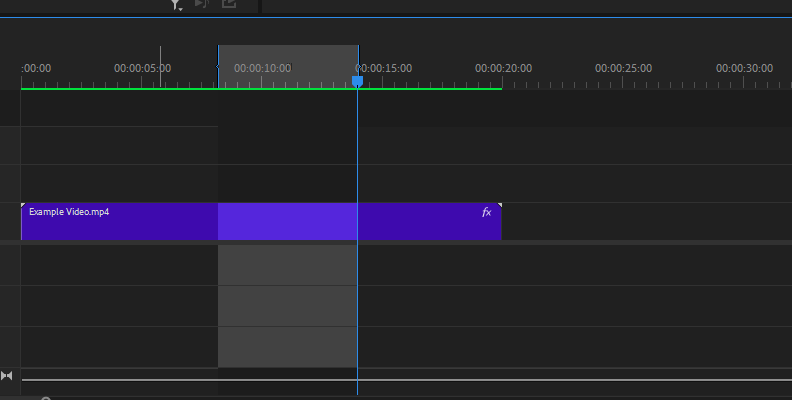
Then, pressing "Enter" (or opening the sequence settings menu and choosing "Render In to Out") will only render that part. You can optimize rendering speed and save time like this in more complex projects where you don't want to render the whole sequence to preview just a few seconds of your video.
GPU Acceleration not Enabled in Project Settings
Another helpful optimization you can do is to enable your graphics card to contribute to the overall performance of Premiere Pro. To do this, you need to access the settings in the project panel and enable GPU acceleration in premiere pro.
Go to "File" -> "Project Settings" and then "General".
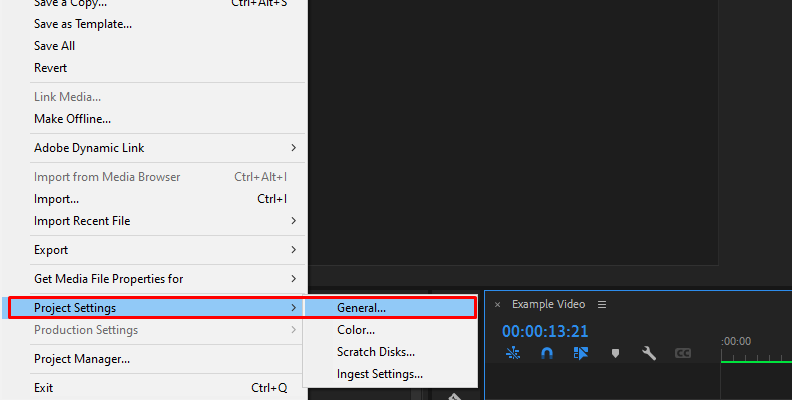
Then, under "Video Rendering and Playback" section, expand the dropdown menu in the "Renderer" field and choose an option that includes GPU Acceleration, as shown in the image below.

Optimize Rendering for Performance (Older Versions Only)
Please note that this feature is no longer available in the latest versions of Adobe Premiere Pro. However, if you are using an older version, you can enable this setting for a performance boost.
What you need to do is to open the "Preferences" panel by going to "Edit" -> "Preferences" and clicking on the "Memory" section in the left sidebar menu. Then, set optimize rendering for performance as shown in the image below.
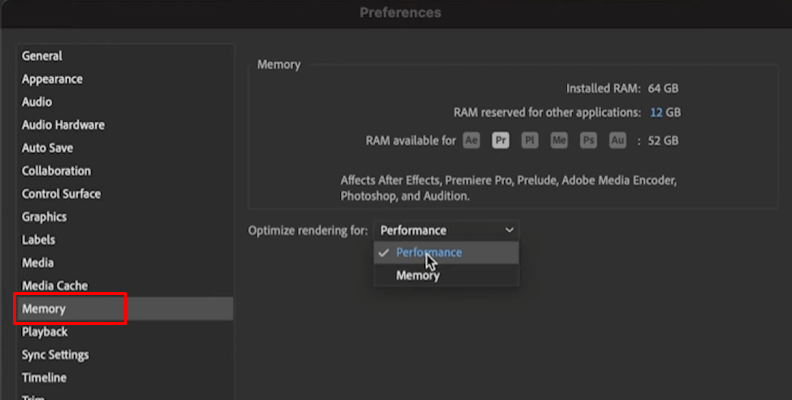
While you're in this section, you can also increase memory allowance for Adobe Premiere Pro by changing the values under the "Memory" section at the top of the window.
A helpful tip is to not allocate all of your RAM to Premiere Pro or other Adobe applications as that can make other programs and processes on your PC less stable and responsive.
Final Words
That covers everything you need to know about the possible causes of experiencing Premiere Pro lag and reduced performance.
Hopefully, this will help you ensure your workflow is optimal and allow you to focus on creating excellent edits in the future.
We wish you the best of luck, and thank you for reading!


