Drag and Drop Layers, Filters and Masks
Drag and Drop Layers
The ordering of layers can be changed by dragging and dropping them to a new location.
1 Apply a filter and create a mask.
Go to the Masking Tutorials to see how to create a mask.
2 Click the Add Layer icon and add a second filter and mask.
3 An entire layer can be moved to a new location by clicking and dragging on the gray area above or below the layer’s name and then releasing the mouse in the new location.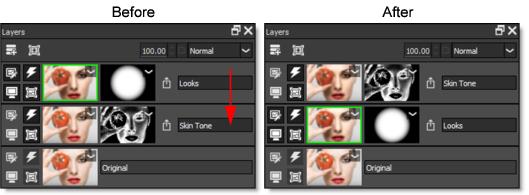
When the mouse button is released, the layer is moved to the new location.
Drag and Drop Filters And Masks
Replacing Filters and Masks
Dragging and dropping a filter or mask in the middle of an existing filter or mask replaces it.
1 Choose a layer that has a filter applied to it.
2 Click the layer’s image thumbnail that you want to copy, drag it over the image thumbnail that you want to replace, and release the mouse when a red outline appears and the cursor changes to a + sign.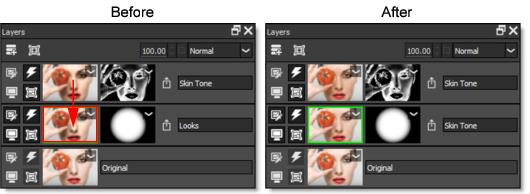
When the mouse button is released, the destination filter is replaced with the source filter.
3 Click a mask, drag it over the mask you want to replace and when a red outline appears along with a + cursor, release the mouse.
When the mouse button is released, the destination mask is replaced with the source mask.
Moving Masks
Within a layer, the order of masks can be changed.
1 Click a mask, drag it between two other masks or to the edge of the last mask and when a red vertical bar appears along with an arrow icon, release the mouse.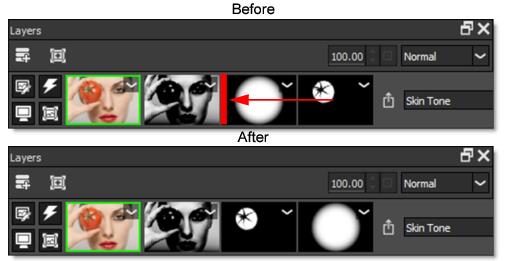
The mask is moved to the new location.
Copying and Inserting Masks
Dragging and dropping a mask to an open area of a layer or between masks on another layer copies/inserts it.
1 Click a mask, drag it to an open area of a layer or between masks on another layer and when a + cursor appears, release the mouse to copy/insert it.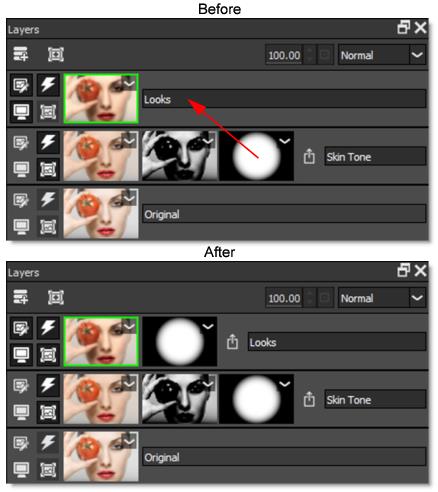
The mask is copied to the new location.