Working With Masks
Masks allow you to limit the effect of a filter by revealing it only in white areas of the mask. White is on, black is off and gray areas in between represent a level of transparency.
The following mask types can be applied to a layer: Gradient, Spot, Path, Snap, EZ Mask, Selection and Paint by clicking the Add Mask icon in the Layers window.
Import Masks
Masks are imported into the Original Layer in Optics. The mask can then be copied for use on other layers.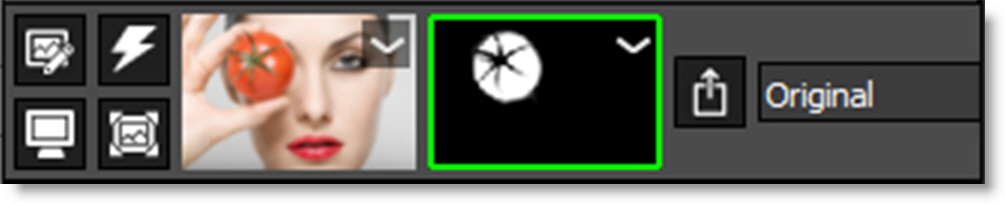
Photoshop
The Photoshop layer mask is transferred to Optics.
1 If you are using a file with transparency, convert it to a layer mask by either dragging and dropping the layer thumbnail onto the Add Layer Mask icon or select Layer > Layer Mask > From Transparency.
2 Apply Optics.
3 Select No when prompted with “Apply previous filters/masks?”
Lightroom
• Apply Optics to a PNG or TIFF file with alpha/transparency.
Standalone
• Load a PNG or TIFF file with alpha/transparency.
4 To view the imported mask, select the Original layer and press the A key.
Export Masks and Generated Alpha
Masks
Masks are exported along with the image and filters using a layer’s Export Masks icon visible to the right of the layer’s masks.
1 If you are using Photoshop, create a Layer Mask before applying Optics.
2 Add a filter and at least one mask.
3 Enable the Export Masks icon for the layer.
4 To view the masks to be exported, select the layer whose Export Masks icon is enabled and press the M key. Press the M key again to view the image.
Please note that Optics generates and renders EZ Masks at the current Preview Resolution unless a higher resolution is selected. This means that if you create a mask at any size other than full, it will be scaled up to the original image size when rendered, thus reducing quality.
5 If you want to export a full resolution EZ Mask, change the Preview Resolution to Full and regenerate the mask when prompted.
Note: You can now go back to the lower resolution for performance reasons since the mask is now generated at full size.
6 Export the masks by clicking Apply in Photoshop/Lightroom or saving from the Standalone. Requirements for mask export:
• Photoshop: A layer mask is present.
• Lightroom: Export to a PNG or TIFF file.
• Standalone: Save to a PNG or TIFF file.
The masks are exported as alpha/transparency.
Note: The masks will not be exported if a layer mask is not present in Photoshop or you don’t save/export to a PNG or TIFF file in the Standalone or Lightroom.
Generated Alpha
Some filters that generate elements like S_LensFlare and S_Rays add values to the alpha channel which can be exported along with the image and filters.
Images With Transparency
1 Load an image with transparency.
2 For Photoshop users, select Layer > Layer Mask > From Transparency, select the layer’s image thumbnail and apply Optics.
3 Apply S_LensFlare and choose a preset.
4 To view the alpha channel, press the A key and you will see that the generated element is also added to the existing alpha channel. Press the A key again to view the image.
5 Leave the Export Masks icon enabled on the original layer.
6 Export the modified alpha along with the image and filters by clicking Apply in Photoshop/Lightroom or saving from the Standalone. Requirements for mask export:
• Photoshop: A layer mask is present.
• Lightroom: Export to a PNG or TIFF file.
• Standalone: Save to a PNG or TIFF file.
The modified alpha channel is exported as alpha/transparency.
Note: The modified alpha channel will not be exported if a layer mask is not present in Photoshop or you don’t save/export to a PNG or TIFF file in the Standalone or Lightroom.
Generated Elements and Alpha Only
After positioning the generated filter elements over the background image, you can render only these elements along with their alpha channel values for further manipulation in Photoshop.
1 If you are using Photoshop, create a Layer Mask before applying Optics.
2 Apply S_LensFlare and choose a preset.
3 Set the Combine mode to Flare Only.
The majority of filters that generate an element have a Combine mode that renders only the element.
4 To view the alpha channel, press the A key and you will see that the generated element is also added to the existing alpha channel. Press the A key again to view the image.
If you have multiple generated elements, the S_ChannelSwitcher filter can be used to set the RGBA channels of the Original layer to black. This would be faster than setting the Combine mode to render each element only.
5 Add a S_ChannelSwitcher filter to a new layer, select the RGBA Black preset and then move the layer directly above the Original layer.
6 Leave the Export Masks icon enabled on the original layer.
7 Export the modified alpha along with the generated filter elements by clicking Apply in Photoshop/Lightroom or saving from the Standalone. Requirements for mask export:
• Photoshop: A layer mask is present.
• Lightroom: Export to a PNG or TIFF file.
• Standalone: Save to a PNG or TIFF file.
The modified alpha channel is exported as alpha/transparency.
Note: The modified alpha channel will not be exported if a layer mask is not present in Photoshop or you don’t save/export to a PNG or TIFF file in the Standalone or Lightroom.