If you want to achieve color grading similar to that in films like Saving Private Ryan, Minority Report, or 300, then this tutorial is for you! Today, you’ll learn how to color grade in DaVinci Resolve to achieve this look in your next project.
Let’s dive right into it.
What Is Bleach Bypass?
Bleach Bypass is a film development technique in which you skip bleach during processing to retain the silver tones that are normally washed away by bleach. This results in an image with low saturation and high contrast. This color-washed, dirty, and cold aesthetic is commonly found in dramas, horror films, and action movies. It may not work for every project, but you can create a significant impact if you learn how to use this style effectively.
Today, since we film most of the time with digital cameras, you can replicate that effect in post-production with DaVinci Resolve and third-party plug-ins more quickly and safely than using the traditional film technique.
3 Methods to Get a Bleach Bypass Look in DaVinci Resolve

DaVinci Resolve is highly regarded as one of the best video editing tools for professional color grading, and if you want to experiment with bleach bypass looks, it's your best option. I'll show you three methods to achieve a bleach bypass look in any video using DaVinci Resolve and a few plug-ins.
Bleach Bypass with BCC+ Bleach Bypass
Our first method is a quick and easy-to-use filter. BCC+ Bleach Bypass is bundled in the Boris FX Continuum plug-in suite. You can get a free trial to follow this tutorial before committing to a subscription or license.

-
Step 1: Import Video
Create a DaVinci Resolve project and import the video to the timeline.
-
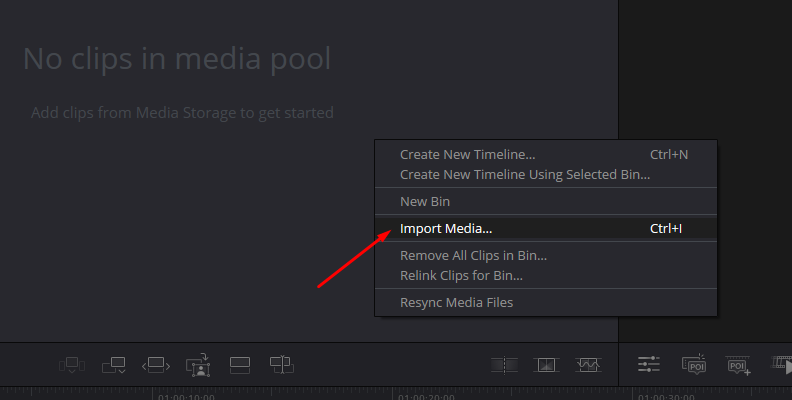
Step 2: Apply BCC+ Bleach Bypass
Go to the Edit page and click the Effects button (the magic wand icon) to open the Effects library. Type 'BCC+Bleach Bypass' in the search box to find the bleach bypass filter under the BCC Film Style category. Grab the effect and drag it to the video clip to apply it.
-
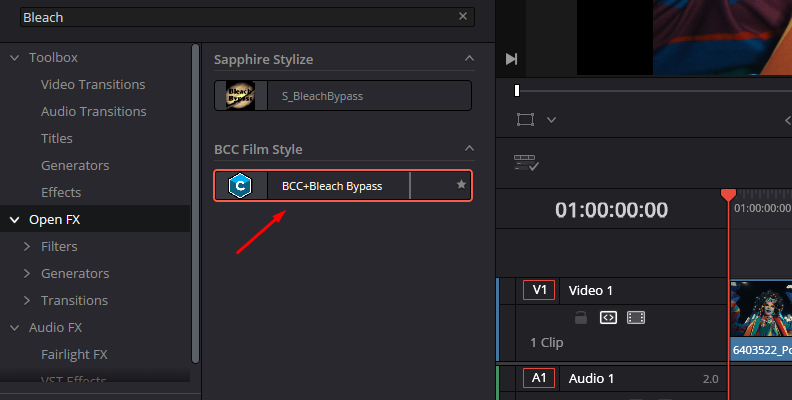
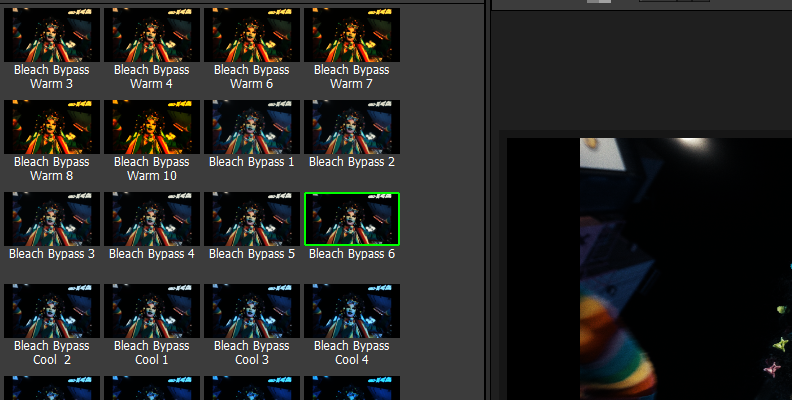
Step 3: Preset Library
If you're looking for a quick look, open the Inspector panel and click the FX Editor button to launch the preset library.
You'll find a plethora of looks, ranging from warmer, yellowish tones to cooler, blue tones. Simply click one to preview it and apply it if you want to use it.
-
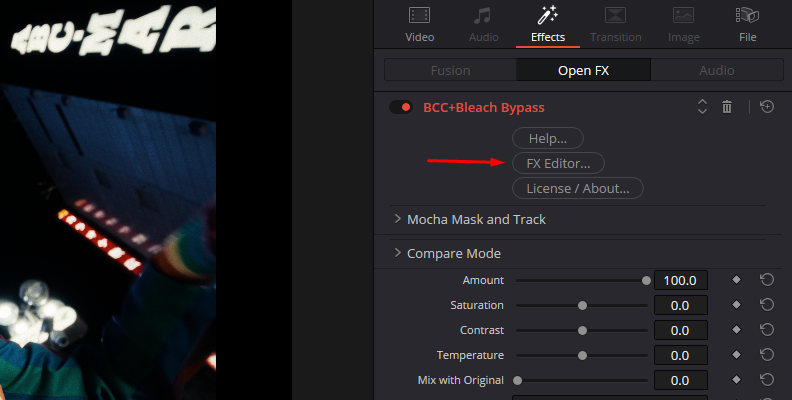
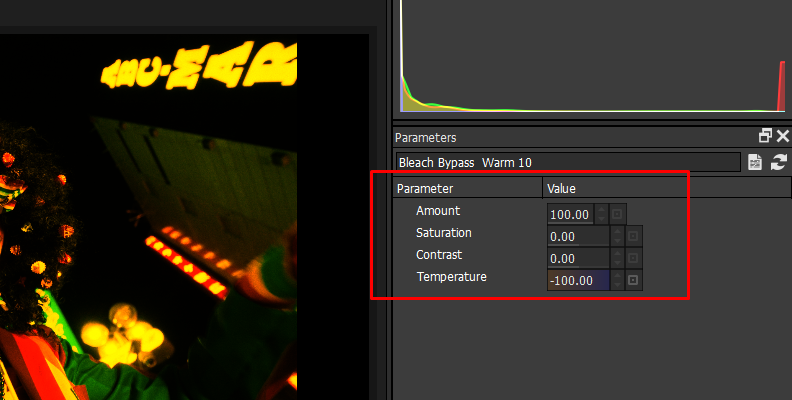
Step 4: Setting Up the Bleach Bypass Look
Use the parameters in the Inspector to create custom bleach bypass styles. You can modify a preset to make the effect more extreme and adjust the filter strength, saturation, contrast, and temperature.
-
Step 5: Adjust the Bleach Bypass Effect
Use the Amount slider to adjust the strength of the overall bleach bypass filter. Increase the slider to create an extreme look, or reduce it for a more subtle effect. Adjust it as needed for your project.
Saturation, contrast, and temperature can be adjusted to positive and negative values. For saturation and contrast, negatives decrease, and positives increase the parameter. For temperature, negative values create a cool tone, and positive values create a warmer tint.
-
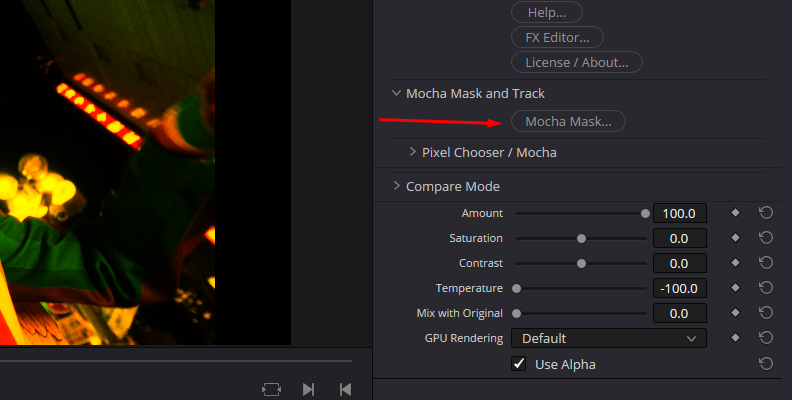
Step 6: Masking and Tracking with Mocha
Sometimes, you want to apply a bleach bypass effect but keep certain areas untouched or restrict the effect to a specific portion of the image, such as skies or skin tones. At the top of the BCC+ Bleach Bypass settings, you can see the Mocha Mask and Track parameters.
Click to view all available settings. To create a new Mocha mask, click the Mocha Mask button. It will launch the Mocha interface and import your video.
Once in Mocha, select a spline tool or shape to draw a mask around the object or area you want to mask and track.
To track a layer, select the track motion options and click "Track Back" and "Track Forward." You can refine the tracking by adjusting the mask. Once you're done, go to File > Save and close Mocha.
Once you return to DaVinci Resolve, go to the Mocha Mask and Track parameter in the Inspector panel and adjust the Mask settings to ensure the filter blends seamlessly with the full image in the video.
Before BCC+ Bleach Bypass:
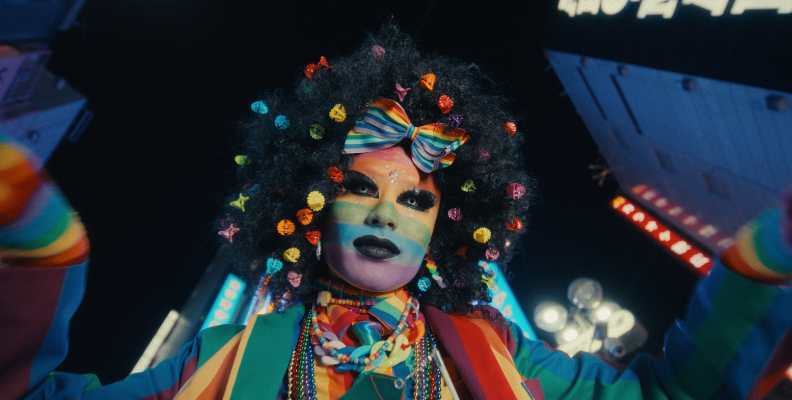
After BCC+ Bleach Bypass:

Bleach Bypass using DaVinci Resolve's Color Page: Layer Nodes
The Color page is where all the magic happens for color grades in DaVinci Resolve. This method will show you how to set up the nodes to create a bleach bypass effect without using any external plug-ins.
-
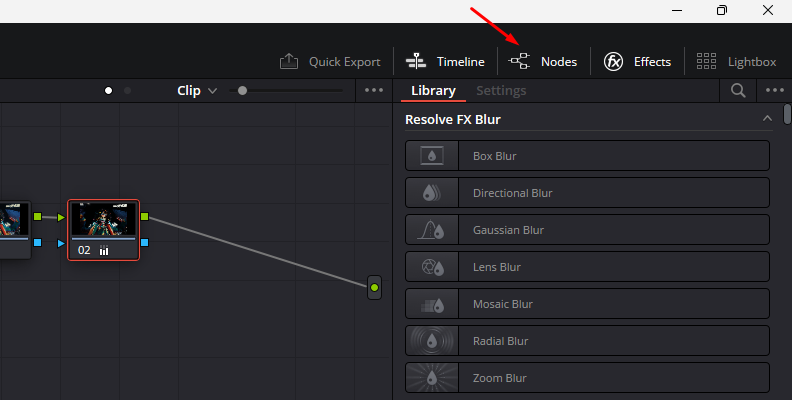
Step 1: Set Up the Color Page
Once you have imported the video, go to the Color page.
Click the Nodes button at the top right corner to make the node grid visible.
Right-click node 1, and select Add Node > Add Serial to add a second node. After that, right-click the new node and select "Add Layer".
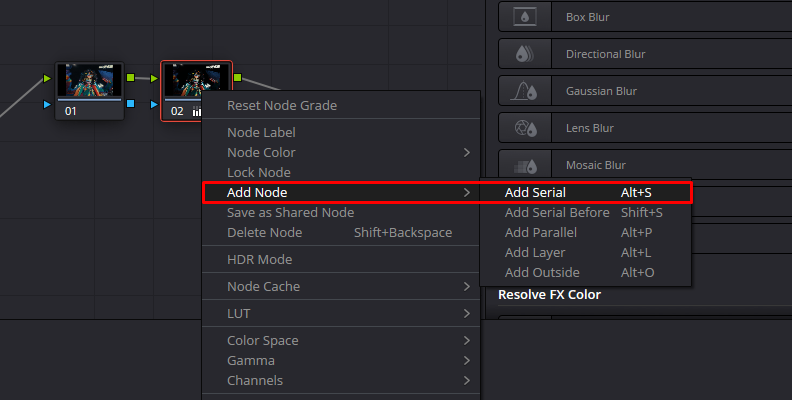

You should have three nodes in the node grid. The first one is where you will make adjustments. The second one contains the Layer node, and the third one is where you’ll be desaturating the image.
-
Step 2: Desaturation
Select the third node and go to the Color Wheels tool. In your primaries, locate the saturation (Sat) option below the wheels and decrease the saturation value to zero. The video will become a black-and-white image.

-
Step 3: Composite Mode
Right-click the Layer Mixer at the end of the node tree and choose Composite Mode > Hardlight. You'll notice the colors are back, now with high contrast. Here's where you can go back to the first node to adjust shadows and highlights.
-
Step 4: Compound Node
Once you have achieved the desired bleach bypass effect, select all nodes and right-click on the selection, then choose "Create Compound Node" from the menu.
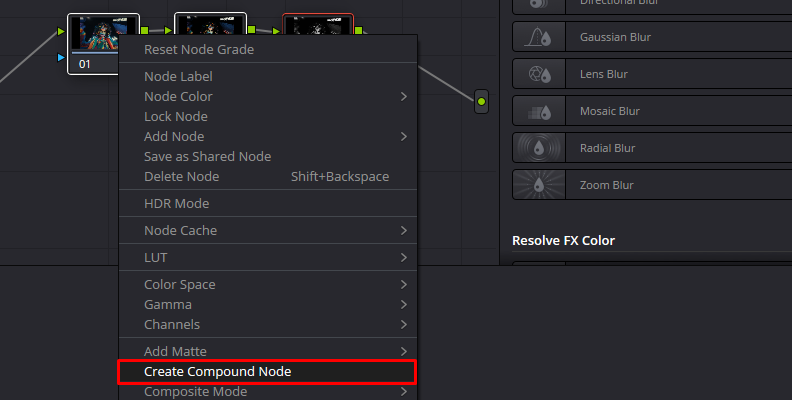
It will create a single node that contains all the nodes, making it easier to rearrange the node or apply it to other clips in the timeline.
DaVinci Resolve One Node Bleach Bypass
This method is for beginners who want to obtain a quick bleach bypass look with the free version of DaVinci Resolve.
-
Step 1: Color Page
Import your video and switch to the Color Page. I recommend you balance your image before the bleach bypass in the first node.
-
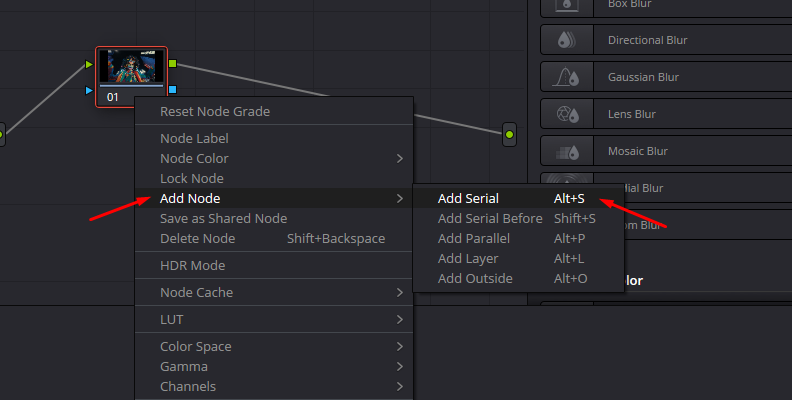
Step 2: Add a New Node
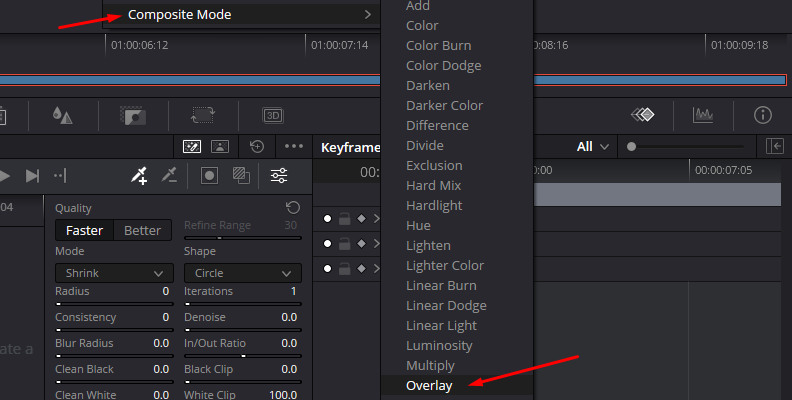
Add a new node by right-clicking the original node and selecting "Add Node"> "Add Serial." Right-click the new node and choose Composite Mode, then change it to Overlay.
-
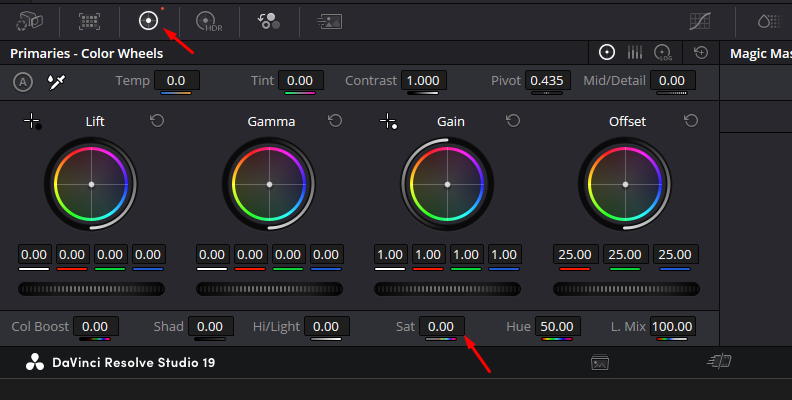
Step 3: Color Wheels
Click the Color Wheels tool, and set the Saturation (Sat) to 0. The saturation is in the options below the wheels. It will instantly create the washed bleach bypass effect. Increase the saturation if the look is too extreme for your video.
-
Step 4: Adjust Key Output Gain
Select the Key tool and adjust the Key Output Gain to adjust the opacity of the bleach bypass node. Return to the first node to fine-tune the look.
Final Words
Bleach bypass is a color-grading process in post-production that can be achieved using DaVinci Resolve. In this guide, you have learned three methods to bleach bypass in DaVinci Resolve for your videos, regardless of your skill level. Practice with DaVinci Resolve tools and experiment with external plug-ins, such as BCC+ Bleach Bypass, which makes the post-production process easier.
Good luck!