The fisheye lens effect is a popular visual technique that creates a distorted, ultra-wide-angle look. It exaggerates perspective, making the center of the frame bulge outward while the edges curve inward. This effect is commonly used in action sports, music videos, and creative filmmaking to give a unique and immersive look to footage.
While a real fisheye lens can achieve this effect naturally, you can easily replicate it in Adobe Premiere Pro without needing expensive camera gear. Whether you're aiming for a dramatic distortion or just a subtle curvature, Premiere Pro offers built-in tools that let you create a fisheye effect with precision.
In this guide, we’ll explain what a fisheye effect is, why it’s used, and provide a step-by-step tutorial on how to create this effect in Premiere Pro.
We've got quite a bit to cover, so without further ado, let's get started!
What Is a Fisheye Effect?
A fisheye effect is a type of visual distortion that mimics the look of an ultra-wide-angle lens. This effect is characterized by:
- A circular or convex distortion that bends straight lines near the edges of the frame.
- A dramatic perspective that exaggerates objects closer to the camera.
- A wider field of view than a standard lens, making the image feel more immersive.
Fisheye lenses are often used in action sports, skateboarding videos, and extreme sports cinematography to capture a dynamic and energetic perspective. They are also popular in artistic and experimental filmmaking for their unusual and exaggerated look.
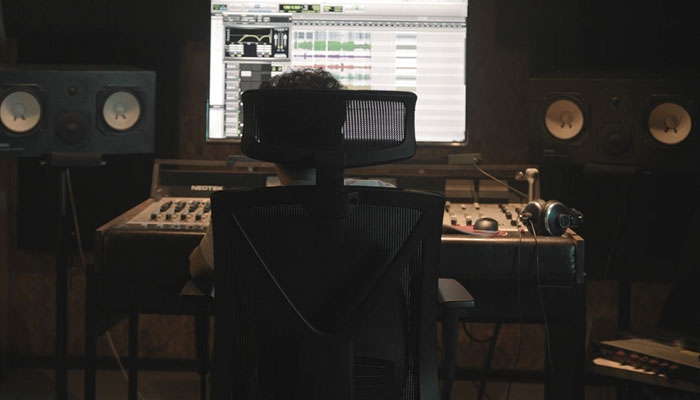
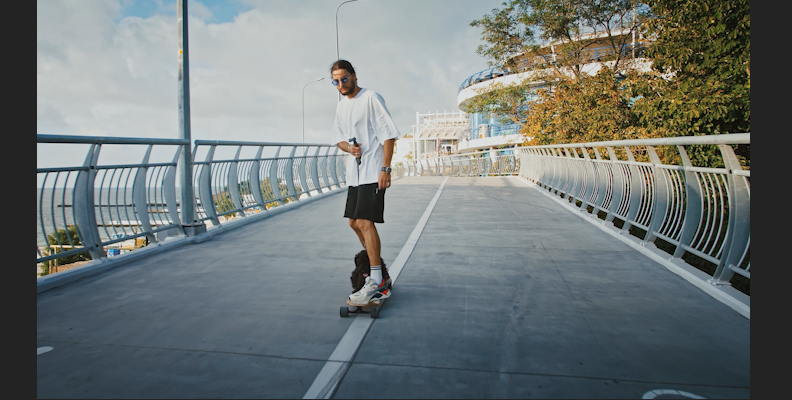
Before fisheye lens effect:
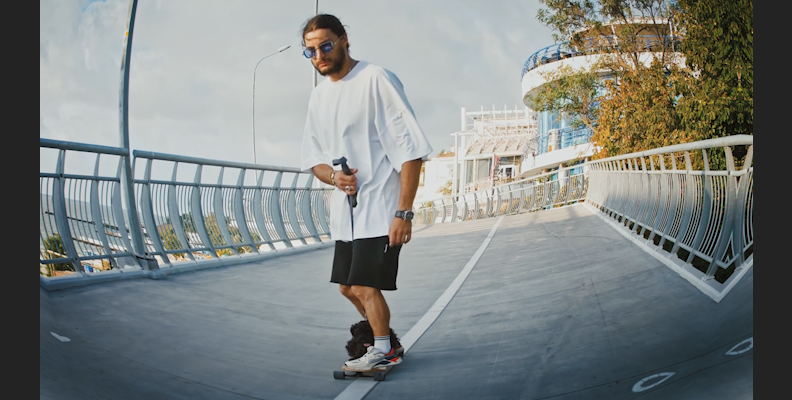
After fisheye lens effect:
In digital video editing, you can create a similar effect using warping and distortion tools in software like Adobe Premiere Pro. By applying specific effects, you can manipulate standard footage to resemble a fisheye lens without needing any special camera equipment.
Create a Fisheye Lens Effect in Adobe Premiere Pro

Follow these steps to apply a fisheye effect to your footage in Adobe Premiere:
Step 1: Import Your Footage Into Premiere Pro
- Open Premiere Pro and create a new project.
- Go to File > Import and select the video clip you want to apply the fisheye effect to.
- Drag the imported clip onto the timeline to begin editing.
Step 2: Apply The Lens Distortion Effect
- Open the Effects panel by going to Window > Effects if it’s not already visible.
- In the Effects panel, search for Lens Distortion (found under Video Effects > Distort).
- Drag and drop the Lens Distortion effect onto your video clip in the timeline.
Step 3: Adjust The Lens Distortion Settings
- Click on the clip in the timeline to select it.
- Open the Effect Controls panel by going to Window > Effect Controls.
- Locate the Lens Distortion effect settings.
- Adjust the Curvature slider to create the fisheye effect:
- Negative values (-50 to -100) will create an outward-bulging fisheye effect.
- Positive values (+50 to +100) will create an inverted, pinched effect (not typically used for a fisheye look).
- Experiment with different values to achieve the desired amount of distortion.
Step 4: Fine-Tune The Effect
- If the distortion causes unwanted stretching at the edges, you can correct it by adjusting the Vertical and Horizontal Decentering options in the Lens Distortion settings.
- To exaggerate the effect further, duplicate the clip and apply additional Lens Distortion effects with varying curvature values.
- If you notice unwanted black borders around the edges, scale up the video slightly using the Scale option under the Motion controls in the Effect Controls panel.
Step 5: Enhance The Fisheye Effect (Optional)
To make the fisheye effect more pronounced or stylized, you can apply additional effects:
- VR Digital Glitch (found under Video Effects > Immersive Video) can add a stylized, distorted look.
- Gaussian Blur (found under Video Effects > Blur & Sharpen) can create a dreamy, soft-focus effect if desired.
- Vignette Effect (using Lumetri Color > Vignette) can darken the edges, emphasizing the circular distortion of the fisheye look.
Step 6: Preview And Export Your Video
- Press Spacebar to play the video and preview the fisheye effect in real time.
- If adjustments are needed, tweak the Curvature and Decentering values until satisfied.
- Once you’re happy with the effect, go to File > Export > Media to export your video.
- Choose the appropriate format (e.g., H.264 for online sharing) and click Export to save your final video.
Fisheye Lens Effect in Premiere Pro Using S_WarpFisheye
When it comes to adding various effects to your video clips, it's worth noting that some tools offer solutions made specifically for the task and are much quicker, more efficient, and a lot more customizable. Such is the case with Sapphire by Boris FX.
Sapphire is a pack containing hundreds of presets, filters, tools, plug-ins, and everything else you need to take your creative work to a whole different level.
In Sapphire, there is a fisheye effect you can apply to your video(s) with just a simple drag and drop, and it offers easy customization and takes way less time to setup compared to the previous method, which is manually creating the effect in Premiere.
On the Sapphire site, you can find the free trial download button. Keep in mind Sapphire is available for all popular video editing programs, so make sure to install it for the one you work with. In our case, we'll be using Premiere.
Once you install Sapphire for Premiere, all you need to do is this:
Step 1: Create a New Project and Import Media
Once you load Premiere, create a new project on the home screen.
Then, head over to the "Project" tab if it's not open by default and click the "Import media" button.
Once you import your video clip(s) you will see them in the same tab.
Step 2: Create a Timeline/Sequence and Apply the Effect
To start working on a clip, applying effects, transitions, or doing any modifications, you need to create a sequence. To do this, simply drag and drop the clip(s) from the Project tab to the timeline area.
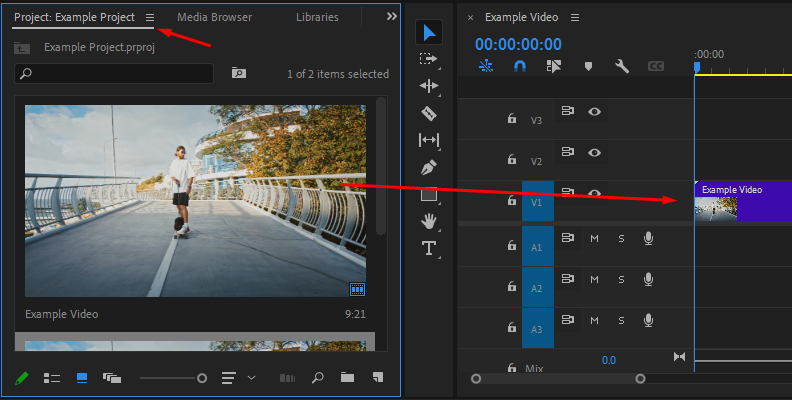
Now you have a sequence ready to work with.
With your sequence ready, open the "Effects" tab and use the search bar to find the S_WarpFisheye effect which is part of the Sapphire pack. When you locate the effect, drag and drop it over the the clip in the sequence on your timeline.
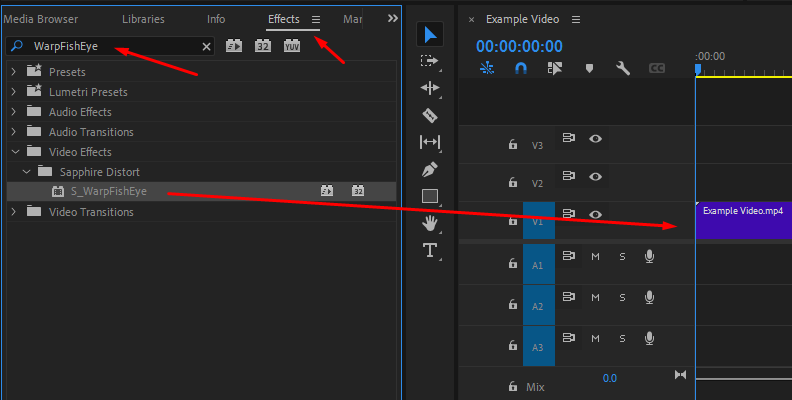
You'll immediately notice a difference in how your video looks.
Step 3: Adjust Changes/Parameters in the Effect Controls Panel
Now that the effect is applied, you might like the look immediately, or you may require a few changes. To make changes, open the "Effect Controls" panel in the top-left corner of your screen in Premiere.
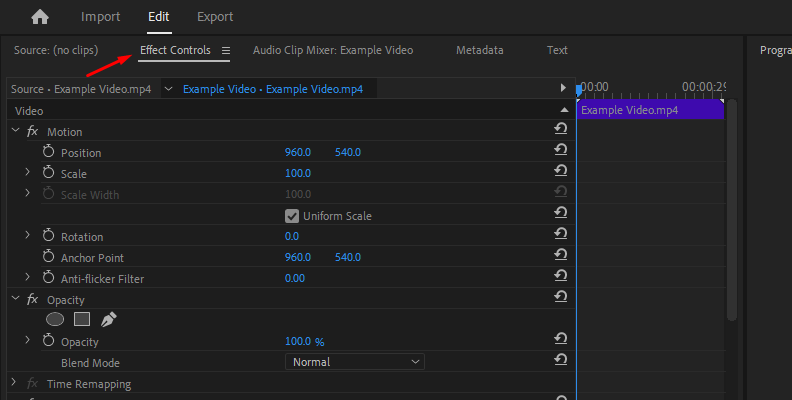
Once in the Effect Controls panel, you can scroll down and find the S_WarpFishEye effect and all its available parameters that you can adjust.
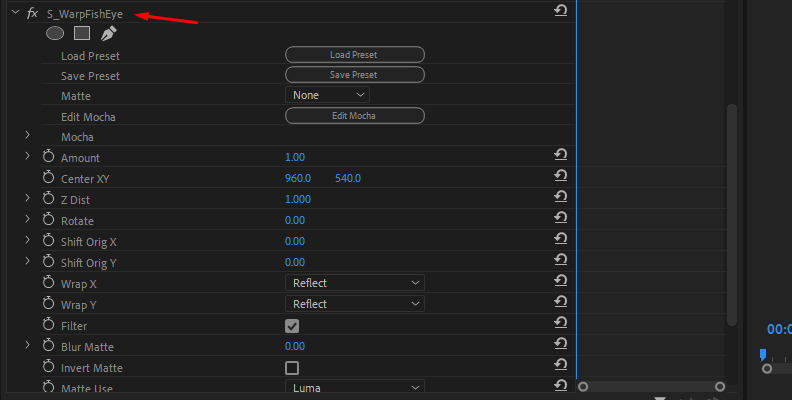
You can click "Load Preset" to open the preset browser and choose one of the pre-made effect looks for your video.

Once you're satisfied with the changes, preview the video, save, and export. That's how easy it is to use the S_WarpFishEye effect!
Final Words
That concludes our guide for the fisheye lens effect in Premiere Pro.
Hopefully, this will help you upgrade your editing toolbox and utilize this effect to its full potential in all your future work.
We thank you for reading and wish you the best of luck!