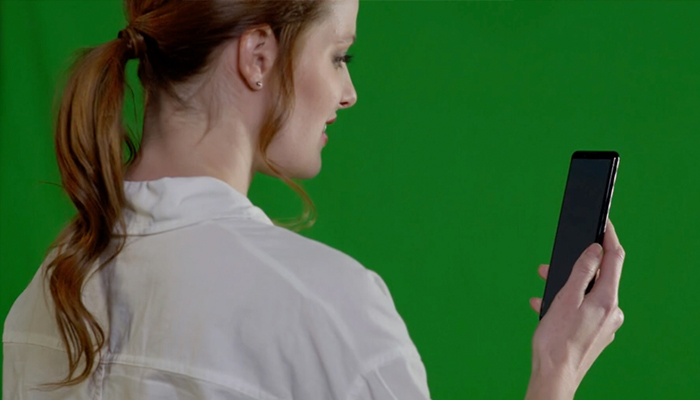
When we take pictures, there's a chance that skin colors look slightly off if we use bad lighting or do not correctly set the white balance on our cameras. The images can look too orange, even pink or purple. We can use tools or fast color correctors for the whole image, but sometimes, skin tones can look unnatural after color correction.
Today, we'll look at two methods to make better skin tones. The first method uses the Adobe Premiere Pro Lumetri Color tool, and the second uses the BCC+ Skin Tone filter from the Boris FX Continuum plug-ins.
Let’s dive in!
How to Correct Skin Tones in Premiere Pro

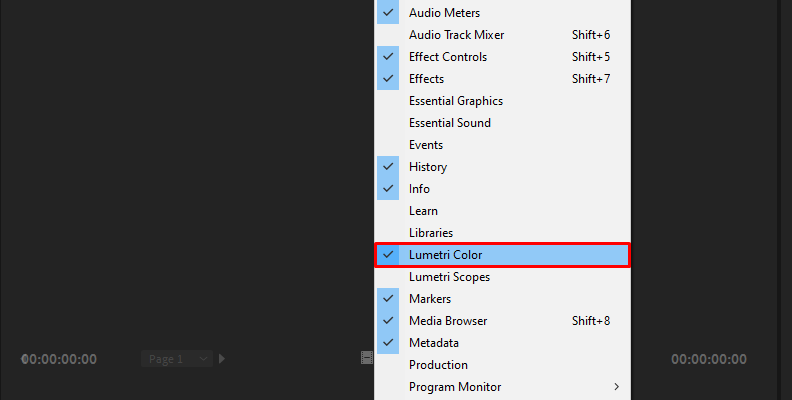
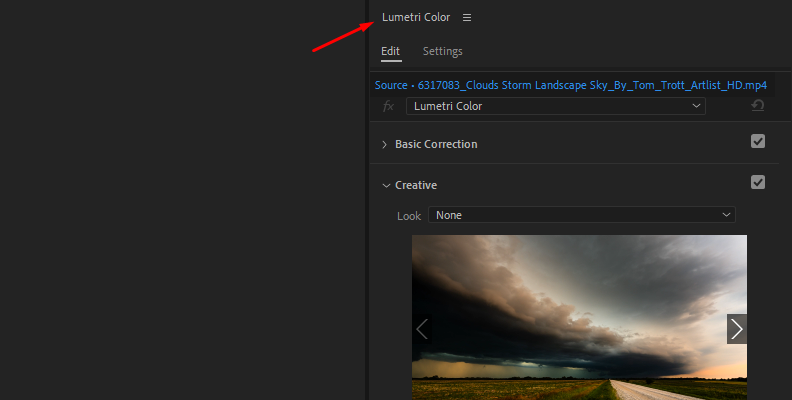
The Lumetri Color panel in Adobe Premiere Pro is a color correction and color balance tool with many features and capabilities. For this tutorial, we'll focus on the white balance and curves.
-
Step 1: White Balance
White balance is a fast and effective way to correct skin color in a photo that has been shot under low-quality light, too cool or warm light, or when the camera white balance was not set correctly.
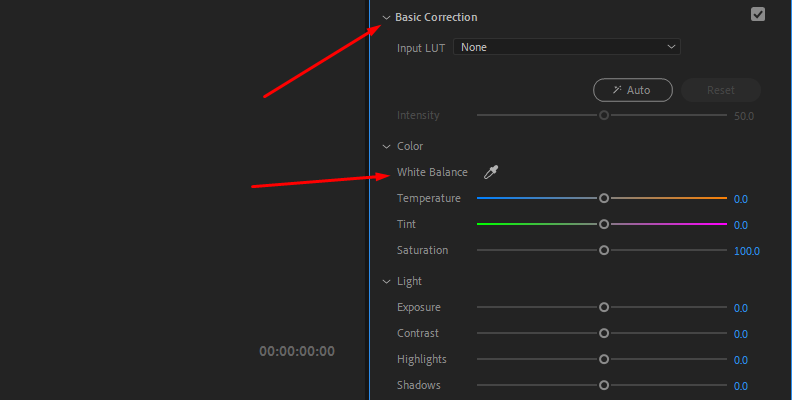
Import your photo into Premiere Pro and open the Lumetri Color panel in the color workspace. If your picture has white or neutral colors, you can use them for white balance. Display the Lumetri Scopes and select the Parade RGB to see the Red, Green, and Blue in the graph. The Lumetri scopes will allow you to see what your eyes can’t see.
First, create a mask or use the crop effect to select the white or neutral colors in the image. It will limit the Parade RGB scope to that portion of the image to work on that white or neutral color. Depending on the picture, some colors in the Lumetri scope will be higher or lower. Use the Temperature and Tint slider to bring them the most even as possible. Turn off the mask or the crop effect to see the result.
If the rest of the tones in the picture still don't look right, you can adjust the white balance sliders further. If you notice a specific issue with one color, use the hue vs hue curve to decrease or increase that hue specifically.
-
Step 2: Check the Skin Tone Line
To ensure the skin tones are correct, use the crop effect or a mask again to select a portion of the skin and select the Vectorscope YUV in the Lumetri Panel. Between the yellow and red is the skin tone line. The tone should be as aligned as possible with the skin tone line. Use the Lumetri color controls to correct the skin tone. The Vectorscope YUV lets you see if the color tends to be red or yellow.
You can use the color wheels for color grade and correction when the colors in the whole image get mixed with the adjustments.
Correct Skin Tones in Premiere Pro with Continuum's BCC+ Skin Tone
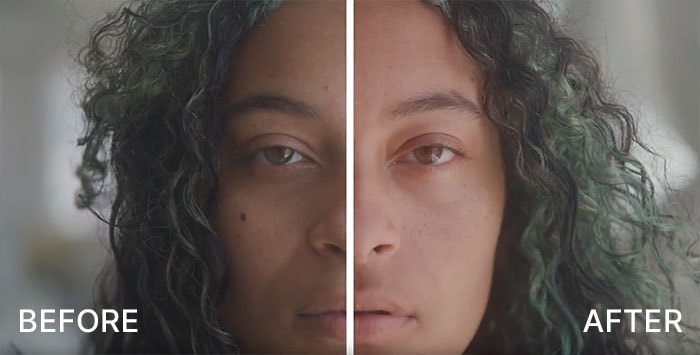
BCC+ Skin Tone is a filter from the Continuum plug-in by Boris FX. It features colorization filters to improve skin tones and color-correct photos and videos. The filter can be applied as an effect in Premiere Pro simply by browsing it from the Effects panel. It has presets to correct skin tones quickly and is fully customizable from Adobe Premiere Pro.
-
Step 1: Download and Install Continuum
Ensure Continuum is installed and updated from the Boris FX Hub application. To try Continuum before purchasing, you can download a free trial and follow this tutorial to correct skin tones from your photos in Premiere Pro.
-
Step 2: Apply The BCC+ Skin Tone Filter to Your Photo
Import your photo or video that needs color correction and skin tone improvements into a new project in Premiere Pro, and drag the video in the project panel to the timeline to create the sequence.
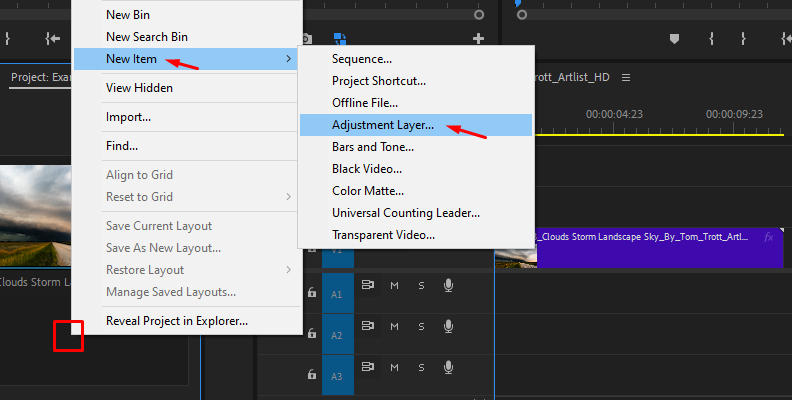
You can use the filter directly on the clip in the timeline, but I suggest using an adjustment layer to avoid affecting the original photo or video. You can extend the adjustment layer to the length of the clip.
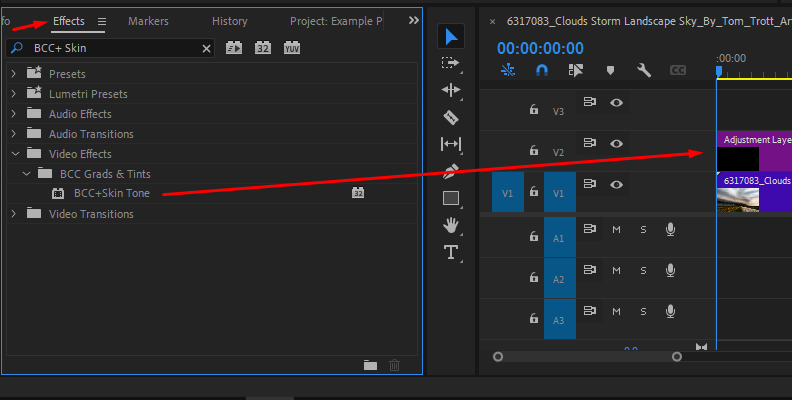
Go to the Effects panel, search for BCC+ Skin Tone on the BCC Grads and Tints category, and drag it to the adjustment layer. The Effect will automatically be applied with its default settings. Now proceed to the Effect Controls panel to set the filter to your liking to improve the skin tone.
-
Step 3: Explore the FX Editor
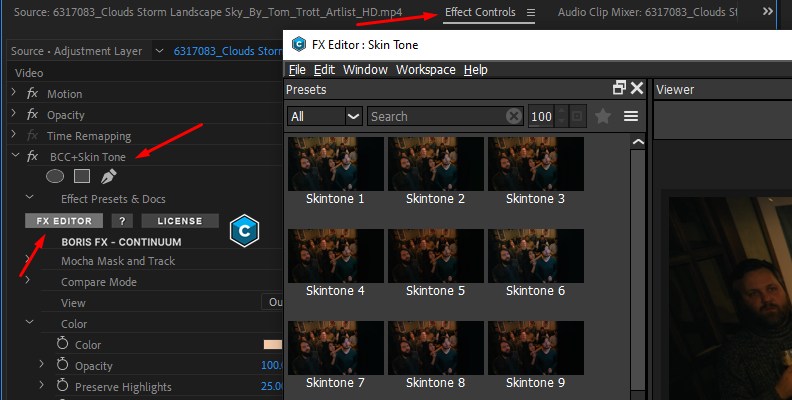
In Effect Controls, you can access the preset library by clicking the FX Editor button. It will launch a different window where you can select from a collection of colorization presets. Select from the left panel to preview it, and click Apply to exit the window. All presets are customizable; choose one close to your desired look and edit it in the Effect Controls panel.
-
Step 4: BCC+ Skin Tone Parameters
The filter has enough controls to get creative looks and enhance your skin tones.
First, select the color filter and adjust the filter opacity. Use the Preserve Highlights slider to maintain the white areas of the photo and the exposure compensation to bring back brightness that may be lost after processing the filter. Play with these settings and experiment with different combinations.
With BCC+ Skin Tone, you can enable a gradient to limit the filter. This allows you to smooth the transition between the filter and the original photo. When you use the gradient, the following settings will be available to adjust:
-
The Type sets the direction of the gradient.
-
Angle controls the gradient’s angle.
-
The following four points allow you to corner-pin the gradient. You can adjust the sliders or the four corner points in the viewer.
-
Final Words
Color correction and the Adobe Premiere tools can take some time to master, but the results are definitely worth the effort. Applying the BCC+ Skin Tones filter to your photos and videos makes the process smoother for beginners and professionals, offering presets and the ability to fine-tune the effect of your image.
Good luck, and stay creative!


