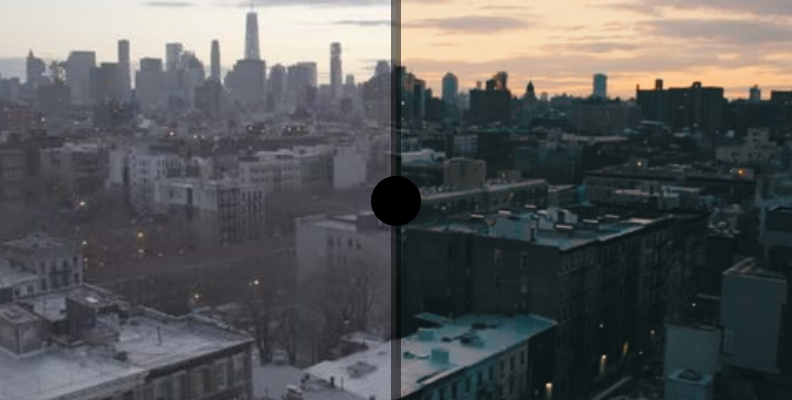
Color grading is one of the main processes to set the looks and mood in your film and video footage. LUTs or Lookup tables are easy-to-use tools for professional color grading that almost everyone in the industry uses to create the cinematic looks in your favorite movies.
DaVinci Resolve is known for being fast video editing software and one of the best color grading programs. Many professionals in Hollywood use its color grading tools. The software also has some interesting options for working with LUTs.

In today’s article, you’ll learn what LUTs are, the types of LUTs and categories used for color grading and correction, and how to add LUTs in DaVinci Resolve.
Let’s dive in!
What are LUTs?
LUT, which stands for Lookup Tables, is a tool for easily achieving a desired look or style for your footage. You can use LUTs with most video editing software, such as Blackmagic Design's DaVinci Resolve, Adobe Premiere Pro, and Final Cut Pro.
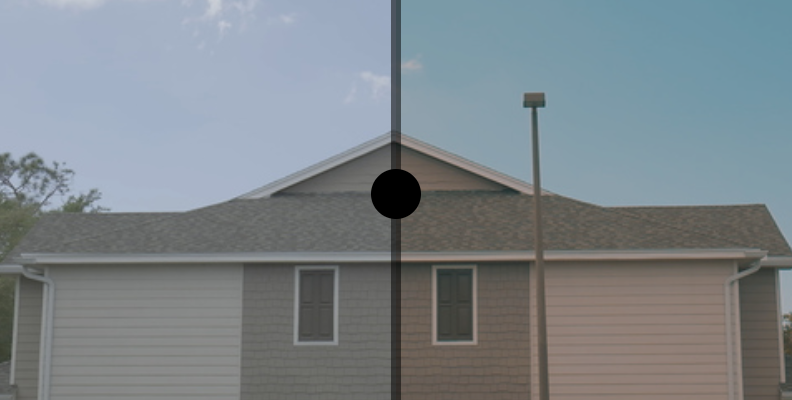
LUTs transform the color in video footage to create a mood or set the tone of your film. They quickly apply pre-established looks, such as cinematic, vintage, match camera, etc. Think of LUTs as color a preset for color grades and color correction.
LUTs can streamline the color grading process, saving time and effort in editing, unlike manually tweaking the color wheels and curve parameters.
In more technical terms, LUTs are mathematical algorithms that map the input color value of video footage and transform it into a different output value.
The benefits of using LUTs are saving time in the color grading and color correction process and improving your workflow.
LUTs also allow you to achieve color consistency across your projects or different clips in a single project and add the possibility to work with the same LUTs in multiple software or displays.
For example, if you’re editing a film where the storyline occurs in two dimensions or past and present, you can use LUTs to create the style and looks of an alternative universe and keep it consistent over the film, even if you work with multiple software and collaborators.
Types of LUTs in Davinci Resolve
Video editors usually use LUTs to color grade and color correct footage. The color correction process helps enhance the technical aspects of the video. In contrast, color grading is a more creative process, and there are LUTs for both techniques as well as other color-related work.
-
LUT Categories
There are two main LUT categories depending on the coloring process you're working on:
-
Technical LUTs: Technical LUTs allow you to change the color space, convert LOG footage, edit raw format, and calibrate the display to ensure that all images shown are as accurate as possible. You may often hear of calibration or camera LUTs, but they are considered to be in the Technical category.
-
Creative LUTs: These LUTs are mostly used to give footage a creative look and to color grade.
There are two main types of LUTs within the creative and technical LUTs: 1D and 3D LUTs. The following are the LUT types that DaVinci Resolve supports
-
-
1D LUTs
1D LUTs can only change one input value to an output value, for example, brightness, contrast, luminance, blacks, whites, and individual colors. They’re mainly used for color correction. In DaVinci Resolve, you’ll see them as 1D input LUT and 1D output LUT.
-
3D LUTs
3D LUTs work with red, green, and blue color values. They can transform any mapped color into a different one, including hue, saturation, and brightness, allowing video editors and colorists more control over color correction and grading.
-
DaVinci CTL (DCTL)
DCTL stands for DaVinci Color Transform Language. It’s a programming language based on CTL (Color Transform Language) that allows users to use scripting language to process images and color using custom code to manipulate color data for precise color adjustments and more control than the built-in tools.
-
LUT Formats
Regardless of the intention of the LUTs, two main LUT file formats are used in DaVinci Resolve: .cube and .3DL.
Some video editing programs have their own LUT format, like Premiere Pro, which creates LUTs as a Lumetri preset in .look files.
The standard format that you’ll see for LUTs that’s compatible with most video editor programs is cube files.
How to Add LUTs to DaVinci Resolve
To start this tutorial, you will need video footage to which you want to add LUTs.
I’ll begin by showing you how to add external LUTs to use in DaVinci Resolve, then follow with the guide to applying LUTs, which works for both built-in LUTs and external cube LUTs.
-
Install LUTs in DaVinci Resolve
First, download or export LUTs in cube files to your computer. You can find LUTs from different sources online, including some free custom LUTs created by other users and paid options. Once you have the cube files in a folder, jump to DaVinci Resolve to install them.
-
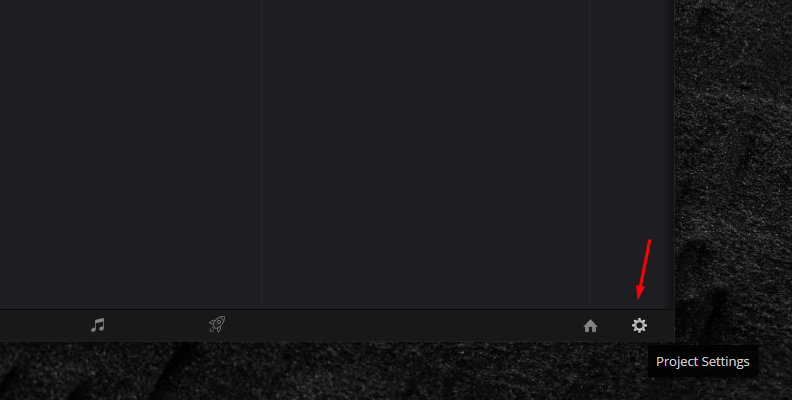
Step 1: Open the Project Settings Windows
Open or create a new project. Click on the settings icon at the bottom right corner of the screen to see the project settings window. You can also access this window by going to File > Project Settings or using the keyboard shortcut Shift + 9.
-
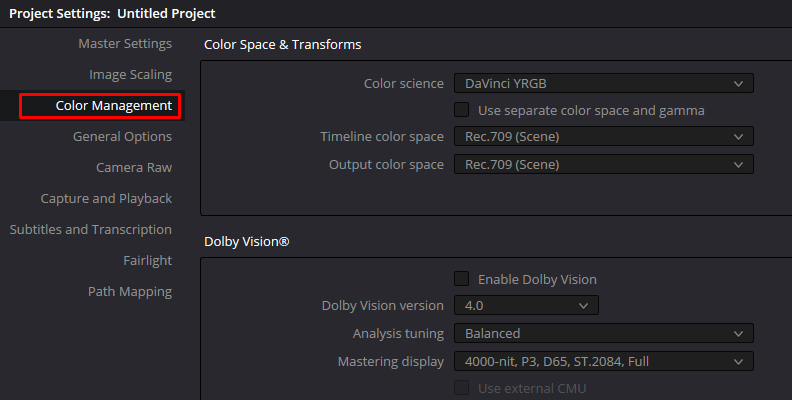
Step 2: Color Management Tab
Search the Color Management Tab on the left in the Project Settings window. Click on it to see the new color spaces, transforms, and Lookup Tables options.
-
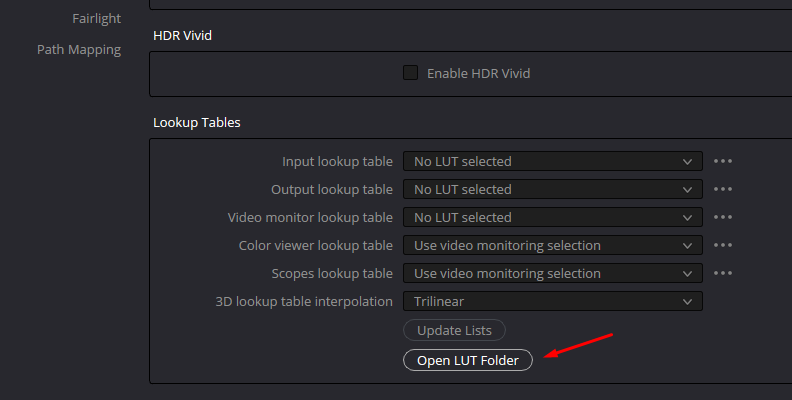
Step 3: LUT Folder
Scroll under the Lookup Table options and click the “Open LUT Folder” button. When the LUT folder opens in a new window, drag or copy the cube files to import LUTs.
You can organize your LUTs in folders to keep all LUT types on specific folders.
-
Step 4: Refresh LUTs
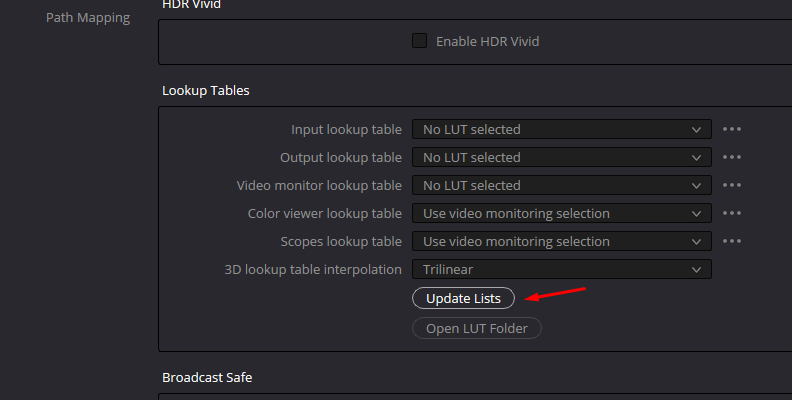
Return to DaVinci Resolve. Now, you need to refresh the LUT list with the ones you just added.
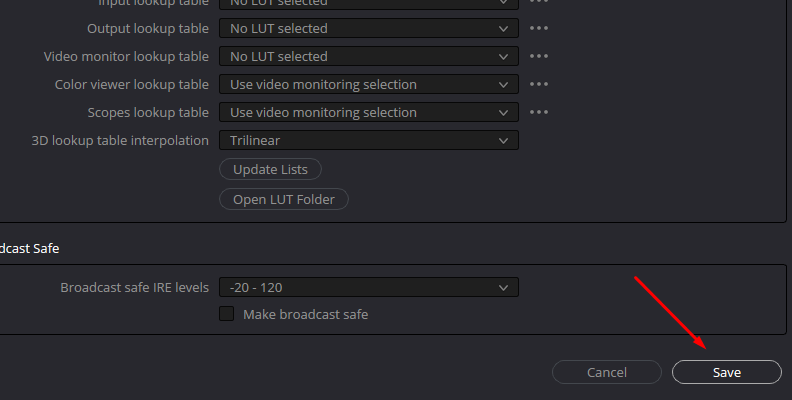
In the Color Management Tab, click the “Update Lists” button above “Open LUT Folder” in the Lookup Tables settings and then click Save in the project settings window to close it.
-
BONUS: LUTs Manual Installation
Another way to install your LUTs is by manually searching your system's DaVinci Resolve LUT folder and copying the new LUTs there. These are the DaVinci Resolve LUT folder locations for each system:
-
LUT folder in Mac: /Library/Application Support/Blackmagic Design/DaVinci Resolve/LUT/
-
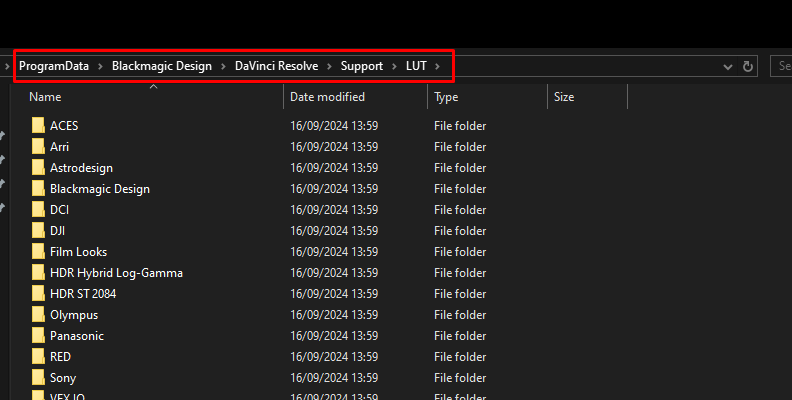
LUT folder in Windows: C:\ProgramData\Blackmagic Design\DaVinci Resolve\Support\LUT
-
LUT folder in Linux: /opt/resolve/LUT
If you install it manually, I recommend copying the LUT file before you open DaVinci Resolve. Otherwise, you must go to the Color Management Tab and update the LUT list. After installing LUTs, they will be available to select inside DaVinci Resolve.
-
-
-
Apply LUTs in DaVinci Resolve
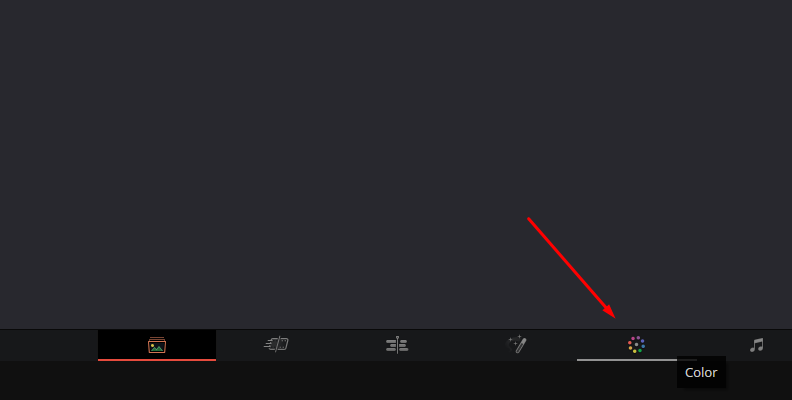
To apply the LUTs you just installed, go to the Color page. To change the workspace, click the color tab at the bottom of the screen or go to the Workspace menu > Switch to Page > Color.
-
Step 1: Select Clips to Apply LUTs
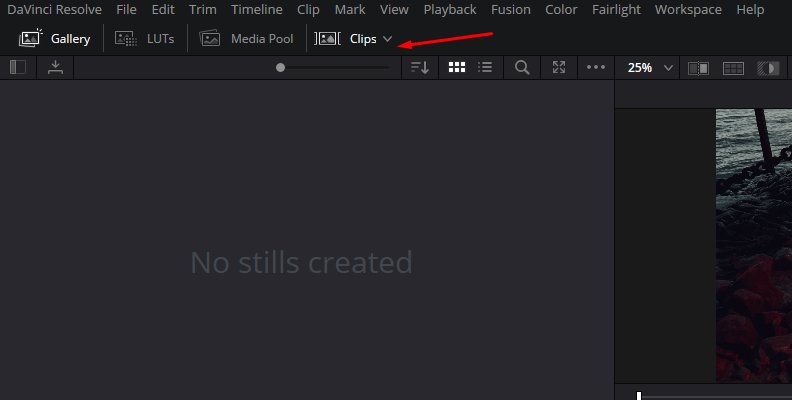
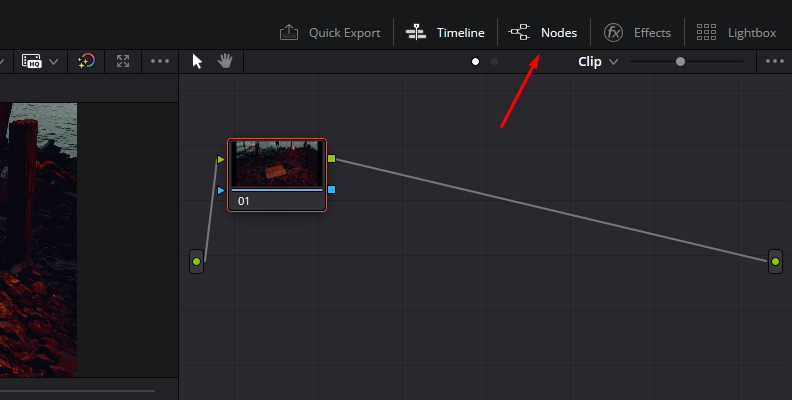
Ensure you enable the clips to be visible in the timeline. Click the Clips button at the top left to see the timeline, and also enable the node grid view by clicking the Node button at the top right corner to see the node grid.
Select the clip in the timeline where you want to apply a LUT. You can apply the LUT directly to the clip.
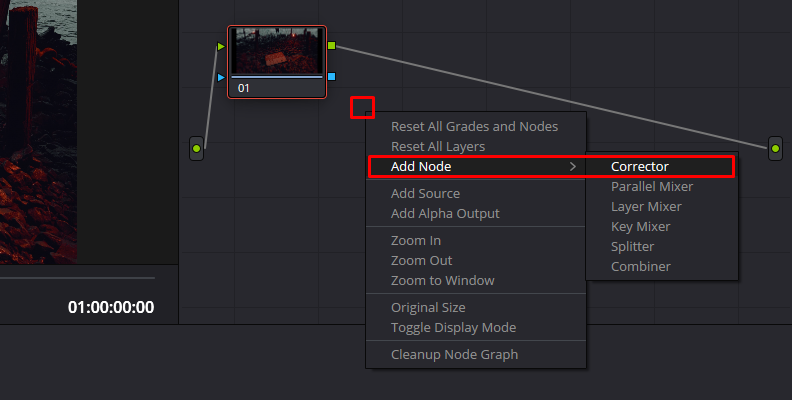
Alternatively, you can add a corrector node to apply the LUT there.
Right-click anywhere on the node in the grid to display the dropdown menu, choose Add Node > Corrector, and then connect the corrector node to the first node.
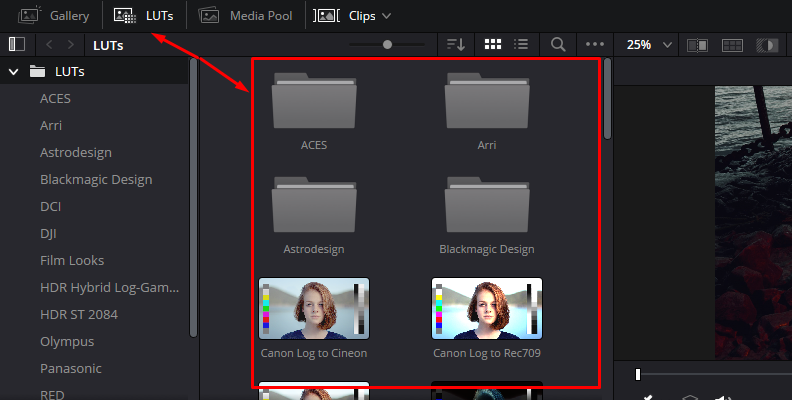
Click the LUT button at the top left corner and select one LUT from the list. You can preview each LUT by hovering the mouse over it. Then, click and drag the LUT to the node to apply it.
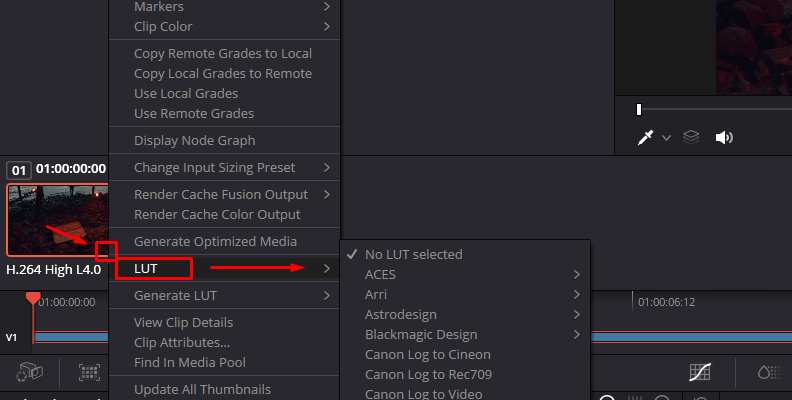
Another way to add LUTs is from the node grid. Right-click the node and select LUT to display all available LUTs. Simply click on one LUT to apply it to the node.
The only drawback of applying LUTs like this is that you cannot preview them.
-
Step 2: Fine-tune LUTs
Using LUTs doesn't mean you can't make adjustments. You can still fine-tune color settings, adjust the LUT intensity, and more. Select the node with the LUT in the color tab and choose any color tools available in DaVinci Resolve. You can adjust the Gain, Gamma, and Offset in the Color Wheels or use the Curve and Key tabs to make further adjustments.
-
Step 3: Export LUTs
If you want to export your custom LUTs for future use on different software or for other video editors to work with the same LUTs as you, right-click the clip’s thumbnail in the color tab. Select Generate LUT and choose a format. The LUT will be saved to the DaVinci Resolve LUT folder.
-
Final Words
Adding and using LUTs in DaVinci Resolve can save you plenty of time when editing videos. Furthermore, it provides you with professional tools to manually adjust colors in your footage, and the DCTL technology grants even more control for color grading and generating LUTs.
LUTs are powerful tools for video editing and other post-production processes that can make your work more efficient. With DaVinci Resolve's built-in tools, you can go beyond to make your ideas come to life.
Good luck, and stay creative!