


A shake effect can make a video more immersive, as if the audience were living the scene at the moment. If you find your videos to be too static, adding a camera shake effect can definitely make the footage more engaging and immersive.
If you want to give your videos more life and action, this tutorial will teach you how to add a camera shake effect to simulate footage recorded with a handheld camera using DaVinci Resolve and Boris FX Sapphire.
Let’s dive in!
Add Shake Effect in DaVinci Resolve
DaVinci Resolve features a Camera Shake effect that adds camera motion to your videos, enhancing your audience's experience, particularly with action, music, or sports footage. You can apply a camera shake effect either from the Edit or Fusion page. I’ll show you the two ways.
Step 1: Set Up Your Project
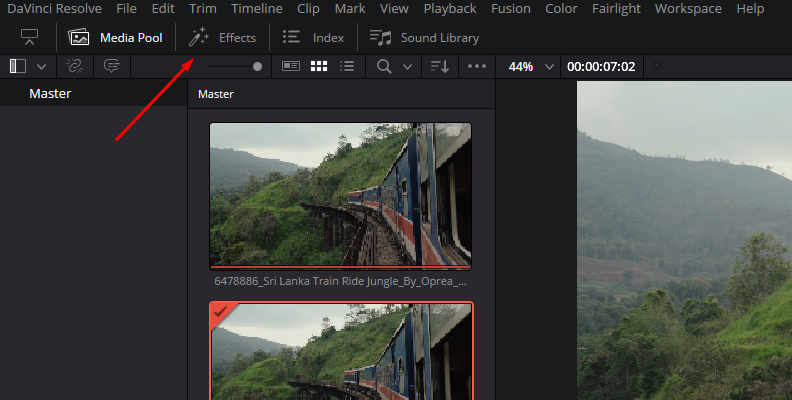
Create a project and import your videos into DaVinci Resolve. Drag them to the Timeline to create the sequence and arrange the videos in the desired order. Go to the Edit page and trim or cut the clip until you have a sequence ready to apply the camera shake effect.
Step 2: Search for the Camera Shake Effect
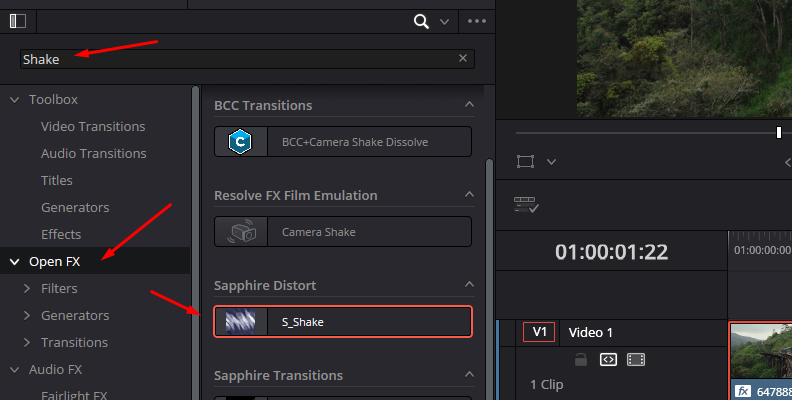
Select the clip where you want to apply the shake effect and open DaVinci Resolve's effects library by clicking the Effects button in the upper left corner. Go to the Open FX category, and use the search bar to type 'Camera Shake' and find the effect. Click and drag the effect to the clip to apply it.
Step 3: Camera Shake Settings
The next step is to customize the effect. Open the Inspector panel from the Inspector button in the top right corner of the workspace, then click the Effects tab. Ensure that you select the clip with the camera shake effect applied to view the effect settings in the Inspector.
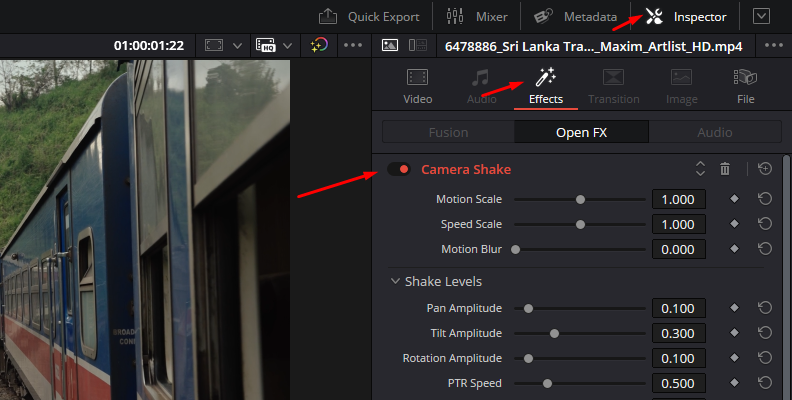
Your main controls are the Motion Scale, Speed Scale, and Motion Blur. With the Motion scale, you control the amplitude of the camera, and speed controls how fast those movements are. Add motion blur to simulate fast-moving videos, making the clip and camera shake effect more realistic.
Step 4: Shake Levels
Below the main settings are the Shake Levels parameters, where you can adjust the intensity of the camera shake. Pan, Tilt, and Rotation adjust the horizontal, vertical, and rotational motion of the clip. You can additionally set speed and zooming options for the camera shake effect.
Step 5: Adjust Camera Shake Quality
Under this parameter, you can customize the shaking for your video clip. Change the motion method, set the starting point of the camera shake, and add randomness to the vertical, horizontal, and rotational motion, as well as speed.
Step 6: Blanking Handling
The last parameter group controls how to handle the empty edges of the clip caused by the camera shake effect. You can choose to replicate, reflect, or wrap to fill the gap or zoom in to crop the video clip to remove the blanking.
Alternative: Camera Shake Effect from the Fusion Page
If you prefer to work from the Fusion page, import your videos and arrange the sequence. Select the clip you want to add shakiness to and switch to the Fusion page. Press Shift+Enter to open the Tool Selector and type 'Camera Shake.' Select the tool 'Camera Shake (CShk)' and press Add.
Connect the CameraShake node between the MediaIn and MediaOut nodes. Select the CameraShake node, open the Inspector panel, and select the Controls tab to see the settings. The Camera Shake tools’ settings are very similar to those of the Camera Shake effect from the Effects library.
Adjust the amount of camera shake with the X, Y, and Rotation Deviation sliders to control the horizontal, vertical, and rotational motion. Add randomness and set a strength and speed for the shake effect. Customize the camera shake effect further by selecting different Frequency and Filter methods, and learn how to handle edges.
Play the clip and experiment with the Camera Shake settings to discover unique and dynamic camera motions that enhance your videos.
How to Add Shake Effect in DaVinci Resolve with Sapphire S_Shake
The Sapphire Shake effect provides a customizable camera shake effect that adds motion to a source clip. It allows you to customize the translation, zooming, rotation, and randomness of the shake effect, as well as the amplitude, motion blur, and speed. It's an intuitive effect, yet it offers numerous options for professional video editors to configure and customize.
Step 1: Import Footage
Prepare your DaVinci Resolve project and import your video clip. When you’re ready, go to the Edit page and display the Effects library by clicking the Effect button. Ensure you navigate to the Open FX category, where your Sapphire effects are located.
Step 2: Apply Sapphire Shale Effect
Type S_Shake in the search bar to find the Sapphire Shake effect. It should be under the Sapphire Distort category.
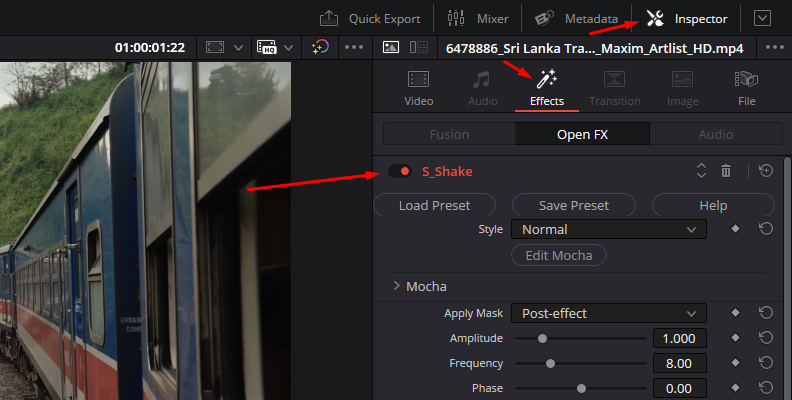
Drag it to the clip where you want to add the camera shake effect. Now, with the clip selected, open the Inspector panel and select the Effect tab.
Step 3: S_Shake Styles
Before creating the shake effect from scratch, check the preset library. Click the Load Preset button to launch the Sapphire Preset Browser, where you can explore and preview the pre-installed presets.
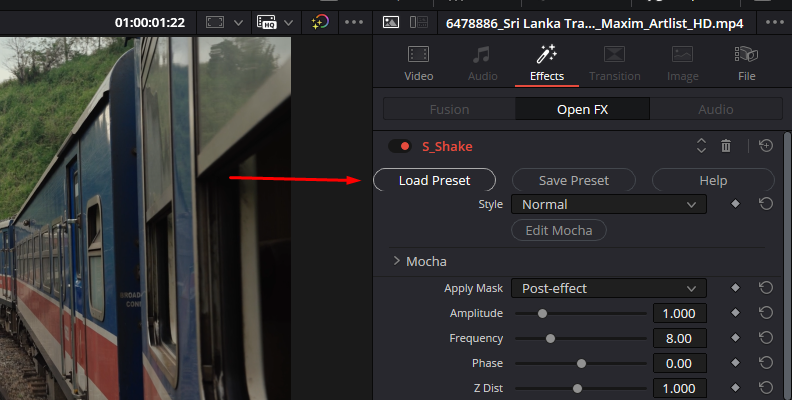
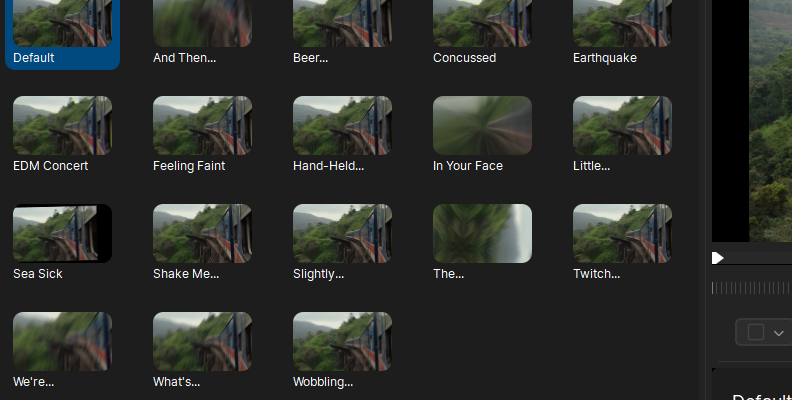
If you find something you like, click Load to apply it and return to DaVinci Resolve. You can then modify the preset to your liking.
S_Shake features three styles of shaking: Normal for a steady camera shake, Twitchy for a mix of stillness and rapid shaking, and Jumpy to create sudden shakes with slower drifting in between.
Step 4: Shake Effect Settings
Depending on the Camera Shake style, several options will be enabled. You can adjust the amplitude of the camera shake effect, its frequency for speed, phase for time shift of the motion, stillness, twitch frequency, drift, the center bias, and zoom distance.
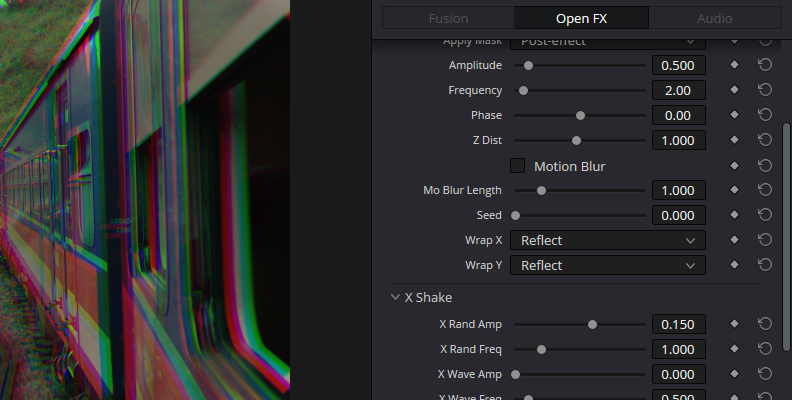
Below, you’ll find an option to add motion blur, along with the X, Y, Z, and Tilt Shake parameters, which control horizontal, vertical, zoom, and rotational shaking, respectively. Within each parameter group, you can adjust the amplitude and randomness of the camera shake effect.
The Channels parameters allow customization of a shift channel effect with movement. You can adjust the amplitude, phase, frequency, and randomness for each color channel to make a specific color shake more than the others.
The best is to experiment and play with these settings to find something you like. Or start with a preset and modify specific parameters.
Final Words
With these DaVinci Resolve methods for creating camera shake effects, you're ready to enhance your videos with realistic and dynamic shakes. With Sapphire, you can make any type of camera shake that is flexible, professional, and realistic-looking.
Start your Sapphire trial to experiment with the many options that S_Shake offers for your videos.
Good Luck!


