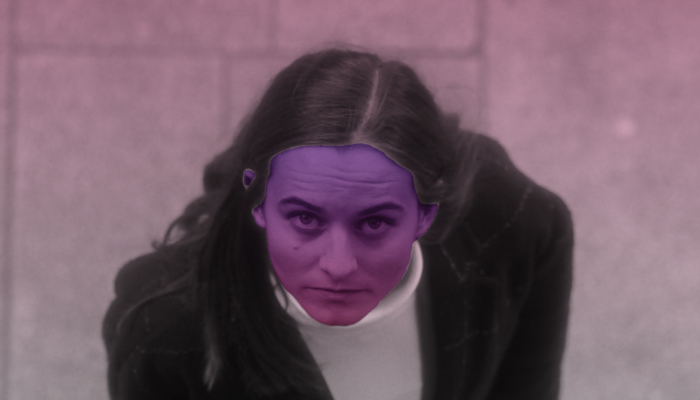
Color corrections, color grading, and changing colors in a photo are the bread and butter of photo editing. We often need to change clothing colors, objects, eyes, hair, and other elements in the photo for a plethora of reasons, such as enhancement, creative purposes, making an object stand out in the photo, or creating eye-catching designs.
Changing colors can be easily done with photo editing tools and dedicated color changer apps. Some applications feature basic tools for changing the colors of the whole picture, and others provide more advanced tools that allow you to select objects to change individual colors.
In today's article, you'll learn how to change the color of something in a picture without affecting the rest of the photo. Think of selective image color replacement with little impact on the overall colors in the image. For the tutorial section, we'll use Optics, a plug-in and photo editing software from Boris FX. At the end of the article, I'll briefly review the top 6 best tools to replace color so you can start building your color replacement toolkit
Let’s dive in!
How to Change Specific Colors in an Image Without Affecting the Whole Picture with Optics Enhancing
Optics is a Boris FX product for editing photos, creating cinematic pictures, and enhancing your photos with a library of hundreds of filters and presets that are easy to use and apply. Enhancing is a color filter in Optics that selectively improves or changes any color of an image to make it stand out with little to no effect on the rest of the photo's colors.
Optics can be used inside Lightroom and Photoshop as a plug-in filter or as an individual application in standalone mode for Windows and Mac systems.
-
Step 1: Download Optics
Go to Optics' webpage and download the free trial. After installing the Boris FX Hub, sign in with the email you used to purchase a license. If you don't own a license, you can still get the free trial from the Boris FX Hub.
Find Optics and click download. It will install the plug-in version for Lightroom and Photoshop and the standalone application. Then, run the Optics app or Photoshop/Lightroom to use the plug-in.
-
Step 2: Import Your Photo
Import the photo to Photoshop or Lightroom and apply Optics as a plug-in.
For Photoshop, you should convert the photo layer into a smart object before applying the Optics plug-in.
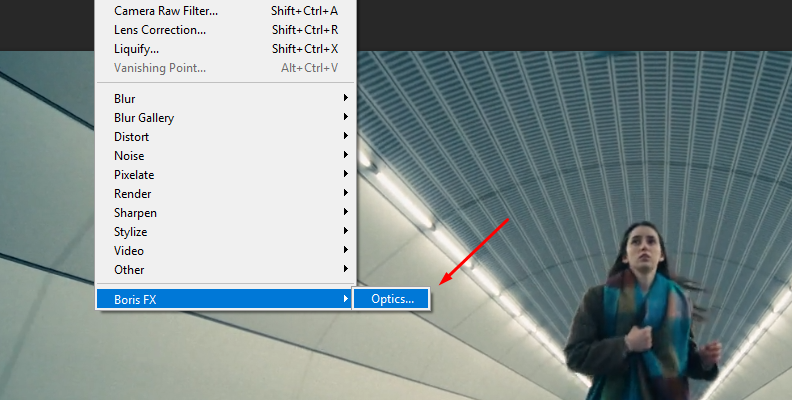
Then, go to Filter > Boris FX > Optics to launch the Optics UI, where we'll continue working with the imported photo.
In Lightroom, right-click the photo and click Edit In > Boris FX Optics. It will launch the Optics UI and launch the photo.
In the Optics app, go to the File menu and click Open to browse for the photo you wish to import.
-
Step 3: Add Enhancing
Enhancing is the filter you need to change colors individually. To apply it to your layer, go to the Filters library at the bottom of the preview window. Use the magnifying glass icon's search feature to display the search box, and type Enhancing. You will find it under the Color category.
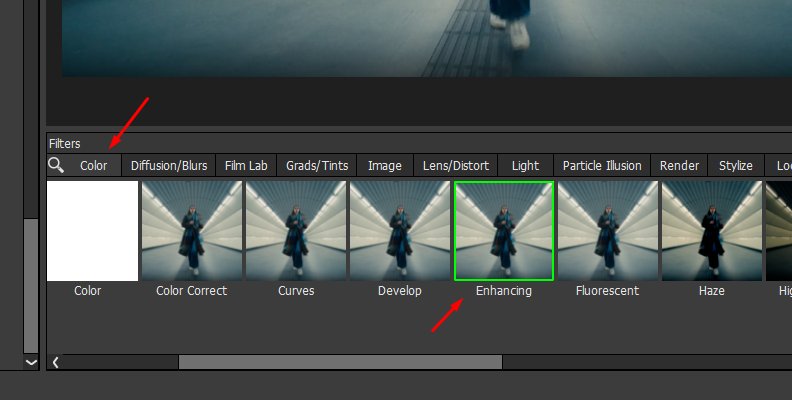
Click on the filter to add it to the current layer.
-
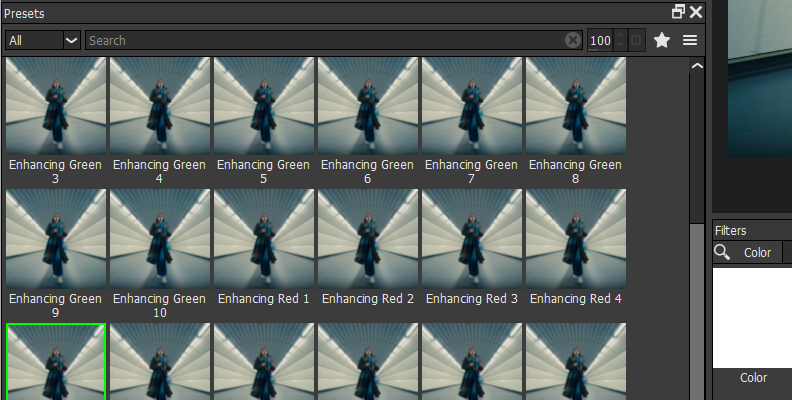
Step 4: Enhancing Settings
Optics includes presets for any filter, which you can find below the layers panel. Feel free to try a few presets to find inspiration. Click on a preset to preview and modify it if you need to tweak it to suit your photo.
The parameters panel is located on the right side of the screen. Enhancing has a single control to set the amount of the filter to apply and a few controls to modify the matte.
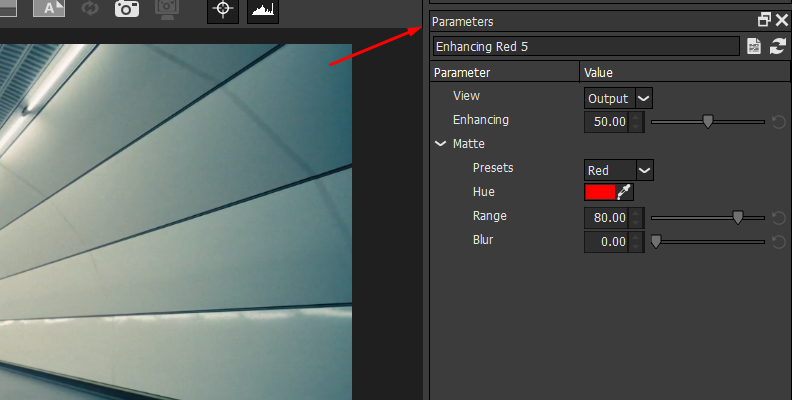
Adjust the Enhancing parameter to set the saturation of the image's red, green, and blue hues.
A matte is generated based on the hue to apply the Enhancing filter on that hue.
Under the Matte settings, you can select a desired Hue preset to choose the Red, Green, or Blue hues or use the eyedropper tool in the Hue parameter to pick a color from the image that will be enhanced.
Modify the generated matte with the Range and Blur controls. Adjust Range to increase or decrease the range of values included in the hue matte and Blur to adjust the softness of the matte.
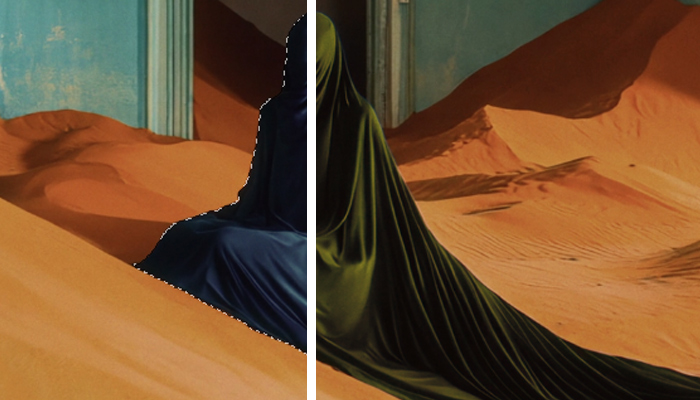
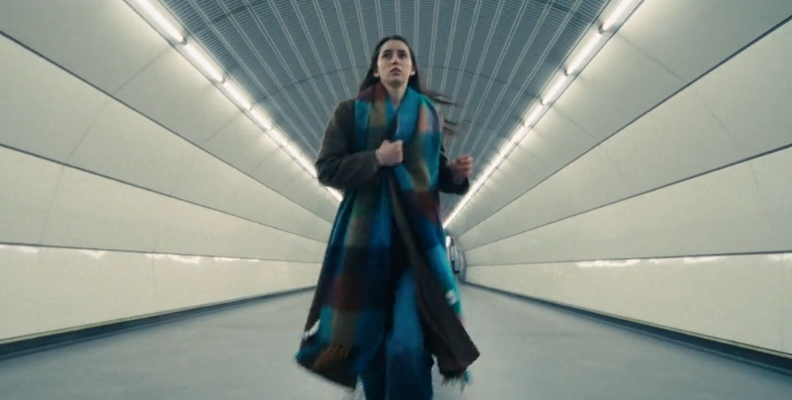
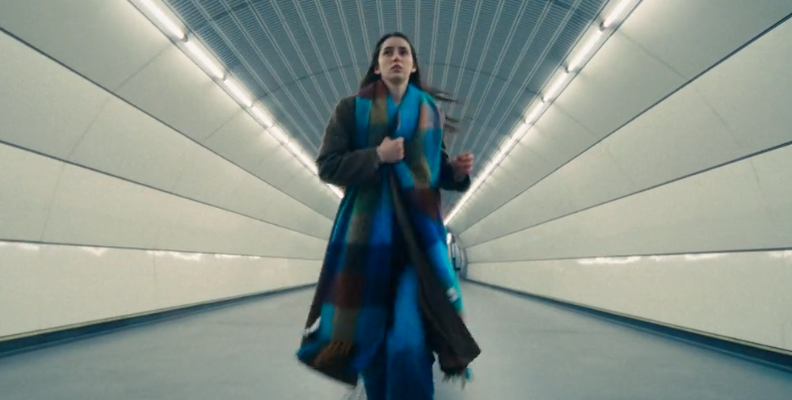
Here is our before and after result of enhancing the blue color in the photo:
-
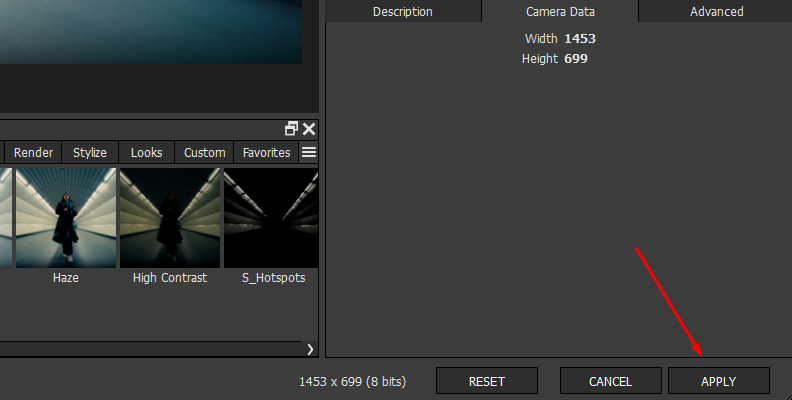
Step 5: Export Final Image
To export the enhanced photo in the standalone app, go to File > Save, choose a file format type, and save the file to your preferred location.
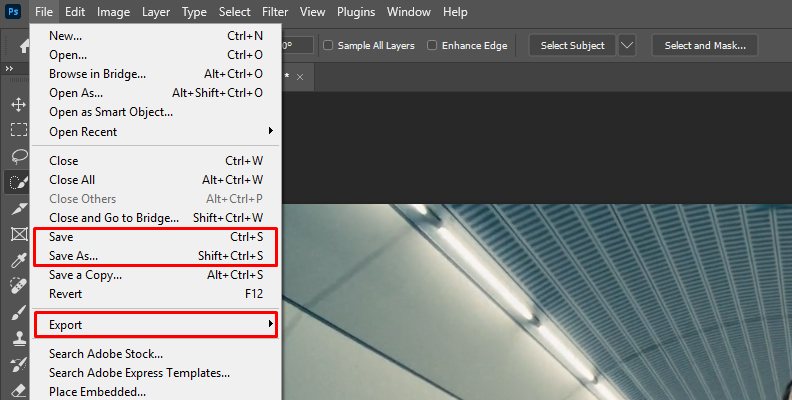
In the plug-in version using Lightroom or Photoshop, click the Apply button when you finish adjusting the Enhancing filter. Once you return to your host, you can render and export the image using Photoshop or Lightroom export workflow.
Best Tools You Can Use to Change the Color of Something in a Picture
Let's review some of the best color changer tools available today. I have included plug-ins, software, and mobile apps so you have several options for every type of photo that you need to enhance or replace color.
-
Tool 1: Optics
Optics features filters to enhance your photos, including beauty filters, film stocks, Sapphire filters, Particle Illusion effects, blurs, flares, color correction, and advanced masking tools. With the AI mask tool (Mask ML), you can quickly select an object to replace colors using Optics' filters to create unique images in just a few clicks.
Pros:
-
Affordable subscription and perpetual license.
-
Multi-host plug-in and a standalone app.
-
Hundreds of filters and presets.
-
AI masking tools.
-
Particle effects.
-
Free trial available.
Cons:
-
Learning curve.
-
Higher CPU requirements.
-
-
Tool 2: Photoshop
Photoshop is a photo editing powerhouse and the industry-standard software for creators and graphic designers. It has many basic and advanced features, including a color replacement tool that makes changing colors easy for beginners.
Pros:
-
Industry-standard software.
-
Many tutorials to learn online.
-
Intuitive user interface.
-
Photo organization.
-
Free trial.
Cons:
-
Only available in subscription.
-
Price.
-
-
Tool 3: Lightroom

Adobe Lightroom is photo editing software for professional photographers and hobbyists. It features easy-to-use tools for clean-ups, retouches, and changing colors in the image. Lightroom's Quick Actions feature provides suggestions tailored to your photo to streamline the editing and color correction while working with multiple images.
Pros:
-
Professional grade software.
-
Organization.
-
RAW files processing.
-
Quick suggestions.
Cons:
-
Price.
-
Learning curve.
-
-
Tool 4: YouCam Perfect

YouCam Perfect is a photo editing iOS and Android mobile app. It features AI tools for removal, enhancement, and color replacement. One of the newest features is the shirt tools to change the color of clothes, tools for pop-up colors, and re-colorization with HSL color adjustments.
Pros:
-
Mobile app.
-
Easy to use.
-
AI-driven masking tools.
Cons:
-
The clothes feature is only available for iOS.
-
-
Tool 5: BeFunky

BeFunky is an online photo editor with basic crop and resize features, a background remover, retouching tools, a replace color tool, and other HSL, temperature, and color adjustments. The replace color tool is very straightforward: select replace color and adjust the mask to apply the effect.
Pros:
User-friendly interface.
-
Easy to use from any computer with a web browser.
-
Free and paid versions are available.
Cons:
Requires to be online to work.
-
Tool 6: Canva

Canva is a publishing and design tool that has basic features for changing the colors of objects and images. You can select an object or shape to alter its color. For images, you can adjust the color by using the temperature slider. However, you cannot target specific elements of a picture to select the target color, as you can with shapes and other design elements.
Pros:
-
Free version.
-
Easy to use.
-
Perfect for graphics and shapes.
-
Does not require a powerful CPU.
Cons:
Requires internet connection.
-
It cannot target the replacement color.
-
No masking tools to isolate objects.
-
Final Words
There are many options to change the color in pictures, but few tools offer the same level of control and customization as our top three apps: Optics, Photoshop, and Lightroom. These professional tools allow you to use AI-driven masking techniques to change colors selectively, enhance vibrant colors through a brush tool, and add special effects to photos.
The most comprehensive tool among these three is Optics, which can be used independently and inside Photoshop and Lightroom, so you don’t have to close your session and edit in a different app. Download Optics and improve your photo editing workflow!
FAQ
Will the Quality of my Photo Drop After Changing the Color of It?
Many online tools and apps export the image in limited lossy files. If you don't want to lose quality, the best option is to work with lossless files such as RAW, PSD, PNG, or TIFF and use professional software such as Photoshop, Lightroom, and Optics.