Infrared photography and videography can create both great fictional and fantasy compositions and outstanding works of art. This field of photography captures what our eyes cannot see, and luckily, there are a few ways to produce infrared images and videos with professional results.
In this tutorial, I'll explore infrared photography and how you can master it, give you a few tips for editing, and guide you through a step-by-step tutorial using the BCC+Infrared filter to create black and white infrared images.
Let’s dive in!
What is Infrared Photography?
Infrared photography is a field of photography that captures images beyond the human visible spectrum using an IR filter, infrared film, or a converted camera to make visible what humans can’t see.
The human visible light spectrum is the range of wavelengths our eyes can see, ranging from 400 to 700 nanometers (with a peak around 500nm) and encompassing the purple to red colors. Infrared photography reveals IR light beyond the human visible spectrum, with unique and even otherworldly details that are simply invisible to us.
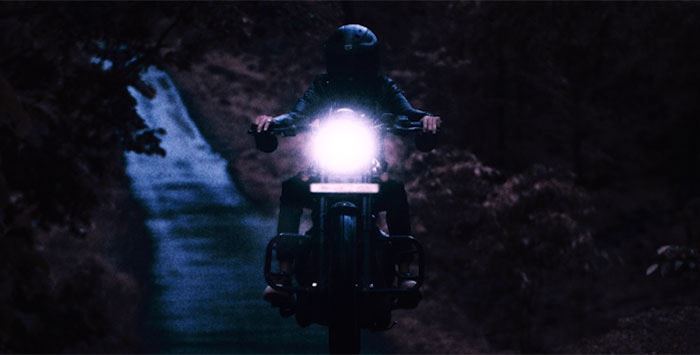
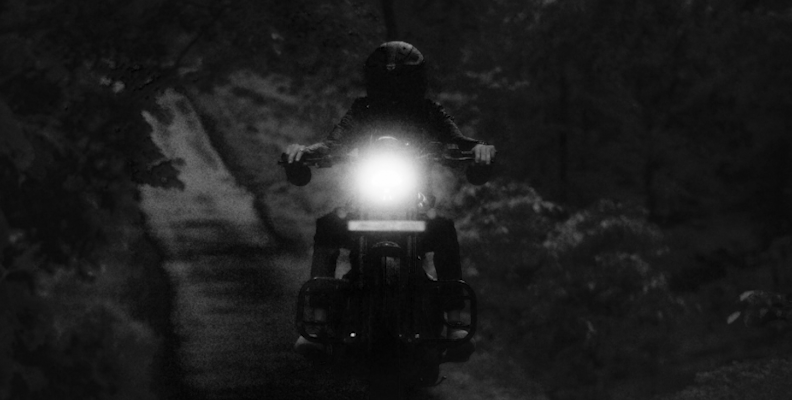
This ethereal look that infrared photography produces attracts many photographers and enthusiasts. It is the unreal look, the artificial colors, the blue sky, and the high contrasts and glow achieved with this technique. With infrared photography, you can either produce color IR images or black and white with high contrasts.
Color IR:
Black and White IR:
How to Shoot Digital Infrared Photography
Unlike normal photography, IR photography is best when the sunlight is strong. However, you'll also need other equipment and post-production software to achieve the characteristic ethereal look of infrared.
Your regular digital camera can't shoot infrared photography, as it has a filter that blocks IR light and captures visible light at full.
If you want to shoot digital infrared photography, you'll need IR films, filters, an infrared conversion for your digital camera, a full spectrum camera, and post-processing software.
Let's review each method to see how it captures invisible infrared light. This will help you decide how to approach the mystical world of infrared photography for the first time.
Infrared filter. This method is one of the easiest ways to get started on infrared photography. They are cheaper than camera conversion and easier to find than infrared film. These filters go into your camera like any other and require no modification, but you'll be limited to a still subject and require a tripod to achieve great infrared photos.
Infrared film. Infrared Films were the first method to capture color infrared images. This method also requires an IR filter and specialized development. Due to the advances in digital cameras, this method is less common today.
Converted camera. This method involves modifying your digital camera, so you might want to try this approach with an older digital camera or one you don’t use as much as your unmodified camera. The modification consists of removing the IR blocking filter that stops the infrared light and replacing it with an infrared filter to make it more sensitive to this spectrum. This makes the camera ready for great IR photos, but that camera will become less sensitive to visible light and thus unable to take normal pictures.
Full spectrum converted camera. If you’ve decided you want to give it a try with a spectrum conversion but still want to use the same camera for normal photography, then your option is a full spectrum conversion. This method replaces the original filter of your camera with a full spectrum filterthat allows all the light spectrum through. You can still use external filters to achieve diverse looks. Think of a full spectrum camera as an all-included package, but I would suggest it only after you’re sure IR photography is for you.
There's one last resource I want to recommend if you want to try infrared photography. A few cameras allow a portion of the invisible spectrum through the filter and can capture limited infrared light. To verify if your camera can shoot infrared photos, you'll need a TV remote control and a dark room for this test.
Point the remote control at the camera and start shooting. If you can capture a light when pressing the buttons in the remote control, then your camera is suited to capture infrared light. It might not be as great as a converted camera or external infrared filters, but it can be a start if you can edit with post-processing effects and filters in your photo editor.
History of Infrared Photography
Robert W. Wood was the first to discover the effect that infrared light produces in photography. His works were first published in the 1910s, and the effect was named after him as the Wood effect.
During World War I, the army used infrared photography for aerial photography. It was not until the 1930s that Kodak and other manufacturers made infrared films commercially available, and common people started to use them. By the 1960s, false-color infrared was introduced and became a sensation when many musicians used it for their album covers.
Today, full-spectrum photography has countless other applications. NASA has used infrared images since 1972 to study changes in the atmosphere, cities, and forests. They’re also used in forensics, medicine, agriculture, and other practical applications.
Ways to Edit Infrared Images
Infrared photos are aesthetically beautiful, haunting, and dramatic, creating a surreal feel. Today, using filters and effects to achieve those looks is the best way to make your RAW files shot with a normal or full spectrum camera, IR filters, or IR films stand out.
Here are a few techniques and tricks to work with your RAW files in post-production software.
False color. You can achieve the psychedelic false-color effect by swapping the red and blue channels using the channel mixer in Photoshop.
You can work with monochrome RAW files in applications like Photoshop or Lightroom and edit contrast, white balance, brightness, and saturation.
Third-party plug-ins can help you improve your infrared photos and add IR filters to your non-IR pictures.
Create an Infrared Filter Effect with BCC+ Infrared
The BCC+ Infrared filter is a Continuum effect that simulates using a combination of IR filters and IR films to create eye-catching black-and-white images. It adds glow in the highlights and allows you to customize the filter, light, and matte to fit your needs and artistic ideas.
Continuum also includes BCC+ Color Infrared for creating full color IR images as well, but this post, we'll be focusing on BCC+ Infrared.
Step 1: Install Continuum
First, install Continuum on your supported host to follow this tutorial. Continuum is available for Adobe Premiere Pro, DaVinci Resolve, Avid Media Composer, and more. Download the Boris FX HUB and select your host application, then install Continuum. You can follow this tutorial with the free trial if you don't have a license.
NOTE: For this specific example we'll be using Adobe Premiere Pro. Keep in mind that the process is very similar with other programs but the exact steps may vary a bit due to the differences in the software user interface.
Step 2: Apply The Filter
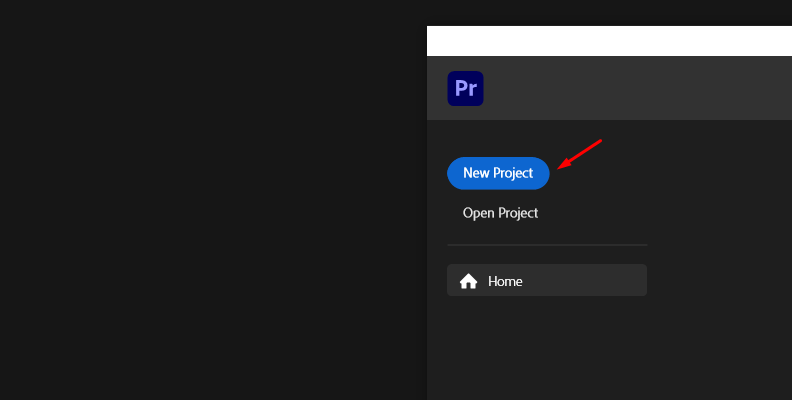
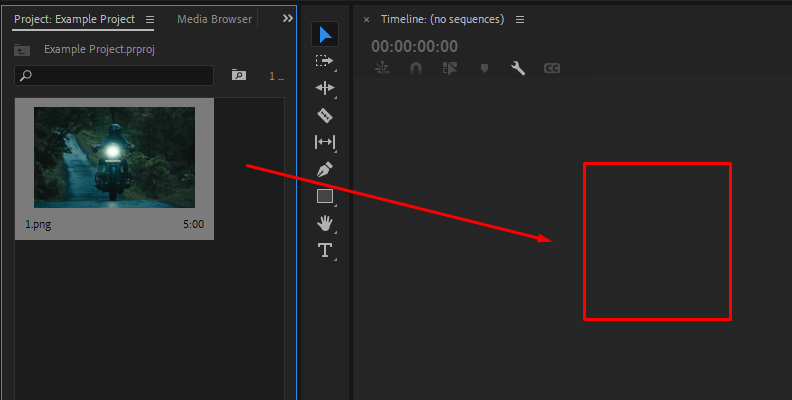
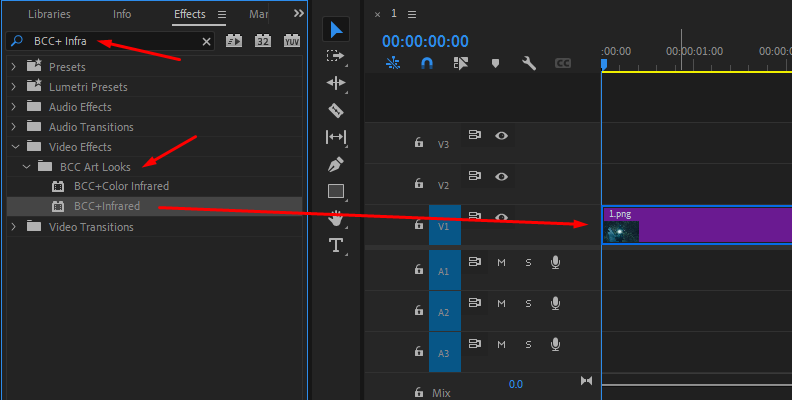
Import the files from your digital camera to a new project. Go to the Effects library and search for BCC+Infrared under the BCC Art Looks category. Click and drag the effect to your photo.
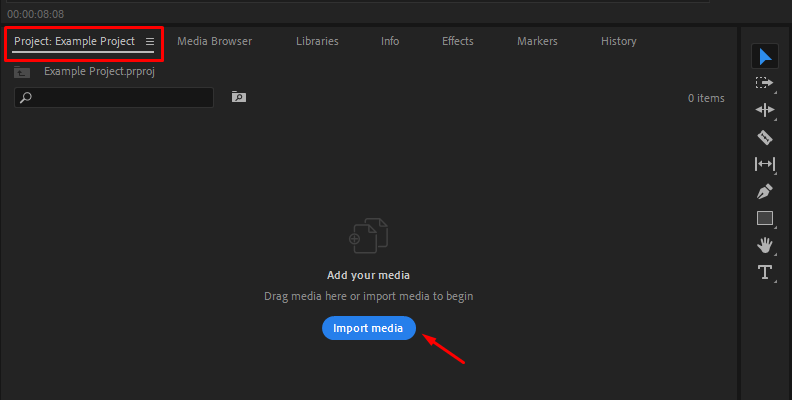
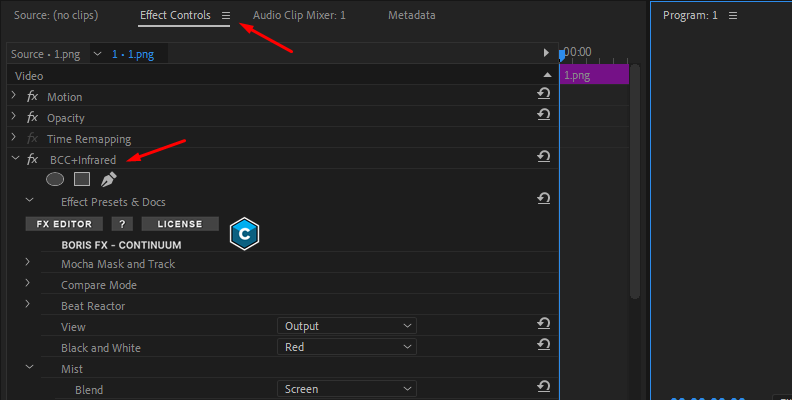
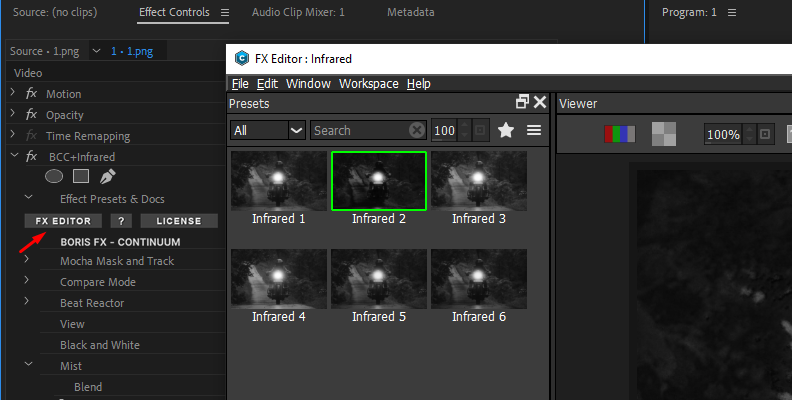
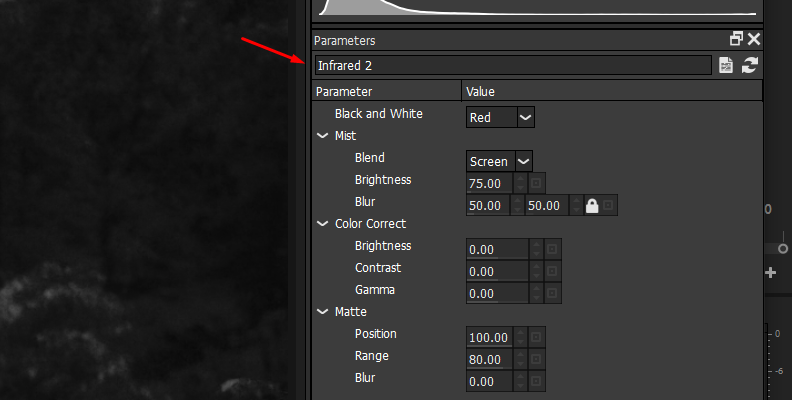
All Continuum filters come with pre-installed presets. You can modify the default camera settings for unique B&W images or check the BCC+Infrared presets. To see the available presets, click the FX Editor button in the effects settings.
Step 3: Navigating the Presets Library
In the FX Editor window, you can select a preset from the left panel, preview it on the viewer, and change its settings on the Parameters panel on the right side of the screen. You can adjust the IR filter from this window or within your host application effect settings. To close the preset library, click Apply to select a preset or Cancel to return without changes.
Step 4: BCC+Infrared Settings
The BCC+ Infrared filter has a few settings to create outstanding black and white infrared photos.
Click on the black and white dropdown menu to select the filter to apply to the image. The Normal filter will convert the photo to monochrome, while the rest will simulate the color filter in black and white photography.
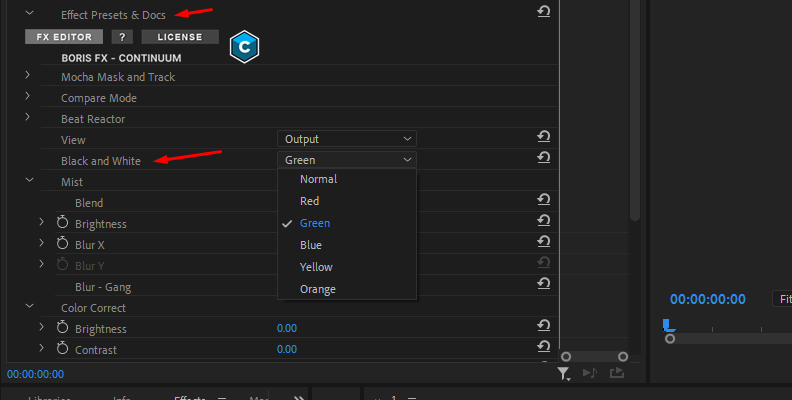
Under the Mist parameter, you can adjust the glow across your photo. Adjust the Brightness and Blur to shape this glow's intensity, style, and softness. Use the blend menu to change between Add and Screen modes for the glow.
The Color Correction parameter allows you to modify the original image's brightness, contrast, and gamma before processing the black and white filter and Mist parameters. Use these settings to generate different styles for your black and white IR image.
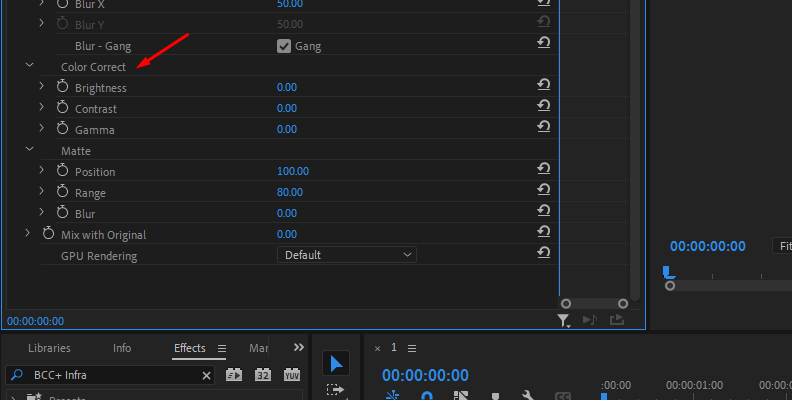
The IR filter generates a matte to create the infrared effect in the image. You can modify and customize the matte. When adjusting the Matte settings, change the View to Matte to see the changes in the matte values. The white area in the matte is where BCC+Infrared will add mist.
Use the Position, Range, and Blur parameters to customize the matte and the location of the mist and glow in your photo. Increasing the position selects different values for the matte. The Range parameter adds or reduces the matte's values, and Blur smooths the transition between the white and black parts of the generated matte.
Remember to change the View to Output to see the post-processed image.
Step 5: Working with Mocha
Do you want to get even more creative with your compositions? Try using Mocha to create custom masks and even track objects in videos to restrict the infrared filter to those masks.
Within the Mocha Mask and Track parameters, you can launch the integrated Mocha planar tracker (a feature in all Continuum filters). Once in the Mocha UI, you can draw shapes and track, and all saves will be exported to your host. Then, you can adjust the Mocha mask in the Pixel Chooser settings.
Adding the filter partially and blurring the edges to create unique looks or inverting the mask to leave areas with natural colors and the rest of black and white are a few examples of how you can use Mocha with this filter in your images. Additionally, if you use the effect on a video, you can track a subject with Mocha and apply the filter only on the tracked subject.
Final Words
Whether you use the original method with IR films, perform a camera conversion, use infrared filters, or use plug-ins like Continuum, your adventure in infrared photography has just begun!
Get started now with a free trial of Continuum and BCC+Infrared to create your first infrared images.
Good luck!


