Matte creation can be a very tiresome and time-consuming process. It requires a lot of practice to get good at roto and to achieve quality mattes for your compositions. The task can also feel daunting when you have your matte and need to animate it for a longer video.
In Silhouette, you have many tools for painting and rotoscoping, as well as a new tool that makes your matte creation process much faster. Matte Assist ML is a node featured in Silhouette 2024 that automatically generates a matte over time based on a frame's single or multiple roto shapes: it employs machine learning technology for object segmentation and propagation.
Matte Assist ML is perfect for creating garbage mattes and fast composites. Even though it uses machine learning technology, you don't need to worry about the security of your videos because nothing is uploaded to the cloud; all the processing is done inside your system.
Before jumping to the step-by-step tutorial, let me briefly tell you about Silhouette.
Why use Silhouette? Silhouette is speedy and reliable rotoscoping and paint software with powerful tracking options. It uses a node-based compositing system that is easy for keying, warping, and rotoscoping techniques. Silhouette features other Boris FX tools from Sapphire, Mocha, Particle Illusion, and Continuum to expand your compositing toolkit. You can use Silhouette as a plug-in in your preferred host or as a standalone application.
Use Matte Assist ML after other Silhouette nodes like Roto, Paint, EZ Mask, or Mask NL to generate the matte from a primary matte. You can combine traditional roto and procedural techniques you already know to improve your work.
Now that you know all you can do, let’s dive into the tutorial.
Create and Animate Mattes: Matte Assist ML
For this tutorial, you'll need a Silhouette 2024 subscription, a license, or a Boris FX Full Suite subscription. You can follow this guide with a free trial if you want to try it before buying, but you'll have a watermark in your render.
Step 1: Download and Install Silhouette

Go to the Silhouette page and click the Free Trial button to download the installer.

Install the Boris FX Hub, where you can manage all the plug-ins in your Boris FX licenses and subscriptions. Select Silhouette from the list and choose your host or the standalone application. Wait for the Hub to download and install Silhouette.
Step 2: Create a New Project Composition
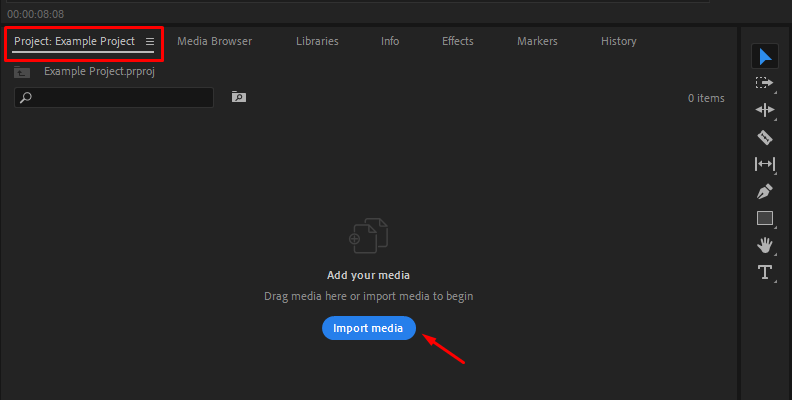
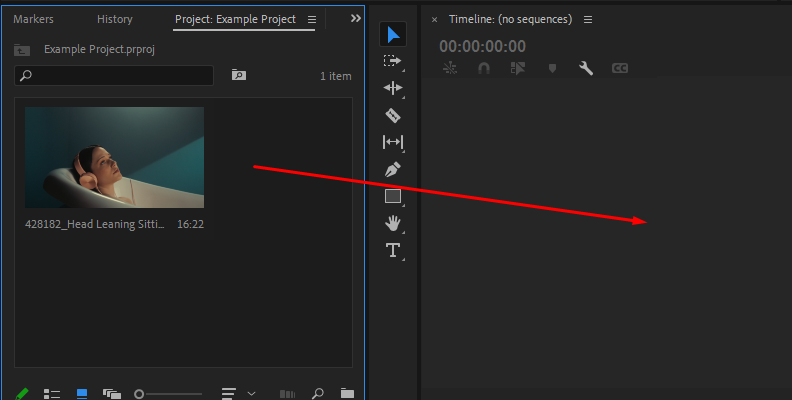
Open your preferred host and either open an existing project or start a new one. Import the video files and drag them onto the timeline to create a new composition.

If you use the Silhouette standalone application, open the application and import the media files by double-clicking in the Source area at the bottom left corner. Drag the video from the Source panel into the Trees panel at the top right corner to create a new session. A New Session window will display, where you can name the session, choose a template and workspace, and adjust the size and duration of your composition.
If it’s not added automatically, add an Output node at the end of the tree.
Step 3: Apply the Silhouette Plug-in
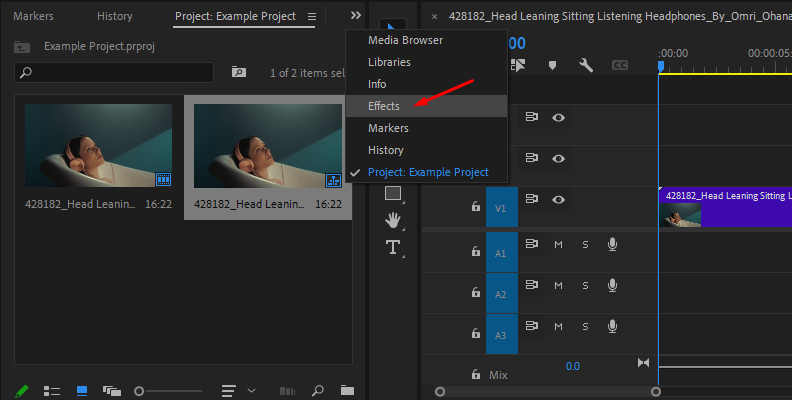
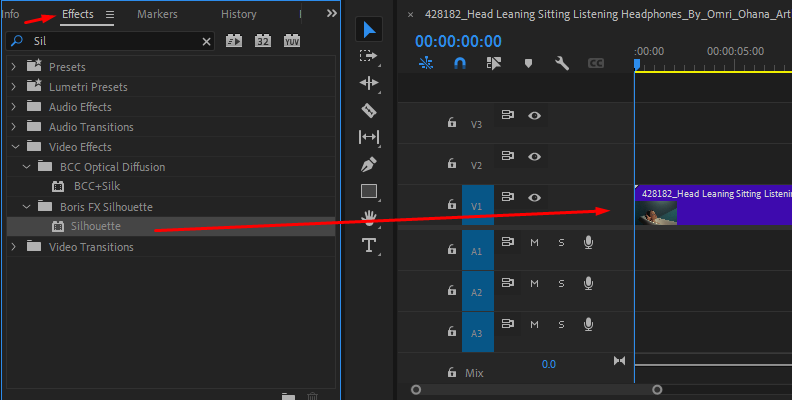
After setting up your project in your host, open your effects library and search for the Silhouette plug-in. Drag and drop it into the video clip where you want to create mattes.
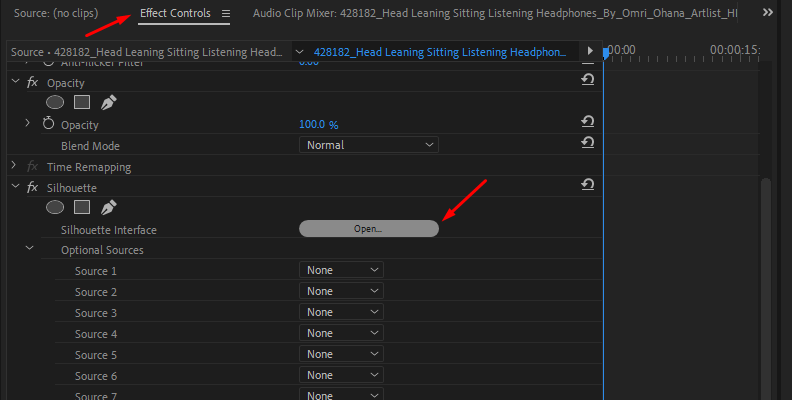
In the effects settings, click "Open Silhouette Interface." When Silhouette UI launches, select the type of work, Working Depth, and click Create Project. For this tutorial, leave the default settings to begin with a Roto node. Once in the session, you can change it.
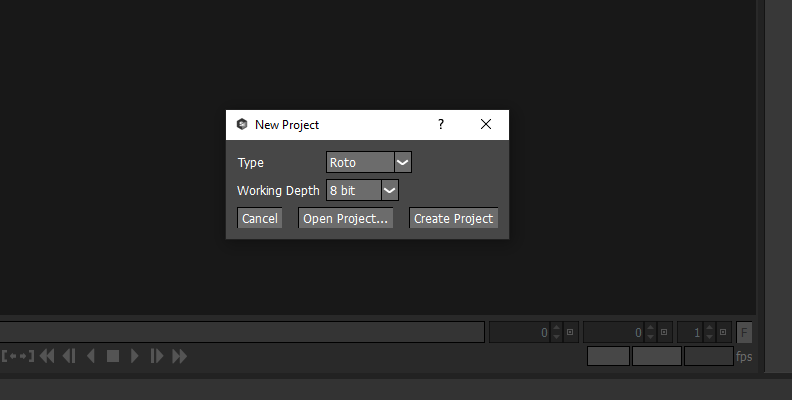
Your video will be imported into Silhouette with the node you selected in Type. To add a different node, search for it in the node panel at the bottom and drag it to the Trees panel. You can also click the Trees panel and press Tab to display a search box. Type the node you want and press enter.
Arrange the nodes by dragging them in the right order and connecting them. To delete nodes, select one and press Delete.
Step 4: Create a Roto Shape or Mask
Matte Assist ML can work with data from a Roto shape or a mask, such as an EZ Mask.
With Roto Shape Data
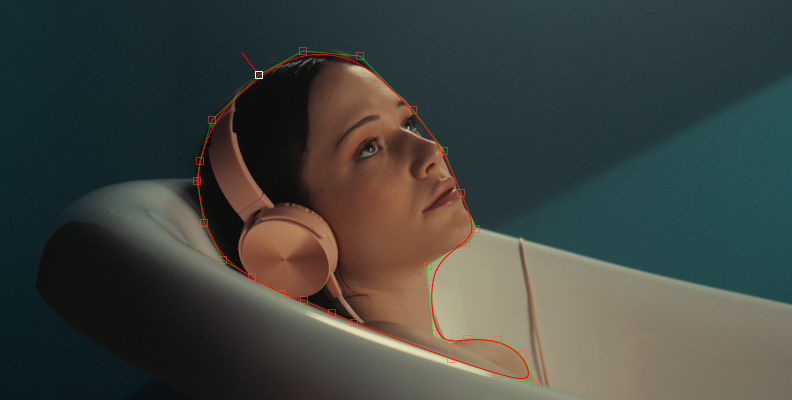
Begin by creating a shape around an object. If it's a complex form, such as a human body, use multiple shapes to cover the entire person. When using various shapes, create layers to organize your roto shapes. You only need one keyframe of the roto shape, and it can begin at any point in the video.
With EZ Mask Data
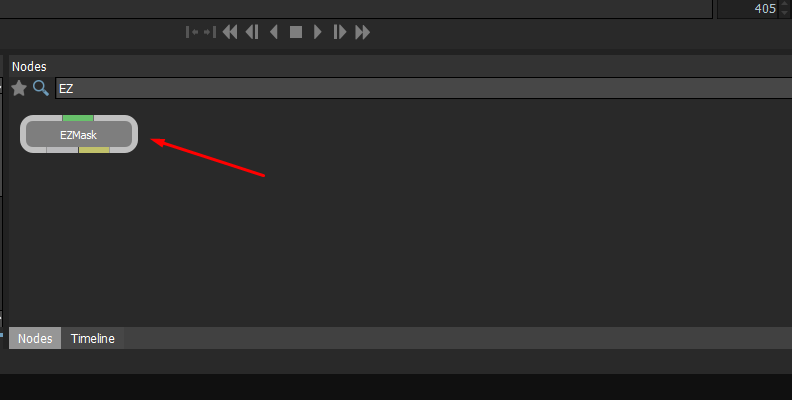
To use a mask, search for EZ Mask in the nodes panel and drag it to the Trees, connecting it between the source and output nodes.
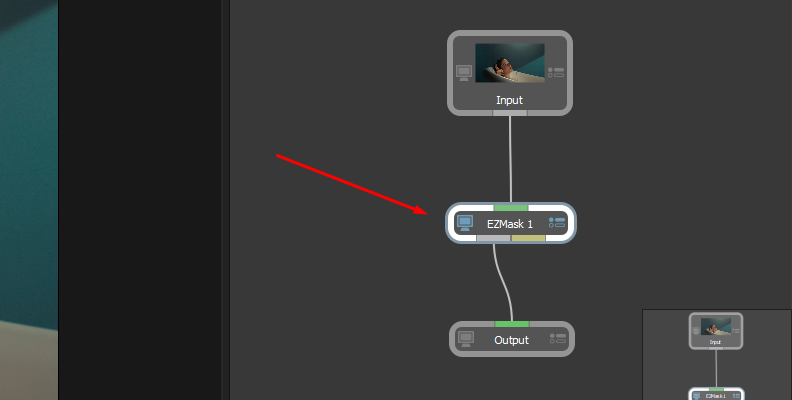
Start by delineating the foreground and background areas using the brushes to generate the matte. You can refine the matte by adjusting the size of the brushes to define smaller sections in the image.
You can use other Silhouette tools to generate the roto or mask data.
Step 5: Add the Matte Assist ML Node
Search for the Matte Assist ML node in the Nodes panel and drag it between the Roto or Mask node and the Output node, or use Tab to open the search box in the Trees panel.

Connect the Output and Data of the previous node to the Input and Data in the Matte Assist ML node.

This step is important to ensure the roto or mask node data is sent to the Matte Assist ML node.
Step 6: Configure Matte Assist ML
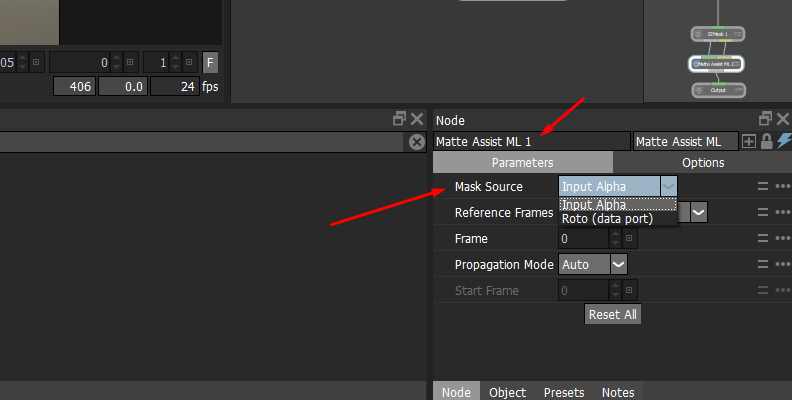
In the Matte Assist ML node, set the Mask Source to Roto when using a roto node with multiple shapes and layers and to Input Alpha when using a Mask node with a single object.
Next, play the sequence to let Matte Assist ML generate the matte. Depending on the duration of the video, the process can take several minutes to complete.
Adjust the Matte Propagation parameter to Auto to start the matte at the first keyframe, or use Custom to set the propagation starting frame.
If you're not getting an accurate matte, add more shapes and keyframes to help Matte Assist ML achieve better results. You can also refine the matte using other nodes like Trimap and Power Matte.
Remember that the entire process is done on your system, so you don’t need to worry about your footage’s security or uploading it online.
Step 7: Save and Render
Go to File > Save Project to save your changes and exit the Silhouette interface when using the plug-in version. Continue editing, and you can render your project with your host when you finish.

In the Silhouette standalone application, click the output node and select your export parameters. In File, enter the path and name for your render. Then, choose the channels you wish to render and click the render button at the bottom.
Final Words
Matte Assist ML is a powerful tool that can save you time when creating garbage mattes. It's not designed to replace traditional roto techniques but to accelerate work and create animated mattes with little user input.
Using Matte Assist ML as an extra tool in Silhouette with other procedural keyers or roto nodes can improve your workflows and create accurate mattes for your compositing projects.
Get Silhouette now bundled in the Boris FX Suite subscription as a single subscription or perpetual license and take a step forward in your matte generation workflow.
Good luck!


