Smoke can bring mystery, magic, and horror to a scene. Capturing fog and smoke can be challenging, and many VFX artists prefer to add it in post-production to blend with the footage. In post-production, you can control the density of smoke, its source, movement, and restriction to a specific area of the image.
In this tutorial, you'll learn step-by-step how to create a smoke effect, smoke fills, and fog in After Effects.
Let’s dive in!
Create Realistic Smoke VFX in After Effects

Create a smoke effect to enhance your videos with smoke visual effects. You don’t need to download anything extra for this part of the tutorial. You’ll only use After Effects native effects and tools. Later in this post, there will be another easier option.
-
Step 1: Start a New Project
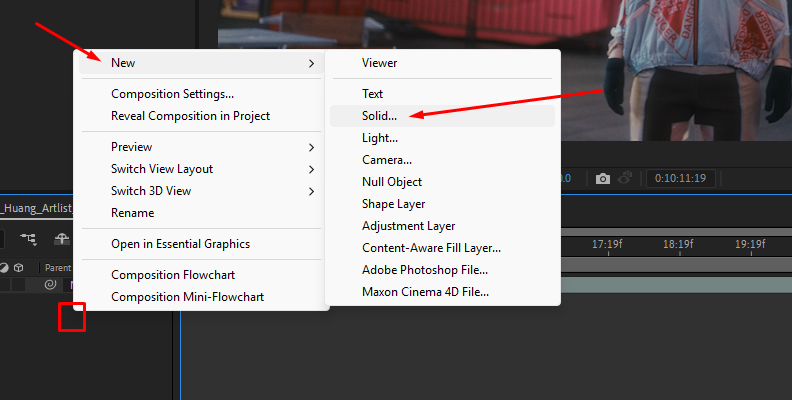
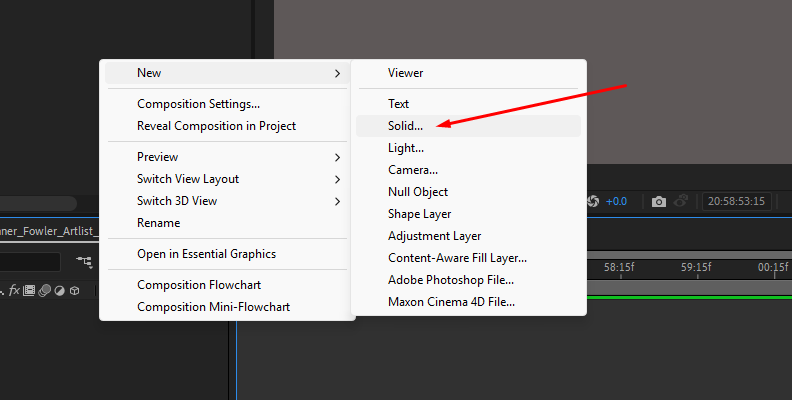
Create a new composition, then add a new black solid layer the same size as the composition.
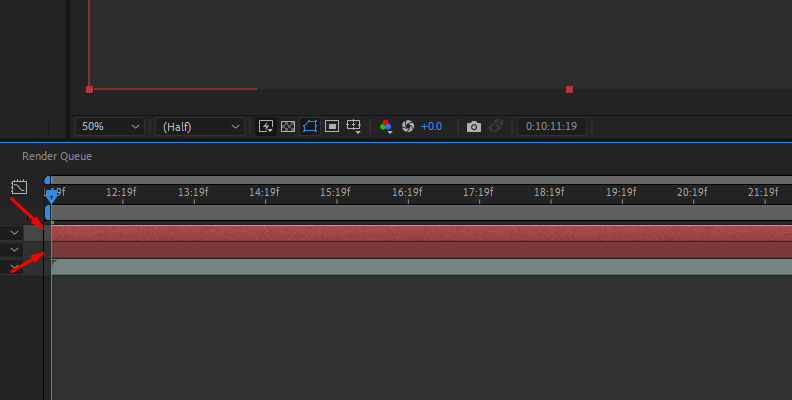
Select the solid layer and press CTRL+D or Command+D to duplicate the layer. You can rename the duplicate layer to differentiate it from the original.
-
Step 2: Add Fractal Noise Effect
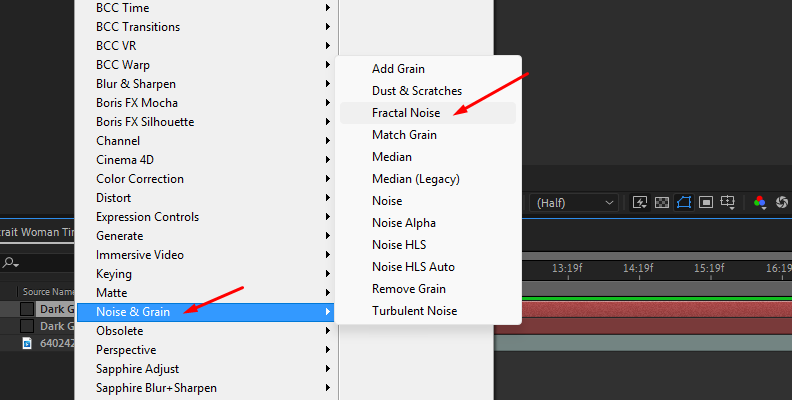
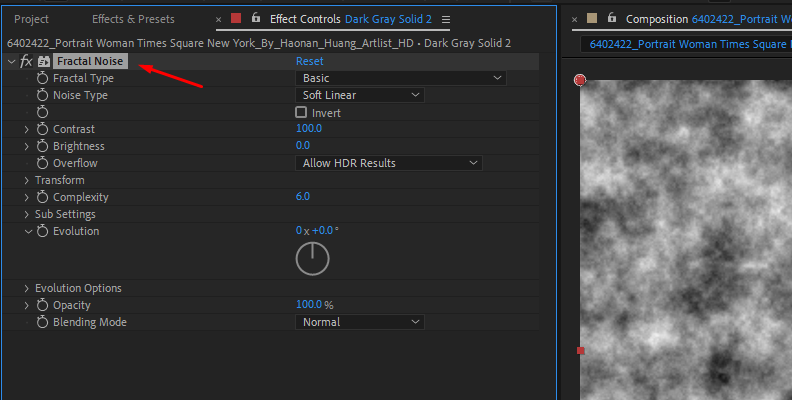
Select the duplicate layer to add the Fractal Noise effect. You can search for it in Effects and Presets in the Noise & Grain category. Drag it to the duplicate layer and go to the effect controls to configure its settings.
-
Step 3: Fractal Noise Settings
The fractal noise effect can be customized to create different textures like clouds, fog, and smoke. The more you spend and tweak the fractal noise effect, the more control you can have over every detail, but it also requires more skills and knowledge. I'll guide you through the process and show you what to do in some advanced settings.
You can start by selecting the Fractal and Noise Type from the beginning or change them as you go through the effect and adjust the rest of the settings.
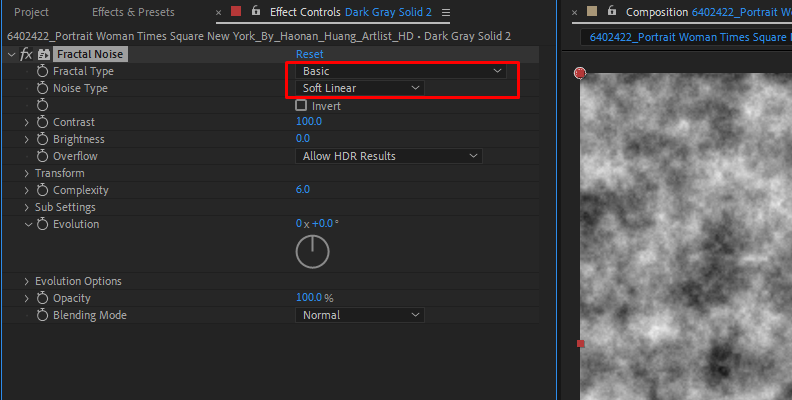
Adjust the contrast to set the intensity of the smoke, and experiment with contrasts and brightness values to create either a light gray smoke or a heavier tone. You can come back later and change these attributes.
Display the Transform settings to scale the smoke. Uncheck the Uniform Scaling box to adjust width and height independently to make it longer or smaller. It will stretch the image to craft different textures.
Next, adjust the Complexity setting to add or reduce detail in the smoke. Select a value you like to create a realistic smoke effect. You can also reduce the Opacity to make the smoke effect transparent.
-
Step 4: Animate Smoke
Now comes a step that may be difficult if you’ve never used expressions, but it's also easy to remember.
To animate the smoke effect, go to the Evolution setting. If you manually change the values, you'll see the smoke move. To make it a constant animation, press ALT and click the stopwatch next to Evolution.
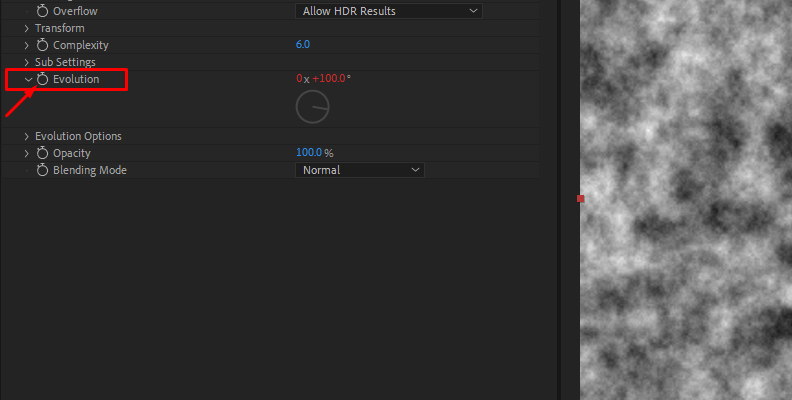
In the command line next to the layer panel, type "Time*value," where "value" can be any number you want. You can start at 100 (Time*100) and adjust from there. Increasing the value increases the animation speed. Experiment with different numbers for a dynamic smoke effect.
Other parameters you can animate with are the Turbulent Displace and Offset Turbulence. Alt-Click the Offset Turbulence stopwatch and type "[time*100, time*100]". You can change the value for another number to change its direction. The first number determines the horizontal movement, and the second determines the vertical movement.
You can use negative values for left and up movement and positive values for right and down movement. For example, if you want the smoke to move only up, you'll set [time*0, time*-100].
-
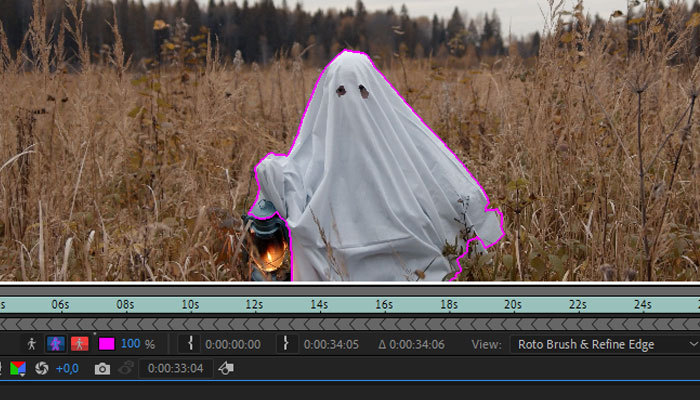
Step 5: Mask the Layer
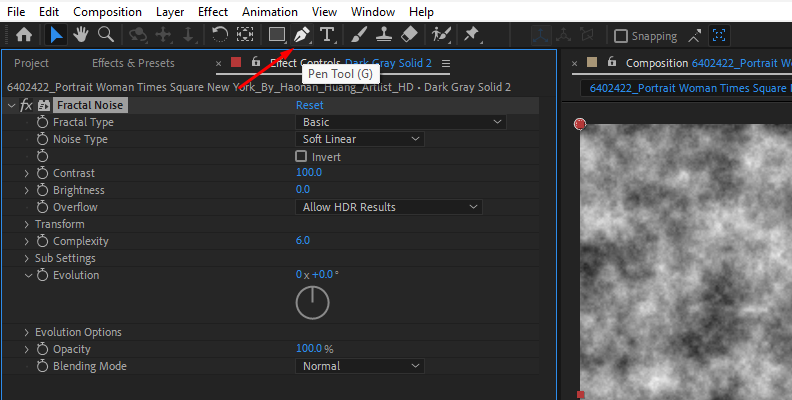
Select the pen tool to draw a shape and create a mask on the smoke layer to limit the smoke effect on the image. Then, select the layer and press F to display the Mask Feather option. Increase the mask feather to blur and fade the edges of the shape.
Drag the footage to which you want to add the smoke effect and place it under the smoke layer. You can add blur and tint effects to blend the smoke with the image and play with the blending modes until the smoke effect is mixed into your footage video.
Create Realistic Smoke VFX in After Effects with Continuum's Particle Illusion

With Continuum, you'll have all the tools you need to create quick and professional smoke VFX. It's great because it's easy and intuitive for beginners while offering advanced users the ability to customize their filters to create complex and unique visual effects in their videos.
In the next part of this tutorial, you’ll learn how to create a realistic smoke effect in After Effects using the powerful Particle Illusion filter included in Continuum.
-
Step 1: Add Particle Illusion
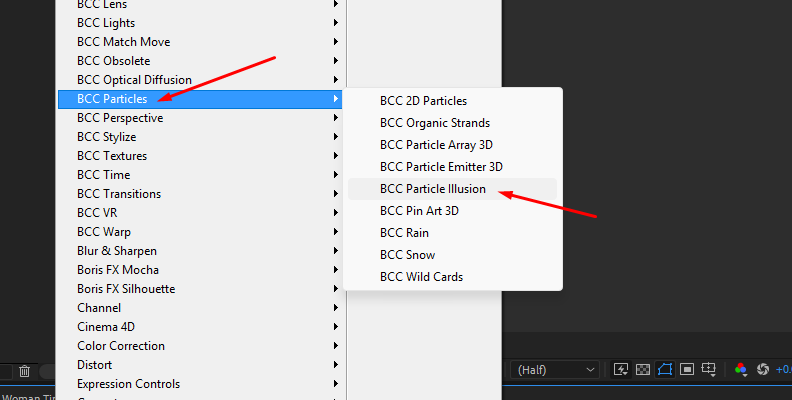
Create a new composition and a solid layer called Particles. Search for the BCC Particle Illusion effect in the Effects browser or from the Effects menu, then click BCC Particles> BCC Particle Illusion.
There are two ways to continue: creating the smoke effect from scratch or using a smoke preset.
-
Step 2: Launch Particle Illusion
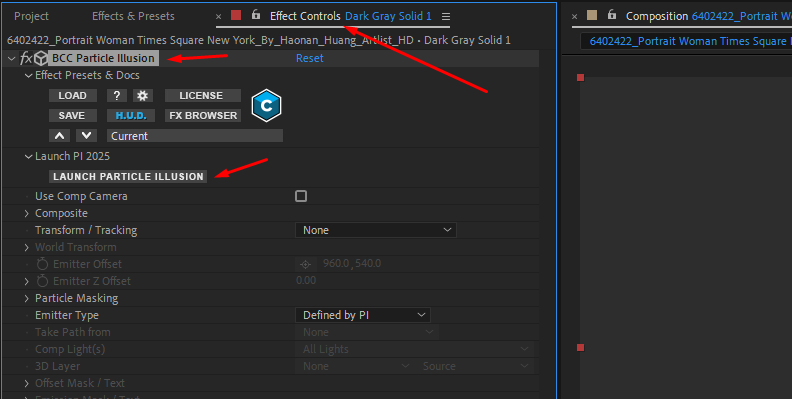
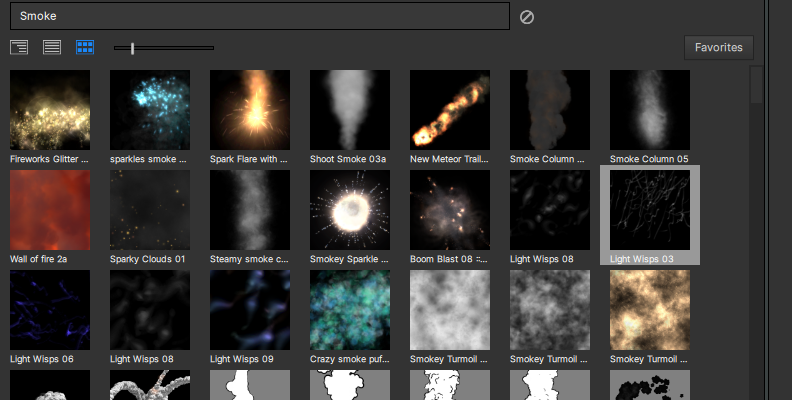
In the Effect Controls, click "Launch Particle Illusion." The preset panel is located on the left side of the Particle Illusion UI. From there, you can search for the keyword "smoke" to filter all the smoke effect presets. Click on a preset to preview it in the emitter preview.
Once you find a preset of smoke effect you like, double-click it. The parameters will be in the Controls view, and you can preview all the changes you make in the composite view.
-
Step 3: Emitter Settings
In the appearance settings, change the emitter's size, zoom, opacity, and color to add depth and create a colored or white smoke. The transform settings allow you to adjust rotation, width, and height.
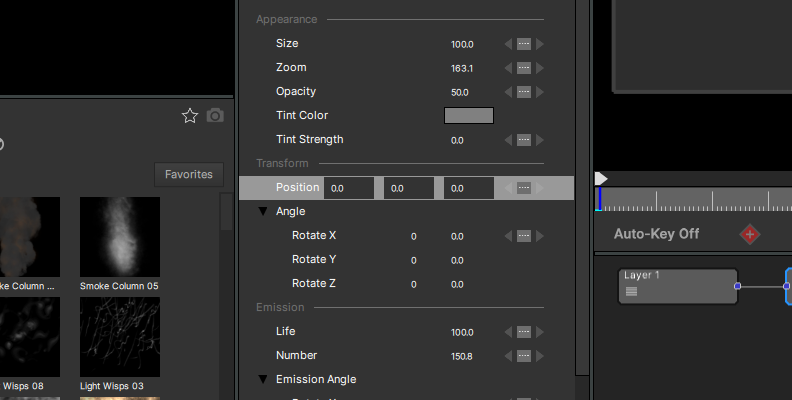
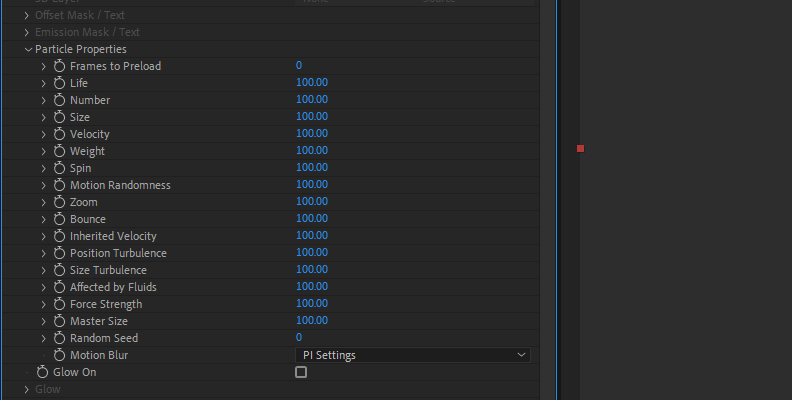
Under the Emission settings, the life setting determines how long the smoke particles remain active after emission, and adjusting the number of particles allows for the creation of denser smoke.
If you select a preset, these usually consist of super emitters made of multiple combined emitters. You can choose each emitter in the node view to change each setting.
Here are our before and after results with just a simple application of a smoke particle preset and a slight modification in opacity and tint:

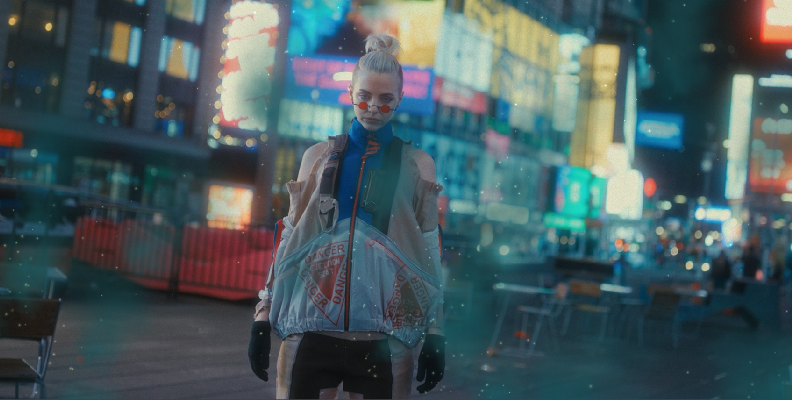
Particle Illusion lets you quickly choose and modify a preset to fit your footage. If you are an experienced user, you can explore other settings to create advanced smoke effects for your footage.
Click Apply when you’re done to return to After Effects and render the smoke effect in your footage.
Final Words
Particle Illusion is a versatile tool for beginners, professional video editors, and VFX artists. You can easily add smoke, fog, rain, sparks, and other particle effects to your videos with just a few clicks, or take the time to learn and familiarize yourself with the plug-in to create realistic and customized smoke effects for specific projects.
Start learning particle illusion today by downloading a Continuum free trial!
Good luck!