Looping videos has become a common need and a must-have skill due to short-form video content platforms like TikTok, Instagram Reels, and YouTube Shorts. Instead of having a video that cuts at the end and repeats, you can create a seamless loop that will make your video look like it never ends.
In today's tutorial, you'll learn how to loop a video in DaVinci Resolve. We'll examine a few methods and provide tips for achieving the best seamless video loop for your video content and animated GIFs.
Let’s dive in!
Loop a Video in DaVinci Resolve
-
Step 1: Import Your Video Clips
Create your loop video project in DaVinci Resolve and import the clip or multiple clips you need for your loop. Drag the clips from the media pool to the timeline and go to the Edit page to edit your video to form the sequence.
-
Step 2: Creating a Simple Loop
One of the easiest ways to create a loop is by using the Mark In and Mark Out feature. This is helpful when you want to see how the video will appear in a loop or when editing a larger sequence and want to adjust a specific clip or section of the sequence while it's repeating to see the changes.
To add Mark In and Mark Out points, go to the sequence section you want to loop and move the playhead to where you want the loop to begin. Press the I key on your keyboard or right-click the playhead and select Mark In. You'll see a grey point appear in the select point.
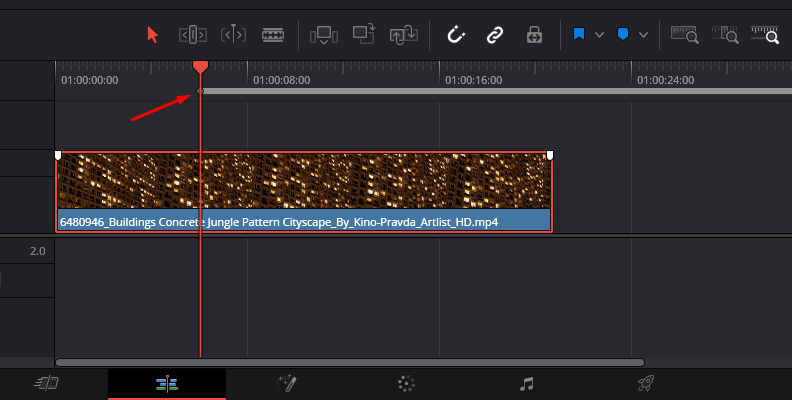
Now, move the playhead to where you want the loop playback to end, press the O key, or right-click the playhead and select Mark Out. A grey point will appear at the selected point, just like before.
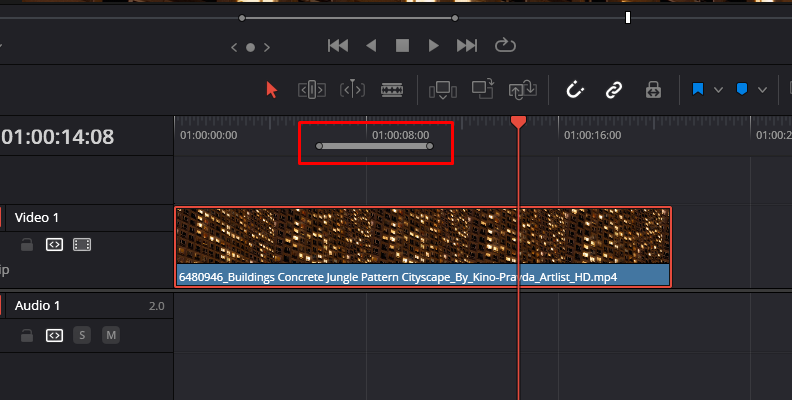
I prefer using keyboard shortcuts to avoid moving the playhead when right-clicking and losing its original position. To enable the basic loop playback, click the loop icon (circular arrow) below the preview window and press play.
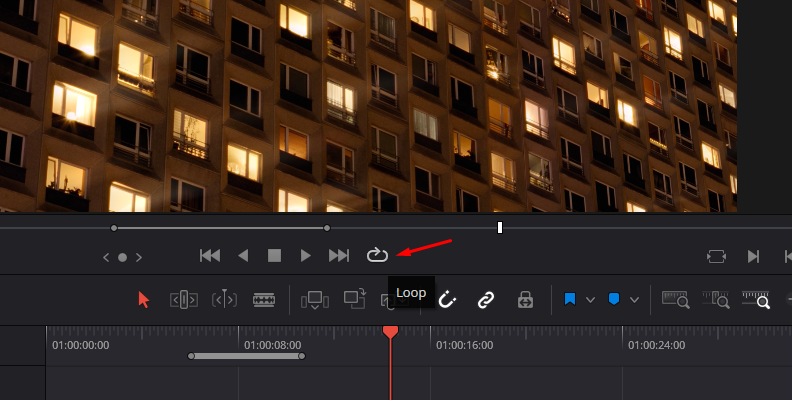
Your video should start and end on your Mark In/Out points.
You can remove the Mark In and Mark Out points with Alt/Option + X.
-
Step 3: Tips to Create Seamless Video Loops
When creating short-form video content, the secret is to create a successful seamless loop. Here are some tips for achieving a seamless loop video and attracting your audience's attention.
- Move the first clip in the sequence to the end. Cut it in half and move the second half back to the beginning of your sequence. This will match the beginning and ending frames to create a more seamless loop.
- Shoot with a video loop in mind. When filming, capture a static frame at both the beginning and end of the video.
- Blend the beginning and end of the video. Cut part of the first clip or the start of the sequence and position it at the end of the video track above. Add a manual fade transition to the top clip to blend seamlessly with the clip below. Play the sequence and make any additional adjustments as needed.
- Add a title or graphic animation and place it at the beginning and end of the clip to start and finish the loop with the animation.
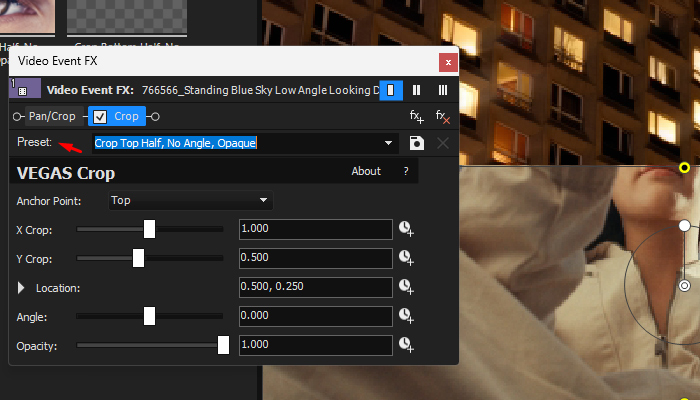
Loop a Video in DaVinci Resolve with BCC Looper
BCC Looper is one of the many plug-ins available with a Continuum license. It allows you to create a loop video in just a few clicks and customize it by adjusting its duration, selecting the starting frame, offsetting the loops, and adding fades and dissolves between the clips to make eye-catching videos.
To make the most of Continuum and this tutorial, update to the latest version. If you’re not a Continuum user, download a free trial to follow this step-by-step guide.
-
Step 1: Set Up a Loop Project
Import the video you want to loop into DaVinci Resolve and drag the clip to the timeline. Go to the Edit page and make the necessary edits before applying the BCC Looper effect.
-
Step 2: Apply BCC Looper
Open the Effects library, go to the Open FX section, and search for BCC Looper in the BCC Time category.
Drag the BCC Loop filter to the clip in the timeline. Click the Inspector at the top right corner to select the Effects tab to see the filter's settings.
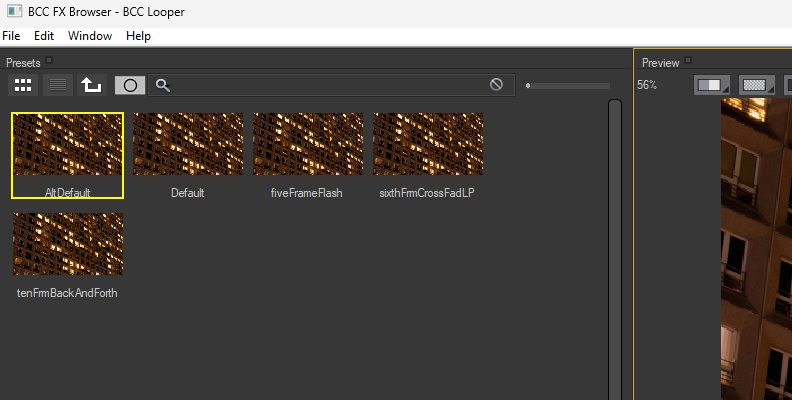
There are a few presets you can quickly apply from the FX Browser. You can preview and choose one for an easy video loop or create your loop manually.
-
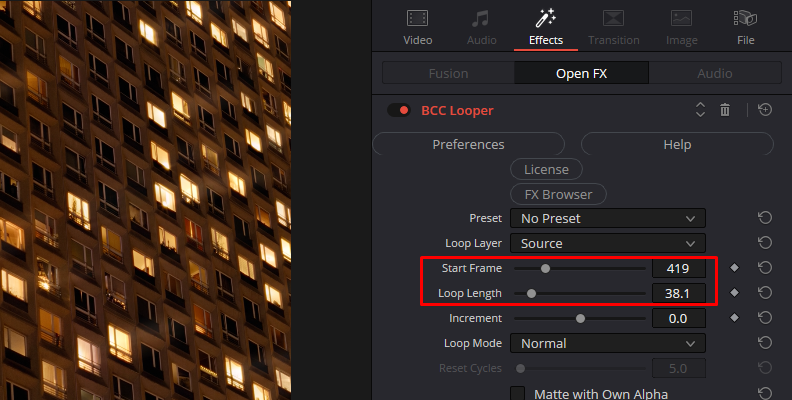
Step 3: BCC Looper Parameters
The best way to learn how to use a filter is to dive into it and experiment with its settings to see what they do. BCC Looper is pretty straightforward, and you'll know what you're doing once you get your hands on it.
Start by setting the starting frame for the loop with the Start Frame slider. Adjust the duration of the length with the Loop Length slider. The values refer to how many frames the video loop will last. You can offset the start frame to have a variable loop effect. The number determines how many frames the loop will vary for the next cycles of the loop.
-
Step 4: Loop Modes
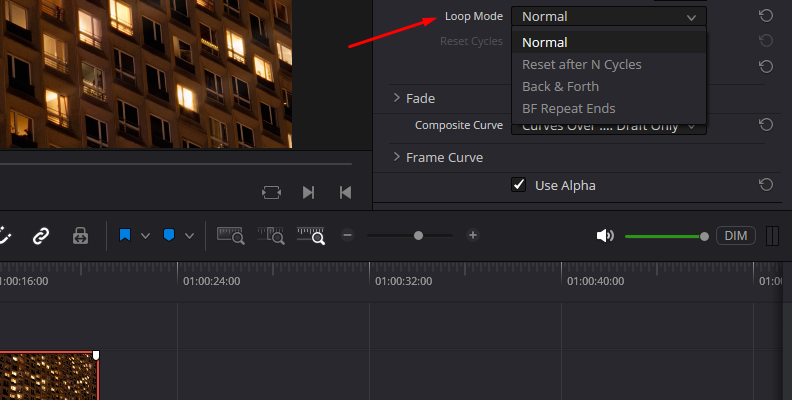
Finally, select a Loop Mode from the dropdown menu to define how the loop plays.
-
Normal will play the loop forward from the starting frame to the last one and then return to the first one to repeat the cycle.
-
Reset after N Cycles, plays the loop as Normal, but once it finishes the last cycle, the Increment value will reset.
-
Back & Forth plays the loop forward and backward to create a boomerang effect, but it only plays the ending frame once. If you want the end frame to be included in each cycle, select BF Repeat Ends.
With these settings, you should have a seamless loop. To enhance the effect, you can play with the Fade parameter group to create dissolves and fades, but only when the Normal Loop Mode is selected.
-
Final Words
Creating video loops is not as complex as it may seem! DaVinci Resolve's Mark In and Mark Out feature provides a quick and easy way to loop a video, but you must make additional edits to create a seamless effect.
With BCC Looper, the filter handles everything for you; you just have to specify what type of loop you want, where to start, and its duration, and it will take care of the rest!