Shadows in photos appear because of uneven lighting during the photo shoot session. This causes some parts of the image to be darker than others. Shadows can be an issue, especially when shooting photos for real estate and products, where a clear image is desired that shows every detail.
With post-production software like Adobe Lightroom, it is now possible to fix this issue and achieve an image with more detail. In today’s step-by-step guide, you’ll learn how to remove shadows in Lightroom using its own features and our cutting-edge photo editor and Lightroom plug-in Optics to create photos that are balanced and well-lighted.
Let's dive in!
How to Remove a Shadow in Lightroom

Let's examine a few methods to remove shadows in Lightroom. Start by importing your photo with unwanted shadows into Lightroom, then follow these steps.
Step 1: The Basic Panel
Go to the Develop Module and click the Basic panel, located below the histogram, to display all the options it provides.
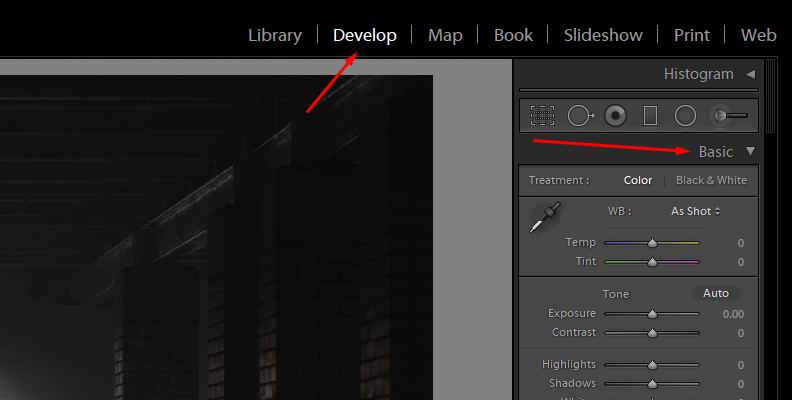
The Basic panel is your go-to for any photo editing process. It features crucial settings for your RAW photos, including options for white balance, exposure, contrast, shadows, highlights, saturation, and more.
Start by making global adjustments to your photo. The Basic panel provides the settings arranged for your workflow from top to bottom. Begin by selecting whether you're editing a colored or black-and-white image, then adjust the white balance, temperature, and tint.
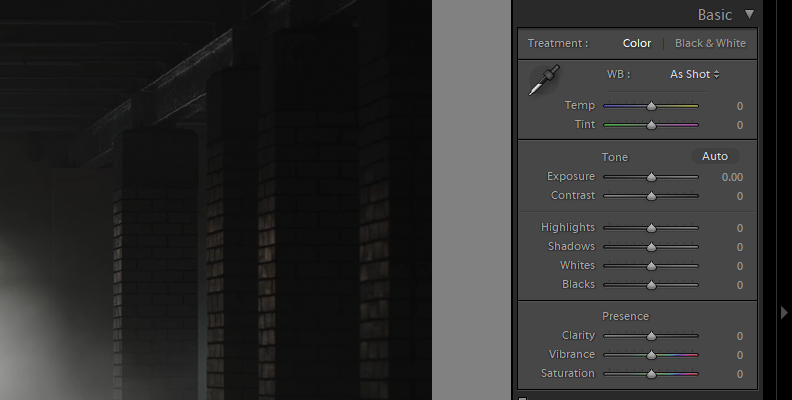
Step 2: Adjust Your Image’s Exposure
Exposure adjustments can help you remove shadows in your photos. Move the Exposure slider to the left to decrease it or to the right to increase it. Be careful adjusting Exposure, as it can be easy to overexpose the image. You can use the histogram to monitor your image.
Increase it slightly and continue to make other adjustments to minimize noise in the shadow areas. You can come back later to adjust it as needed to maintain a balanced image.
Step 3: Adjust Shadows
If, after adjusting the exposure of the image, you feel the photo still has unwanted shadows, increase the Shadows slider to brighten the areas with shadows in the image until you achieve a level of brightness that removes the shadows without looking unnatural. Try increasing the shadows to 100 and then decreasing them slowly to find a balance.
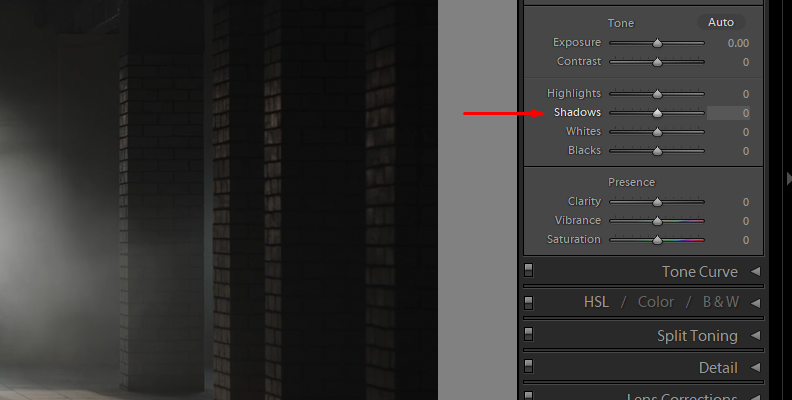
A problem that can occur when simply increasing the Shadows slider to the maximum is that it can add noise and artifacts to the photo. You can balance the image by adjusting the Highlights slider and refining the blacks and whites to fine-tune the global adjustments.
Step 4: Tone Curve Adjustments
The Tone Curve is a simple yet powerful tool that Lightroom offers to control the lightness and darkness of specific regions in your image. You can find it in the Develop Module below the Basic panel. Click on it to display its settings.
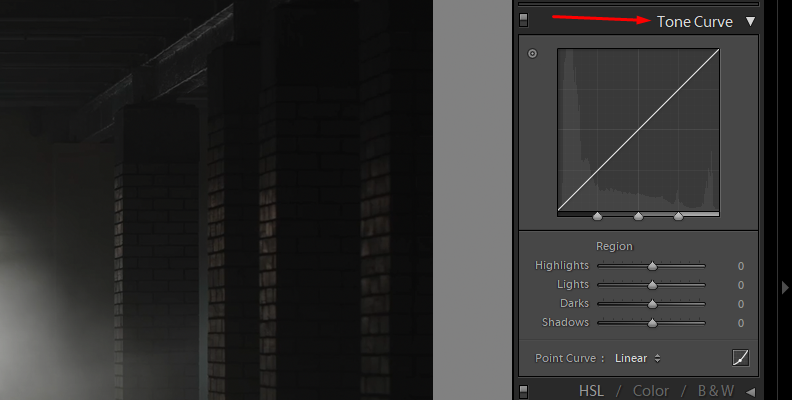
You’ll see the classic line representing all the tones in your image. To understand the curve horizontally, you have the tones which go from shadows (left), midtones (middle), and highlights (right). Vertically, you have the lightness of a tone, which goes from dark (bottom) to bright (top).
Click the bottom-left part of the line and drag the point upward to brighten the shadows using the Tone Curve. You can create more points across the line by clicking and dragging it to make adjustments to the shadows.
Step 5: Adjustment Brush Tool
Another method is using the adjustment brush tool to lighten or darken specific areas of your photo. Go to the Develop Module, and just below the histogram, you'll see icons for several tools; the Brush tool is the one at the far right. You can also press the keyboard shortcut K to toggle it on and off.
When you select it, you'll see the options available for brush adjustments. Choose Shadows from the Brush Effect menu, or you can manually increase the Shadows slider. At the bottom of the Brush panel, adjust the size and feather settings as needed. You can enable the Auto-Mask checkbox to keep the brush within the shadows mask.
Start brushing over the shadowed areas of the image you want to brighten, avoiding the highlight areas. Turn on the overlay (Shortcut O key) to see the mask. If you’re not using Auto-Mask, you may have painted over the light areas. To erase those brush strokes, click Erase at the bottom of the Brush settings, reduce the brush size, and paint over the areas to refine the mask.
You can refine the painting by adding another instance of the Brush tool by selecting New at the top of the settings. You can use up to two brushes with each new mask. Select brush B at the bottom of the settings and adjust options like the Exposure, Highlights, and Temperature to blend the highlight and shadow adjustments more naturally.
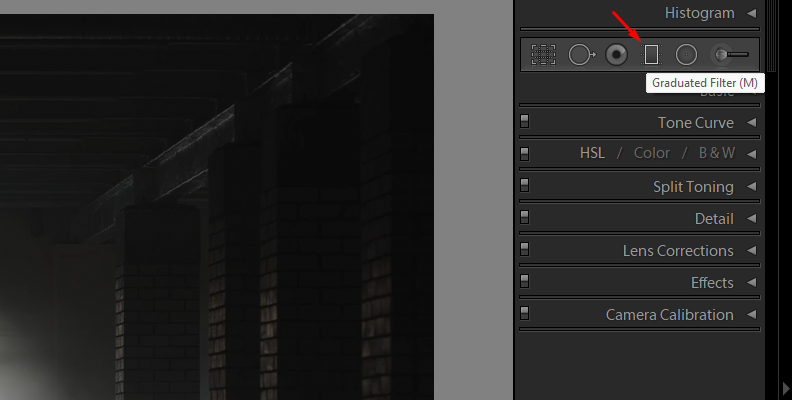
Step 6: Graduated Filter Tool
The Graduate Filter helps you balance your image and recover lost detail by adjusting exposure, shadows, and highlights in darker areas of the picture. You can find the Graduate filter below the histogram in the Develop module, represented by a rectangle icon, or press the M key to toggle the Graduate filter tool on or off.
You can select the Shadows preset from the Effect menu or manually set the Shadows sliders. Then, adjust multiple options in the same brush and click and drag over the darker parts of the shadows. Three lines will appear with zones going from darker to brighter gradually.
Refine the mask by selecting Brush in the Mask menu and painting to add or remove the Graduated filter from the brightest parts of the image.
Remove a Shadow in Lightroom with Boris FX Optics
Optics by Boris FX is a photo editing software that can also be used as a plug-in to edit within Lightroom. It features both basic and advanced editing tools, making Optics is your go-to solution for enhancing images, correcting photography, compositing special effects, and creating cinemagraphs.

Step 1: Apply the Optics Filter
Import your image with shadows into Lightroom. To use Optics to edit in Lightroom, go to the Photo menu, click Edit In, and choose Edit in Boris FX Optics.
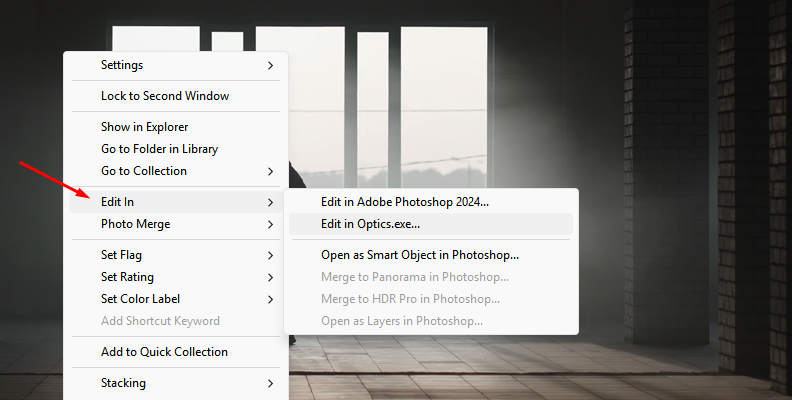
Alternatively, you can right-click the photo with the shadows you want to remove and select Edit In > Boris FX Optics. This will launch the Optics UI, where all editing will take place.
Step 2: Add Filter Shadows/Highlights
Your image will be automatically imported into the Optics interface. Now, you’re ready to start applying a filter to remove shadows. The first one to try is the Shadows/Highlights filter. This filter brightens the shadow areas and darkens the highlights, resulting in an evenly lit image.
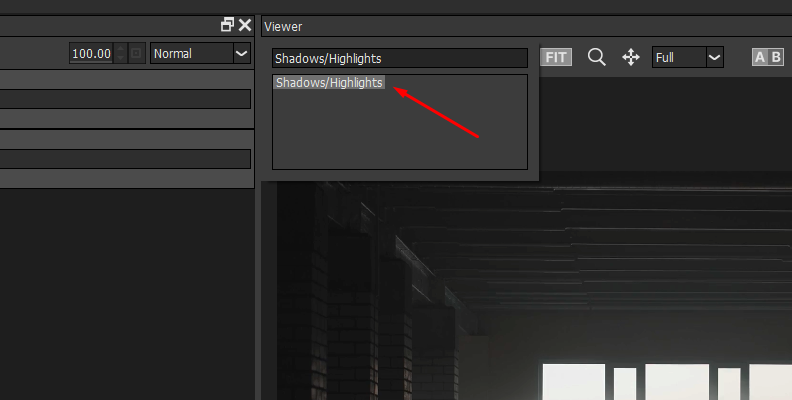
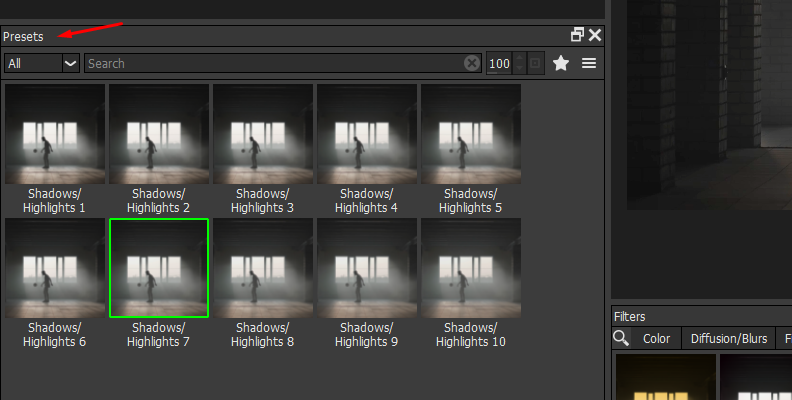
Go to the Color category in the filter gallery and select the "Shadows/Highlights" filter to apply it.
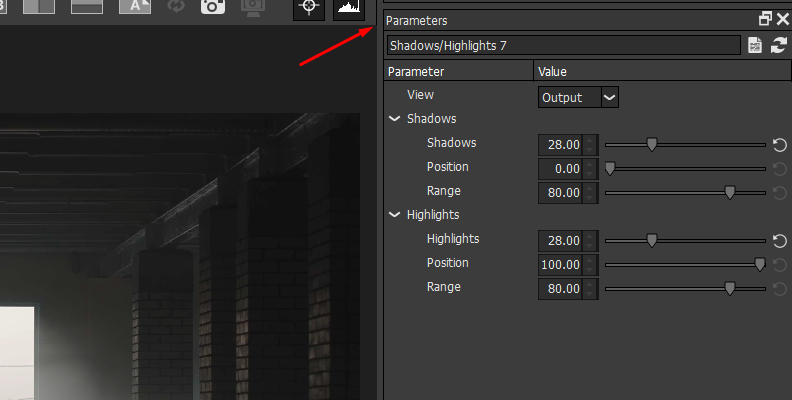
Under the layers panel, you have the presets panel. Try a few presets and modify the parameters in the right panel. Here, you can increase the Shadows and decrease the Highlights brightness.
The Position and Range parameters control the values used for the shadows and highlights matte. To adjust them, change the View to Shadows and adjust the Position and Range for the shadows. Then, change the View to Highlights and adjust the Highlight’s Position and Range.
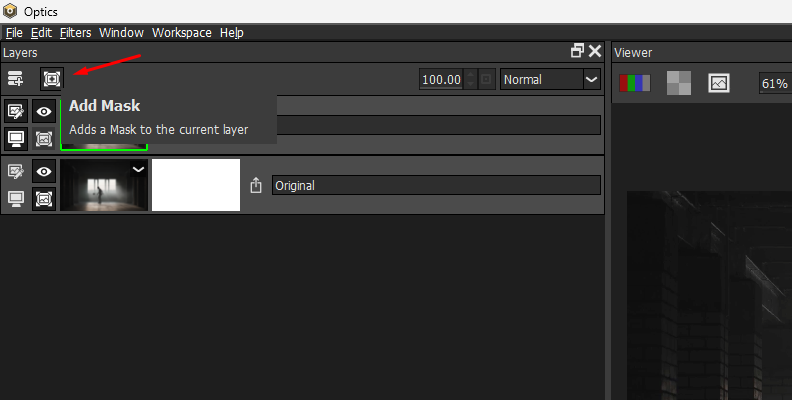
If you want to restrict the filter to a certain area so you can increase the values higher without affecting the highlighted areas, add a Mask layer.
The EZ Mask is an easy way to create mattes. Select it and use the left click to paint the foreground and the right click to paint the background. Then, press Enter to generate the mask.
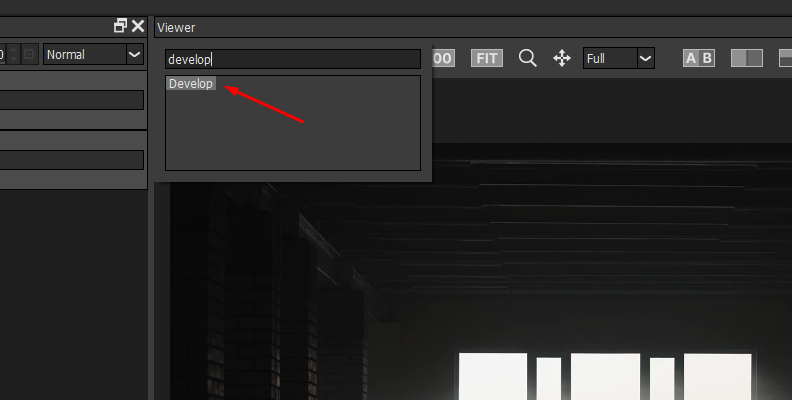
Step 3: Develop Filter
Another approach is to utilize the Develop filter to boost exposure. The Develop filter offers global adjustments for color and tone. You can find the Develop filter in the Color category. Find it and apply it to the image layer.
Increase the Exposure slightly for now.
Add a new Layer by clicking the Add Layer icon or pressing CTRL/CMD + L, and add a second instance of the Develop filter. However, this time, you'll apply it to a mask to restrict the second filter to the remaining shadows. Click the "Add Mask" button at the top of the Layer panel and choose the Paint mask. Adjust the brush size and softness, as well as the mask's opacity, and start brushing over the remaining shadows to remove them.
Step 4: Paint Filter
Sometimes, you'll see shadows on flat, solid-colored surfaces, such as walls and floors. A quick fix is to use the paint tool to cover the shadows in these areas with the Clone and Repair brushes. Go to the Image category to find the Paint filter and apply it to your layer.
A new set of tools will appear at the top of the screen. For solid color surfaces, you can use the Repair tool. The Repair tool will sample the color from when you first click and use it to paint wherever you drag the brush strokes.
If you're working with surfaces that have patterns or designs, the Clone tool may be a better option. Press Shift+Click to sample an area of the image and drag without releasing Shift to the region where you want to paint. Release and start painting. Repeat the sampling process as needed to cover the shadow area.
Step 5: Add Light
In some cases, you can add a light source with a filter from the Light category, such as ambient lights or glows for outdoor shots. A few Light filters to explore are Ambient Light, Soft Light, and S_UltraGlow. You can add multiple instances of a Light filter or combine them with one of the methods above to maintain a natural lighting effect in the image.
Step 6: Save Image
To save the changes made in Optics, click Apply at the bottom right corner, and you'll return to Lightroom to continue working on another image with shadows or to export the photo.

Final Words
It can be hard to effectively remove shadows, and the result will largely depend on the shadows in the original image; some methods will work better than others based on this. Experiment with Lightroom and Optics tools in various scenarios to determine which ones work best in specific situations and streamline your photo editing time.
Get Optics today or download a free trial and say goodbye to shadows interfering with your beautiful photos.
Good Luck!