Removing a video background is one of the most common tasks a video editor may encounter in their career.
There are various reasons to remove a background from a video, and sometimes, the video may be purposely recorded in a way that makes it easy to do so, such as when using a green screen, for example. But, other times, you may need to remove a "regular" background from a video, which is trickier, but still very possible, especially when using a versatile program such as Adobe Premiere Pro.
This guide will cover everything you need to know about removing a background in Premiere Pro, both using built-in tools and a third-party plug-in designed specifically for the task, so without further ado, here's what you need to know on this topic.
Reasons and Use-Cases for Removing Background of a Video
Before we get into the process itself, here are some of the main reasons to remove the background in a video and why you may be asked to do so as a video editor or consider doing it for your projects.
Feel free to skip this section if you want to learn the step-by-step guide on removing background right away.
Enhancing Visual Appeal
A cluttered or distracting background can take the focus away from the subject. Removing it allows you to create a clean and professional look that enhances the overall quality of the video.
Customizing Environments
Background removal enables you to replace the original setting with something more relevant to the theme of the video. For instance, you can place a presenter in a virtual office, a newsroom, or even a fantasy world to better suit the content.
Creating Professional Presentations
For business and educational purposes, removing the background can make presentations more engaging and focused. You can overlay the presenter onto slides, charts, or other visual aids to emphasize key points.
Improving Branding and Marketing
Videos created for marketing or branding purposes often require consistent backgrounds that align with brand identity. Background removal allows you to add logos, brand colors, or custom visuals to maintain a cohesive aesthetic.
Green Screen and Special Effects
Removing backgrounds is essential for green screen work, enabling filmmakers and content creators to incorporate special effects, create realistic scenes, or transport the subject to different locations without physically being there.
Isolating Subjects for Tutorials
In tutorial or how-to videos, isolating the subject can make it easier for viewers to focus on the actions or information being demonstrated. This is particularly useful for product demonstrations or creative arts tutorials.
Simplifying Post-Production
By removing the background, editors gain more control over the visual elements of the video. It simplifies post-production tasks, such as adjusting lighting or replacing elements without affecting the subject.
Social Media Content Creation
Many social media platforms, such as TikTok and Instagram, thrive on eye-catching visuals. Background removal allows creators to add unique effects or visually appealing settings, helping their content stand out.
Virtual Reality and Gaming
In gaming and VR content, background removal is often used to create immersive environments or to overlay players onto game footage, enhancing the interactive experience.
Accessibility and Inclusivity
For videos that cater to global or diverse audiences, removing and replacing backgrounds can help make content more relatable or neutral, avoiding cultural or contextual distractions.
By leveraging these use cases, video creators can significantly improve the effectiveness and impact of their content.
Remove Background in Premiere Pro with Built-in Tools

If you want to know how to remove background in Premiere Pro, step by step, below you will find the whole process explained from start to finish.
Simply follow the instructions and you'll get this task done in no time.
Step 1: Import Your Footage
Start by launching Premiere Pro and creating a new project or opening an existing one.
Name your project and select an appropriate save location to keep your files organized. Import your video file by clicking on the "Import" button or pressing Ctrl + I (Windows) or Cmd + I (Mac). Navigate to the location of your file and import it, or drag and drop it directly into the Project panel.
Once the file is imported, drag it to the timeline to create a sequence. If prompted, match the sequence settings to your clip for optimal quality.
Step 2: Check the Background Type
Analyze the background in your video to determine the best approach. If your video has a solid-colored green or blue background, you can use Premiere Pro’s Ultra Key effect for efficient background removal. This method works best with evenly lit, high-contrast backgrounds.
If the background is not a solid color, you’ll need to use masking and manual adjustments. This approach requires more precision and time but can deliver excellent results.
Step 3: Remove Background Using the Ultra Key Effect
For videos with green or blue screens, apply the Ultra Key effect. Search for "Ultra Key" in the Effects panel and drag it onto your video clip in the timeline.
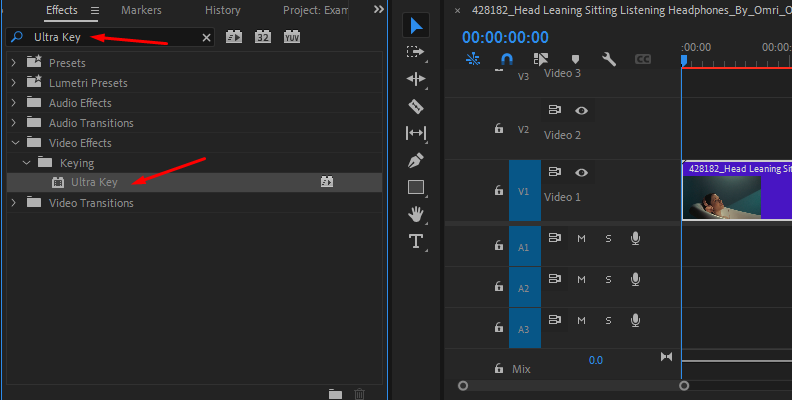
Open the Effect Controls panel to access the Ultra Key settings. Use the eyedropper tool to select the green or blue color in your video. Adjust settings such as Transparency, Highlight, Shadow, and Tolerance under Matte Generation to refine the removal.
Fine-tune the edges using the Matte Cleanup options like Choke and Soften, and reduce any tint on the subject with Spill Suppression.
Step 4: Masking and Tracking for Complex Backgrounds
If the background isn’t a solid color, you’ll need to manually mask your subject.
Select your video clip in the timeline and go to the Effect Controls panel. Under the Opacity section, use the Pen tool to draw a custom mask around your subject or use predefined shapes like rectangles or ellipses.
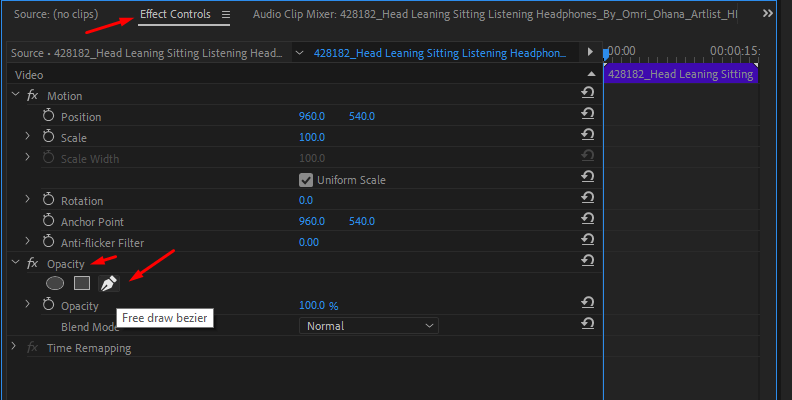
Position the mask accurately and soften the edges with the Feather option. If the subject is moving, enable keyframes for the mask path and adjust the mask frame-by-frame or at key intervals to follow the subject’s movement.
For highly detailed subjects, consider combining masking with other effects to further isolate the subject.
Step 5: Replace the Background
After removing the background, replace it with a new one. Import the new background image or video into the Project panel and place it on a layer below your subject clip in the timeline. Ensure the background layer extends across the entire duration of the video. Use the Effect Controls panel to adjust the position, scale, or rotation of the background.
If necessary, use the Transform effect to match the perspective of the new background with your footage.
Step 6: Final Adjustments
To ensure a seamless result, adjust the brightness, contrast, and color of your subject to match the new background using the Lumetri Color panel. Smooth rough edges by using the Edge Feather and Refine Edge tools in the Ultra Key settings.
Add subtle video effects, such as a slight blur to the background, to simulate depth of field and make your subject stand out more prominently. By correctly applying visual effects, you can "mask out" any imperfections if you are unable to seamlessly remove the background, which can sometimes happen if the scene is "tricky."
Step 7: Export the Video
Once you are satisfied with your work, playback the video in the timeline to ensure all elements are properly aligned.
Export the video by going to File > Export > Media. Choose a format and preset that suits your project’s purpose, such as H.264 for web use.
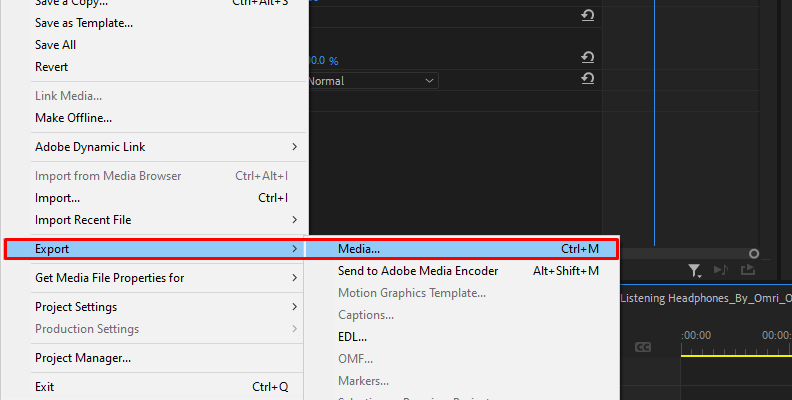
Ensure the resolution, frame rate, and quality settings match your project’s requirements. Click Export or Queue to render the video.
Remove Background in Premiere Pro with BCC+ Linear Color Key
Adobe Premiere Pro is a versatile tool, and there's a reason why it's one of the most popular video editing programs out there. It has many useful built-in tools that you can use to accomplish almost every video editing task and perfect each video frame in your video.
However, when it comes to completing tasks, there's almost always a quicker and more user-friendly way to do it with a plug-in specifically designed for it.
In this section, we introduce you to BCC+ Linear Color Key, a tool that's part of Continuum by Boris FX.
Here's how you can use BCC+ Linear Color Key to remove a background in Adobe Premiere Pro or any of the popular video editing programs, as Continuum is compatible with DaVinci Resolve, VEGAS Pro, After Effects, Avid, and many others.
Step 1: Create A New Project And Import Media
The first step is to launch your software of choice that is compatible with Continuum, which in our case is Adobe Premiere Pro.
Create a new project using the home screen options.
Once you're in the project, import media using the "Import media" button within the "Project" tab, as shown in the image below.
Step 2: Create A Timeline And Apply The Effect
Now that you've imported your video, you should be able to see it within the same "Project" tab.
Now, to be able to do any modifications to it or apply effects, you need to create a sequence of your video. To do this, simply drag and drop the video onto the timeline area.
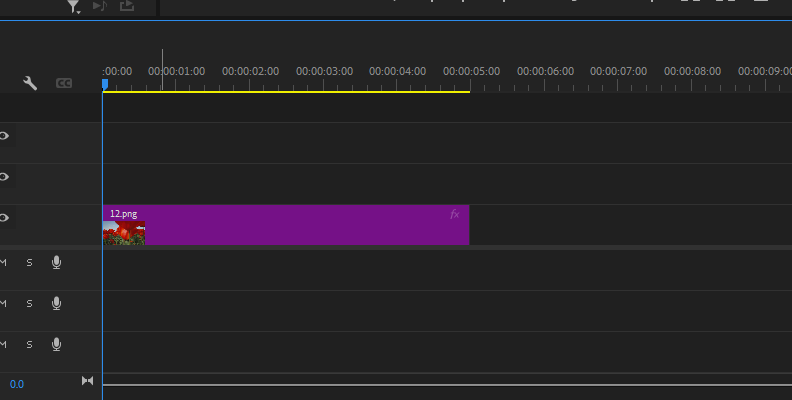
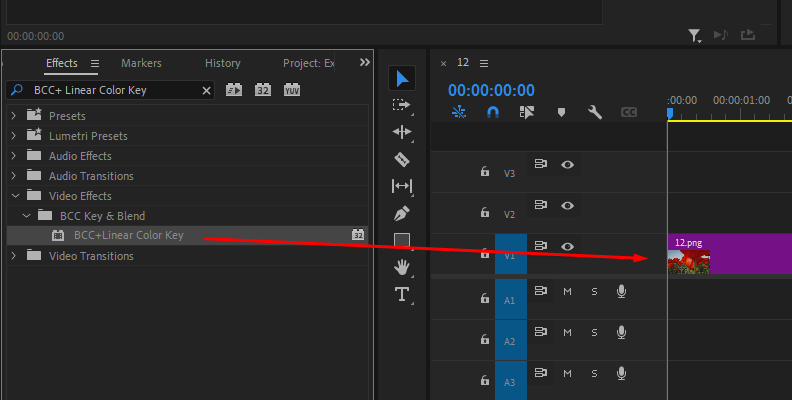
Now that the video is laid out on the timeline and there's a sequence of it, access the "Effects" panel within Premiere Pro and use the search bar to find the BCC+ Linear Color Key effect.
Once you locate the effect, drag and drop it over your video.
Step 3: Adjust Settings Within The Effect Controls Panel
Once you apply the BCC+ Linear Color Key effect to your video, you will immediately notice a difference.
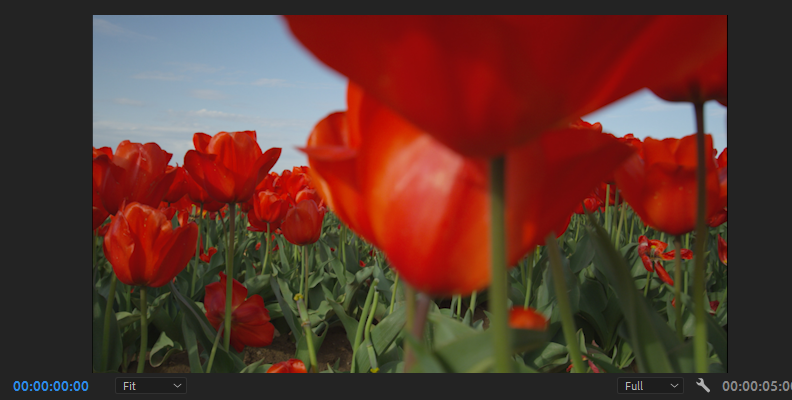
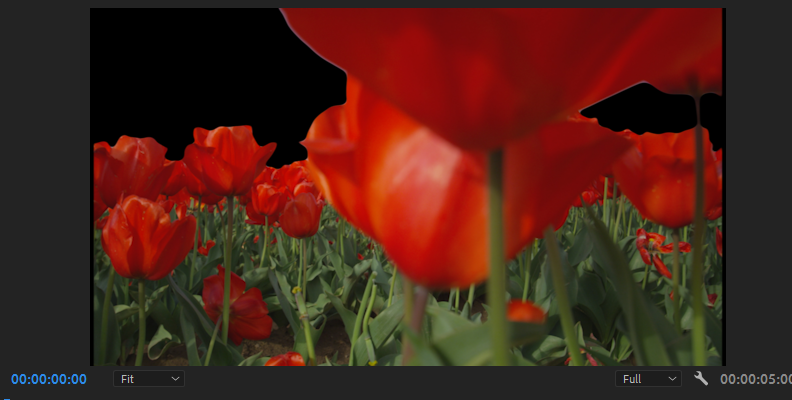
However, the results may not immediately be perfect, which is why you'll need to access the "Effect Controls" panel in the top-left corner and adjust the BCC+ Linear Color Key effect settings to your liking.
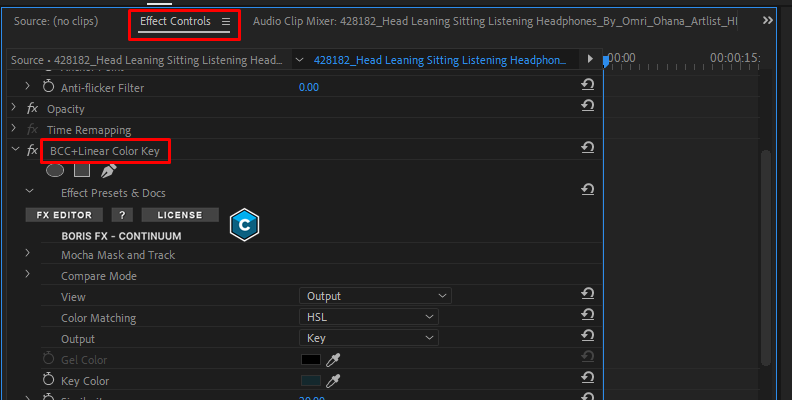
Now, since every project is different, and the background of your video will always vary no matter what example we use, it's best to refer to the BCC+ Linear Color Key page and see the functions of each setting, then adjust from there.
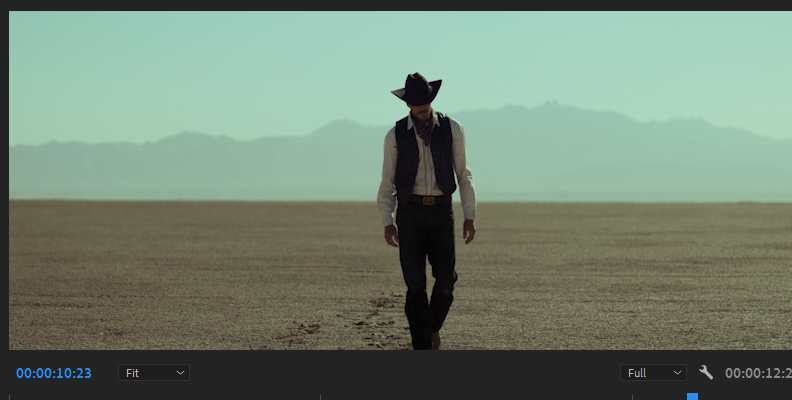
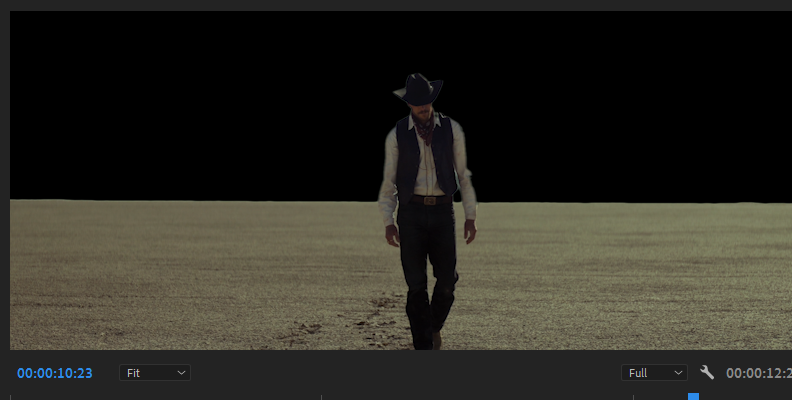
Here's another example as well:
Final Words
That concludes our guide for removing the background in Premiere Pro from your clips. Hopefully, this will help you produce high-quality videos.
We thank you for reading and wish you the best of luck with all your future projects.


