Many things can happen throughout the shooting, editing, final export, and delivery stages of a project, and one common issue that might not be immediately recognized is banding.
You may have seen images exhibiting a gradient transition from dark to light that appear to break up into distinct blocks of color; this unwanted effect is known as banding, and when it happens, it can compromise the overall quality of your picture.
In this article, you will learn what banding is, why it appears, and how to remove it in Photoshop using several methods and tools. By the end of this tutorial, you’ll have enough tools and options to remove banding from your photos in different scenarios.
Let’s dive in!
What is Banding?
Banding is an issue in digital photography when what should appear as a smooth gradient turns into sharp stripes of color. The main cause is digital compression, which reduces the bit depth and color information from the original file. With a limited number of tones, areas in photos with gradients, such as landscapes, skies, and backgrounds with solid colors like black or grey, are more prone to displaying these noticeable bands.
Banding is not always a bad thing. Sometimes, it can be used as a creative look called posterization to replicate the look of mass-produced posters, which used limited ink for printing and resulted in the abrupt transition between colors.
When shooting in RAW, banding may not be noticeable to the naked eye or in your camera. It typically appears during the editing process after making numerous adjustments to exposure, color grading, and various image processing tasks. Due to their lossy compression, it's also a common issue when editing JPEG images.
Uploading your photos to social media might also result in banding because most social media platforms compress your image even further.
How to Remove Banding in Photoshop

Photoshop offers a few tools to help you remove banding. I'll show you four methods you can combine to reduce banding successfully.
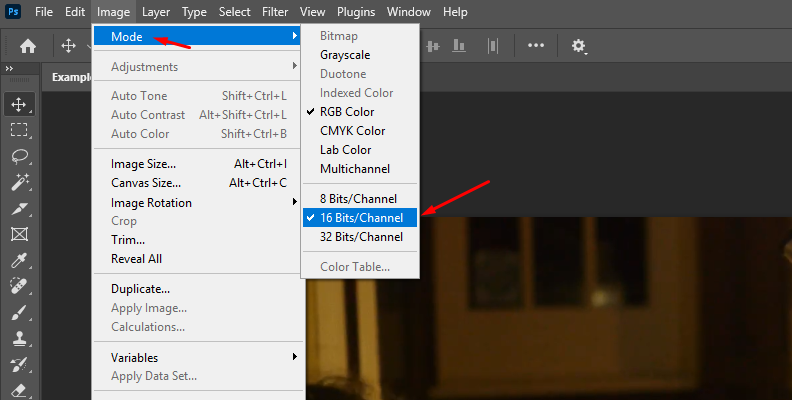
Method 1: Convert to 16-bit
Ensure you're working in 16-bit instead of 8-bit because 16-bit files have more color information and won't overcompress your image. 16-bit can also more accurately represent different shades of colors with more accuracy in color transitions and reduce banding. Try this method before everything else to see if there is a positive change, but only when working with RAW or lossless files. Converting a JPEG to 16-bit is useless because there is not more than 8-bit depth in a JPEG.
- Import the image with banding into Photoshop.
- Go to Image > Mode and select 16-bit if it’s not already selected.
Method 2: Reduce Banding with Noise
Some artifacts are better removed with more artifacts. Noise is an effect that can provide a cinematic look when done with moderation.
- Import your photo, duplicate the layer, and change the mode to overlay.
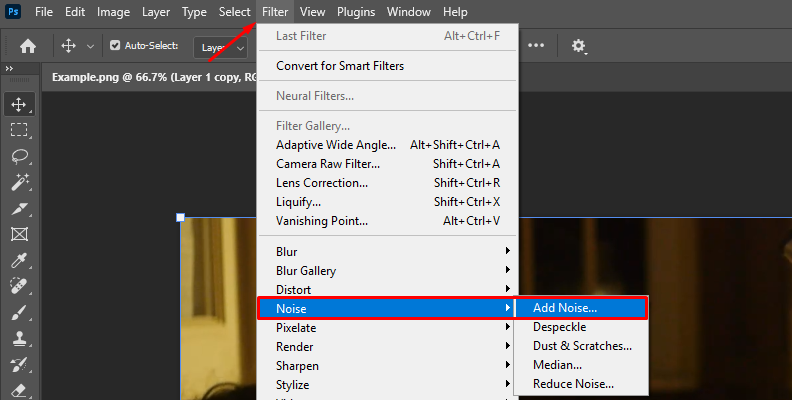
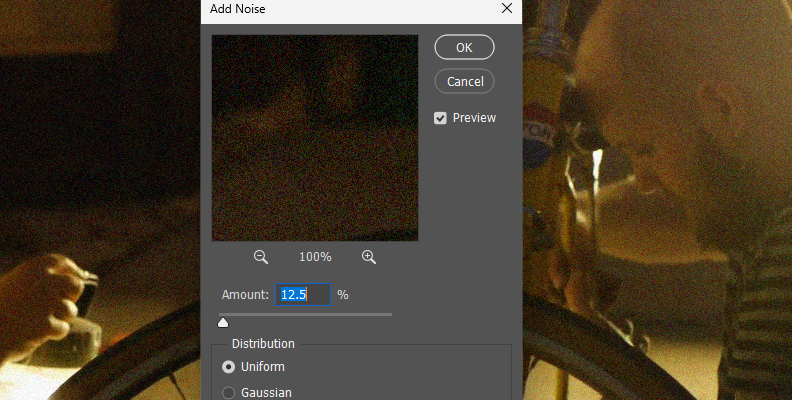
- Go to Filter > Noise > Add Noise. Adjust the amount of noise until you see the banding fading.

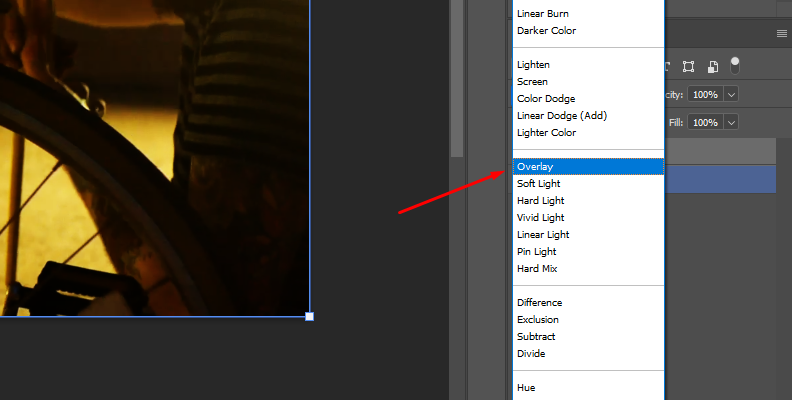
Similarly, you can also overlay your picture with neutral color by creating a new layer and checking the box "Fill with Overlay Neutral Color".
Method 3: Cover with Gaussian Blur
Adding a Gaussian Blur effect can help you cover part of the banding with blur. However, try to restrict the filter to the part of the image with banding using a mask unless you want to blur the entire picture.
- Import your photo.
- Duplicate the background layer with CTRL/CMD + J.
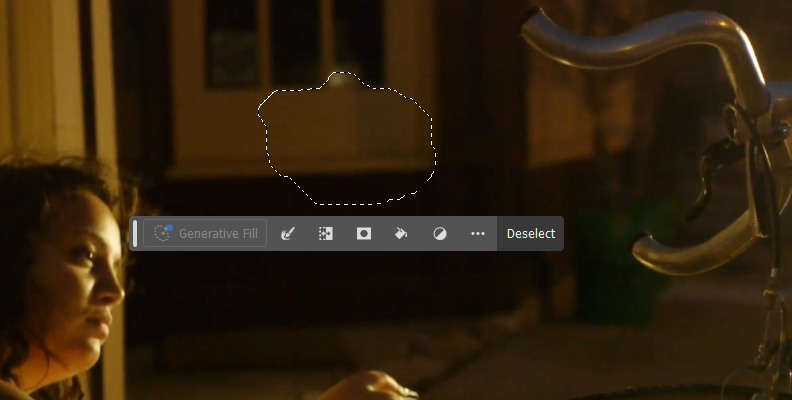
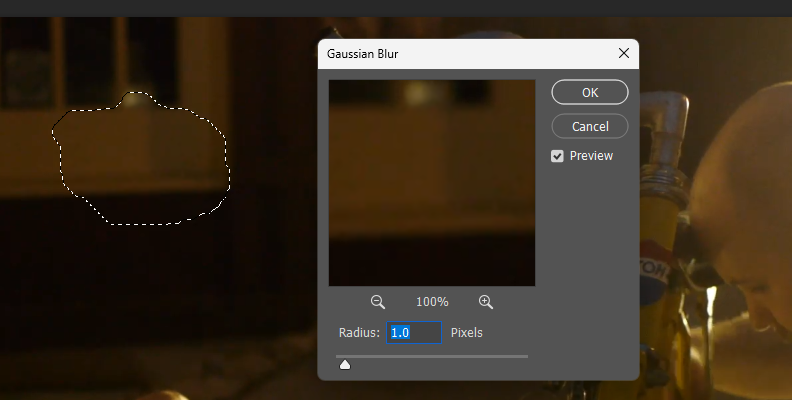
- Choose the selection tool to draw a mask around the area with banding.
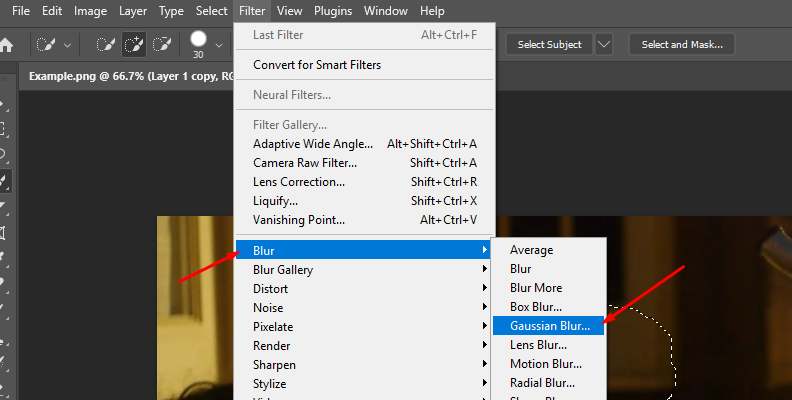
- Go to Filter > Blur > Gaussian Blur to add the Gaussian blur effect to the new layer mask so it is only applied to the mask.
- Adjust the slider to adjust how much blur to apply. Increase until you reduce banding the banding pattern.
If you're looking for a more natural effect, you can use a soft brush to blend the blurred area seamlessly into the surrounding details; it'll create a smooth transition between the affected and unaffected parts of your image.
Method 4: Add Texture
Use a texture overlay to reduce banding in your images and add a detailed texture to your composition. This method may not work for all types of images, so use it only when it seems appropriate.
- Import the photo with banding and the texture image into Photoshop. You should have both images in different tabs.
- Go to the texture tab and press CTRL/CMD + C to copy the image.
- Go to the photo tab and press CTRL/CMD + V to paste the texture as a new layer above the photo.
- Resize the texture if you need it to fit the whole picture.
- In the layer panel, select the texture layer and reduce the Opacity to your liking. Don't worry if it affects parts of the image you don't want; we'll fix that with a mask.
- Select the texture layer and click the “Add Layer Mask” button at the bottom of the layers panel. It’s a rectangle with a circle in the middle.
- Now, click the mask layer, select the brush tool, and choose black as the foreground color. Adjust the brush size and the opacity to begin painting over the parts without banding and remove the texture from those parts. Paint in white if you need to add more texture to the image.
Remove Banding with Optics DeBand

Optics by Boris FX is the ultimate photo editing toolkit for photographers and digital artists. It can transform your photos and digital art into professional-looking images with hundreds of stunning filters and effects to enhance and fix your photos. Optics features DeBand, a filter that removes banding artifacts by smoothing the pixels in the areas with banding problems without losing detail from the image.
Optics works as a plug-in inside Adobe Photoshop. Download and install the Boris FX Hub, then click Optics to install Optics for Photoshop, Lightroom, and the standalone application. The steps are the same for the standalone application and the plug-in version. You can use the free trial to follow this tutorial and see if this Photoshop plug-in is for you.
If your image shows a clear blue sky, Optics’ DeBand filter can help you restore a smooth gradient without creating unnatural textures. Using the smart filters, you can fine-tune the effect and make sure the sky remains natural and realistic.
Step 1: Import Images
Create a new Photoshop document and import the photo with banding. Right-click the layer and select Convert to Smart Object. This will allow for nondestructive editing if you need to go back to make more edits or remove the filter.

Step 2: Add Optics to Your Photo
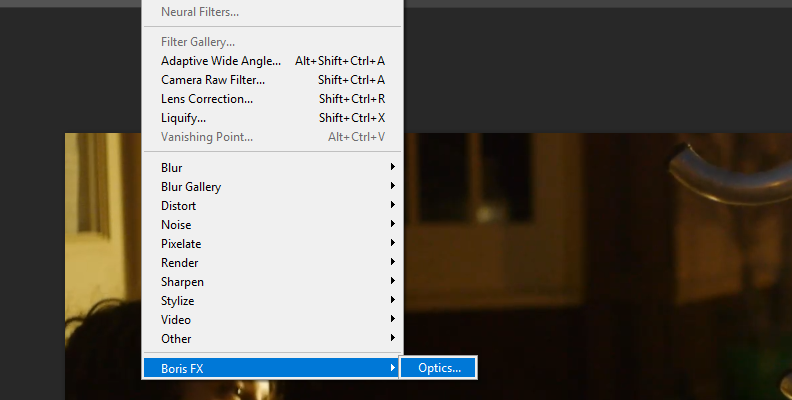
Optics is applied as a regular filter in Photoshop. Go to Filter > Boris FX > Optics. The plug-in will launch its user interface and import your photo to the Optics workspace. Optics’s workspace is very intuitive. You have your layers panel on the left side, the viewer on the top center, filters on the bottom center, and parameters to your right.
Step 3: Find and Apply DeBand
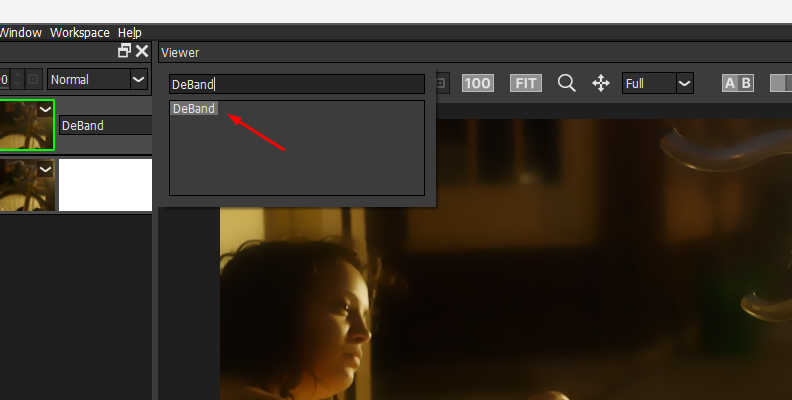
Below the viewer is the filter library, where you can search for the DeBand filter. You can find it in two ways: by going to the Image category and browsing the filters until you see it (they're organized in alphabetical order) or by using the magnifying glass and typing "DeBand." Select the filter to apply it to the current layer.

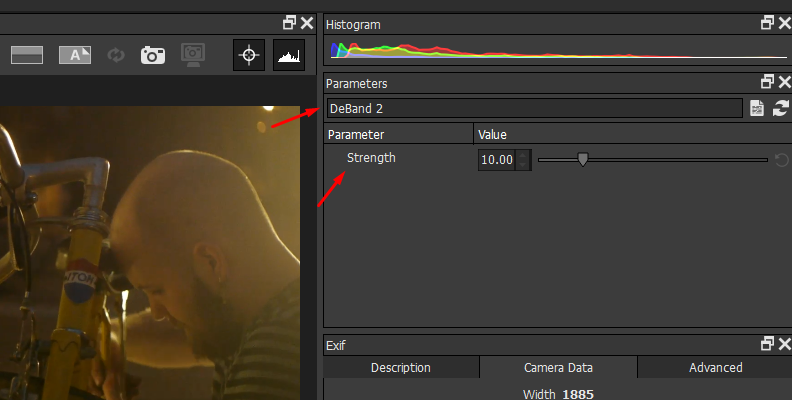
Step 4: Adjust DeBand Filter
The DeBand filter is very straightforward. Once you have applied it, you can use a preset from the preset library below the layer panel or fine-tune it by adjusting the settings on the right-side panel.
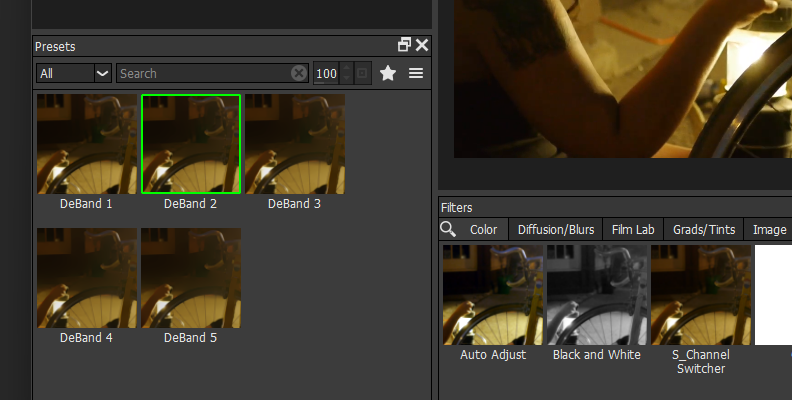
There is only one control for setting the amount of DeBand you want to apply to your image. Start by slowly increasing the amount and previewing the result until you remove the banding.
Step 5: Masks and Other Filters
You can make further adjustments by combining more Optics filters. You can add blur or noise to cover any residual banding with the help of masks to restrict the filter to areas with banding.
Add a new layer by clicking the "Add Layer" icon above the layers panel or pressing CTRL/CMD + L. Then, select the filter you want to add to the new layer, such as blur, to smooth the gradient.
To restrict the filter, create a mask. Click the “Add Mask” icon next to “Add Layer” and select a mask type. You can use the Paint Mask to paint over the banding area with the brush. The blur filter will only apply to the paint strokes. You can adjust the brush size, softness, and opacity.
When you stack multiple filters, try different blending modes and adjust the opacity of each layer to achieve a smooth and more natural image.
Step 6: Export to Photoshop
Once you're done editing in Optics, click Apply and return to Photoshop, where you can make the final export. Remember to export your photo in a high-quality and lossless format such as RAW, TIFF, or PSD, and only export to JPEG when you have made all the image processing needed.
How to Avoid Banding
The best way to remove a problem is to avoid it in the first place, and with banding, there are a few things you can do to reduce banding in your images when editing in Photoshop.
Shoot in RAW
I mentioned how JPEG files are more susceptible to banding because they already work with more digital compression. JPEG files may even present banding as soon as you import them into Photoshop before any editing. Shooting in RAW will remove this issue by retaining more data captured directly from your camera's sensor. RAW files contain more information but are also bigger in file size.
Avoid Over-Editing a JPEG
If you have your photoshoot already in JPEG, I recommend avoiding overusing color grading or other image processing unnecessarily. Also, avoid saving and reopening the file multiple times. Every time you do that, the image will be compressed, and more information will be discarded, causing irreparable banding the next time you open the file.
Work in 16-bit
When you open a RAW image in Photoshop, always work in 16-bit to have a wider color palette to represent each shade of color in your gradients. Remember that JPEG files use an 8-bit color depth and cannot be transformed to 16-bit because the file has insufficient information. The downside is that your files will become bigger, so keep an eye on your storage capacity.
Work with High-Quality Monitors
Some low-quality monitors can struggle to display the correct colors from lossless files, resulting in banding that isn't actually present. If you notice banding in a picture, try it on multiple displays to ensure that the banding is not in the image but in how the monitors display it.
Final Words
Now, you have a few tools to remove banding when it appears in your photos. However, always aim for the best image quality and consider whether the banding will negatively impact your work. You can detect some banding if you pay attention to popular commercials, films, music videos, and photography. Sometimes, over-processing the image with filters and deband effects does more harm to your photo than the banding itself.
Whether you choose to leave the banding, fix it, or cover it, Optics offers an excellent toolkit for your digital images. You can access hundreds of filters for beauty, lighting effects, film stocks, flares, particles, and more.
Start your free trial here!