In photography and videography, light plays a crucial role; it has the power to transform the mood of an image, evoke emotions, and transport viewers to different places. While light can enhance a picture, excessive too much brightness can also mitigate its quality.
There are many creative techniques to use light to your advantage for artistic purposes. In this article, you'll learn about lens whacking, a difficult technique used to create light effects to create blurry and hazy images for dreamy sequences, memories, flashbacks, and more.
Today, we'll discuss everything about lens whacking, how to do it with your camera, and an alternative way to use it safely if you're worried about damaging your camera.
Let’s dive in!
What Is Lens Whacking?
Film photographers and videographers use lens whacking or free lensing, a DSLR technique, to create an out-of-focus effect with lights and blurriness similar to a tilt-shift effect. The lens whacking in-camera effect is achieved by shooting with the camera's lens detached and allowing light to get into the sensor.
When shooting normally, the only light allowed is through the lens. However, when you remove the lens to shoot with lens whacking, the lens is physically held in front of the sensor to allow light to pass from the lens and the gap between the camera and the lens, causing a light leak, which is crucial for the effect.
Photographers then move the lens to control how much light to let in and shift the focus. All this is done while holding both the lens and the camera body (if not using a tripod). Bear in mind that your photos could be overexposed by light leaks and flares that may not look great on your first try.
Because of the nature of this technique, it will be hard to replicate the same image twice, making each image unique. So, it’s best to practice before using lens whacking for an important shooting session or film, as the videos or photos taken with this technique can’t be fixed in post-production to undo the effect.
Lens whacking has many creative uses, and you can experiment with more. Here is a list of the most common uses of free lensing:
Light leaks effects.
Lens flares.
Focus in and out.
Blur effects.
Manual tilt-shift effect.
Dreamy scenes.
Depict confusion from the point of view of a character.
Show memory sequences.
Dramatic distortion effects.
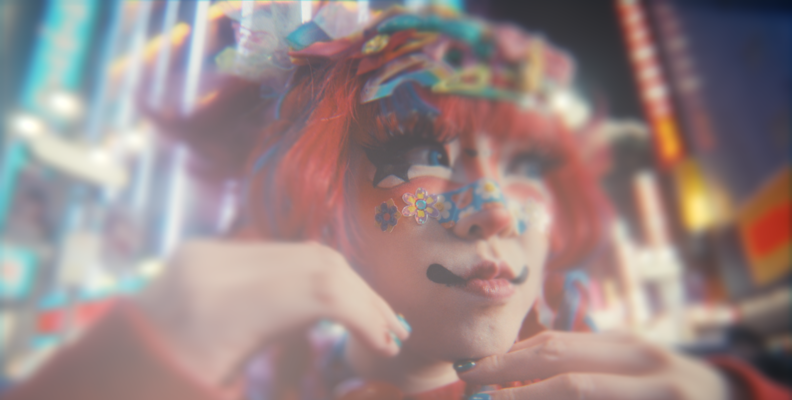
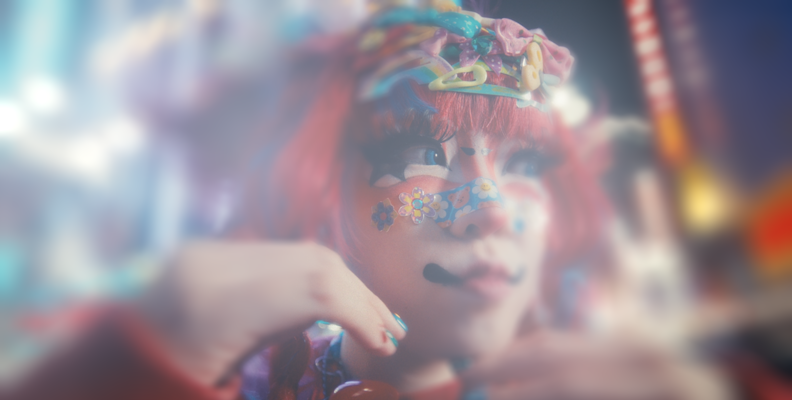
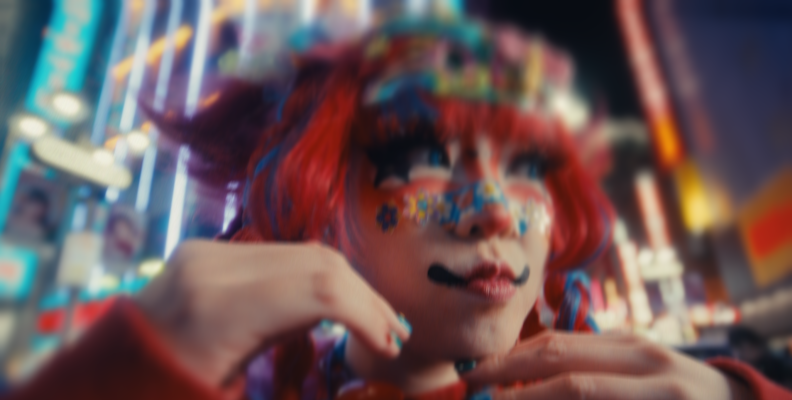
Here are some examples of what lens whacking looks like:

The possibilities of lens whacking are endless, limited only by your creativity. If you're curious about this technique, let’s find out how you can master it.
How To Do It?
It might be obvious, but to begin with, you need a camera with a removable lens to achieve this, like a Nikon lens and camera body. You can combine camera and lens brands since the lens won’t be attached to the lens housing. Some photographers believe that older cameras work best. Warning: understand that this technique can expose your camera to dust and dirt and affect or damage the sensor, so you may prefer not to begin experimenting with free-lensing.
First, you must set your camera to live mode or live view. It will allow you to see the effect in real-time through your camera as you move the lens and adjust the effect. A word of advice is that live view exposes your sensor more, so use it for short periods of time.
Next, set the focus to infinity before removing the lens. You could also focus on the main subject before detaching the lens and setting your camera exposure fully open.
Now, detach the lens from the camera body. If you will be holding the camera, keep it close to your chest, holding it with your right hand. Hold the detached lens with your left hand between your index finger and thumb. You can place your middle finger between the lens and the lens housing. This will allow you to move the lens to adjust the focus and let light in.
To focus, you will manually move the lens forward and backward from the camera. Use your finger to move the lens up and down or to the sides. Keep an eye on the viewfinder to see where the focus goes and how the light leaks and flares affect the frame.
At first, it may seem difficult to get a good shot. But with practice, you'll understand how your camera works and learn how to move the lens to get the desired effect. Remember to keep your camera in place with a strong grip and be careful not to drop the camera or the lens as you move it.
You can start shooting with a tripod to concentrate on the lens grip and movement. You may find a different grip that works better for you. You can use your other hand and finger to cover the gap between the lens and the housing to control the amount of light you let it.
The rest is just experimenting and trying different angles with the lens and handholding in general. Remember that the effect won’t suit every film or photo session. But as you learn, you can shoot anything while you get the grip of the technique.
Lens Whacking Recommendations:
There are a few things to consider when using the lens-whacking technique.
Use an interchangeable lens camera.
It's best to work with short focal length lenses.
When possible, use lenses with manual aperture ring and focus to avoid the need to connect the lens to adjust the focus and aperture.
Adjust everything before detaching the lens from your camera. Set your frame and focus. If you're recording video, you can begin before removing the lens to find the best angle for the shooting. Try different angles to find the right spot to get good-looking lens flares.
Remember to cover the gap with your fingers when strong light leaks wash your image. Finding your technique for controlling how much light you let in may take a lot of trial and error.
Place the camera on a tripod to keep it steady if you find lens whacking difficult or your footage looks shaky due to handholding while moving the lens. The best approach would be to start shooting still subjects as you learn how to move the lens.
Don't be afraid to experiment. Move the lens far away to see how this affects the image. Learn the limits at which it becomes blurry and in which direction the focus changes.
Lens Whacking Warning:
Although lens whacking is an enjoyable and creative technique, there are some caveats:
Lens whacking can damage your sensor. Do at your own risk.
Be careful of where you shoot. Avoid places with dust, dirt, moisture, and sand.
Don’t shoot during rainy and windy days.
Always hold your camera; use the lanyard to prevent it from falling to the ground.
Don't leave the lens disconnected for long periods if you're not shooting to prevent dust and dirt from getting into the sensor.
Lens whacking is an in-camera effect that can't be fixed. If you shoot an important session and don't like the result, you cannot remove the lens flares and light leaks from the image.
If you’re not feeling confident with the technique, it’s ok not to use it. There are other alternatives, like adding the effect in post-production with plug-ins, as we’ll see next.
Create/Achieve Lens Whacking with S_FreeLens
If you want to try lens whacking but don’t have a camera to do it or are afraid to damage the lens or lens mount, you can try plug-ins like the Sapphire S_Freelens effect.
FreeLens creates distorted and defocused light leak effects over a source clip to simulate the lens whacking technique.
Step 1: Download and Install Sapphire
Download Sapphire and install it from the Boris FX Hub. Select your host installation and wait. Sapphire is available for most host applications, such as Adobe Premiere Pro, After Effects, DaVinci Resolve, VEGAS Pro, Flame, Nuke, and Avid Media Composer.
For this specific example, we'll be using Adobe Premiere Pro, but keep in mind you can use any of the compatible tools and the process will be mostly same with small differences regarding software UI.

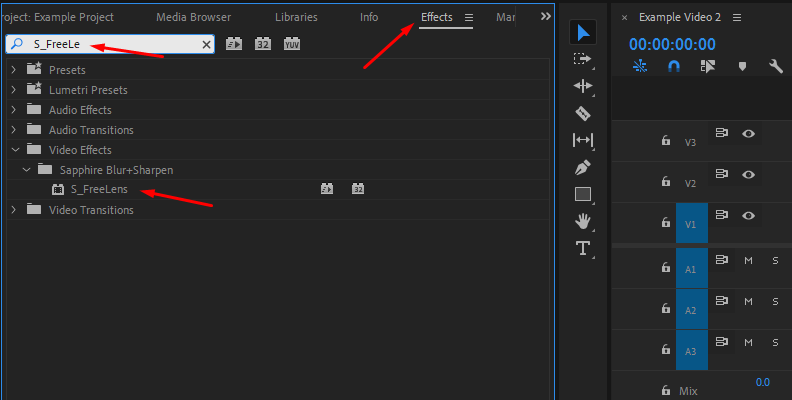
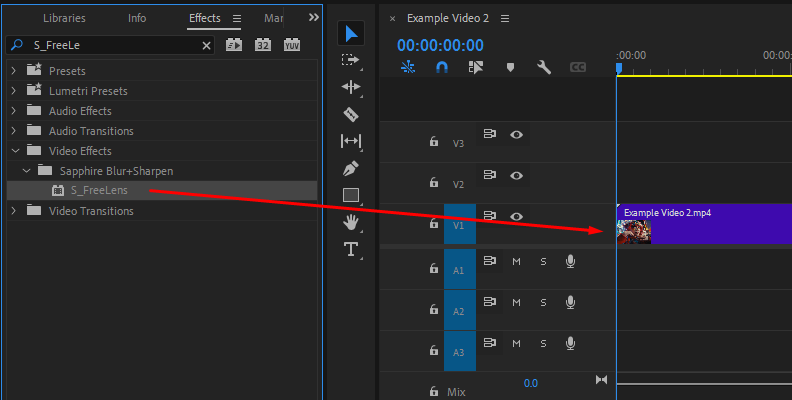
Step 2: Apply S_FreeLens
Once in your video or photo editor, go to your effects and search the Sapphire Blur+Sharpen category. Then, scroll to find the S_FreeLens filter and apply it to the footage in your project’s timeline.
Step 3: Finding Inspiration
On the effect controls, click Load Preset to launch the Preset Browser. S_FreeLens and all Sapphire effects come with presets you can use for inspiration or as a starting point for your projects.
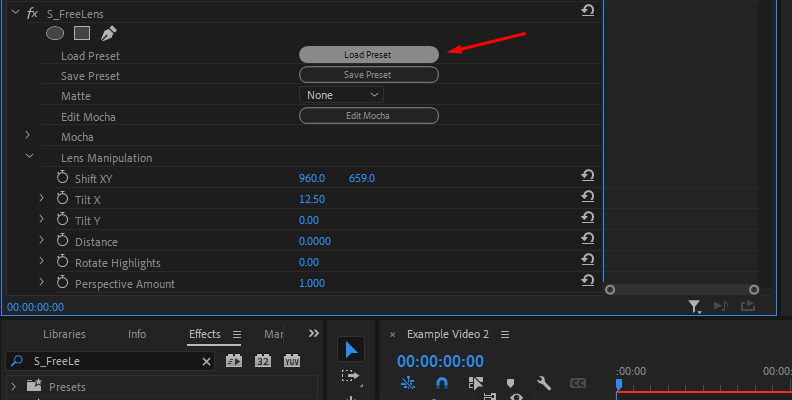
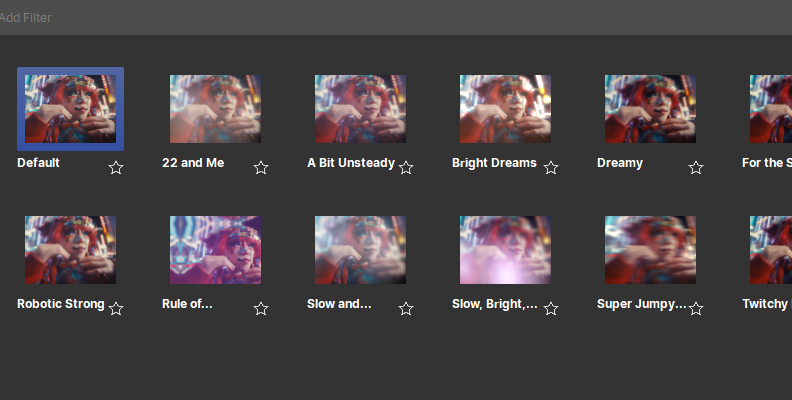
Click Load to apply the preset or cancel to return to your host without any changes.
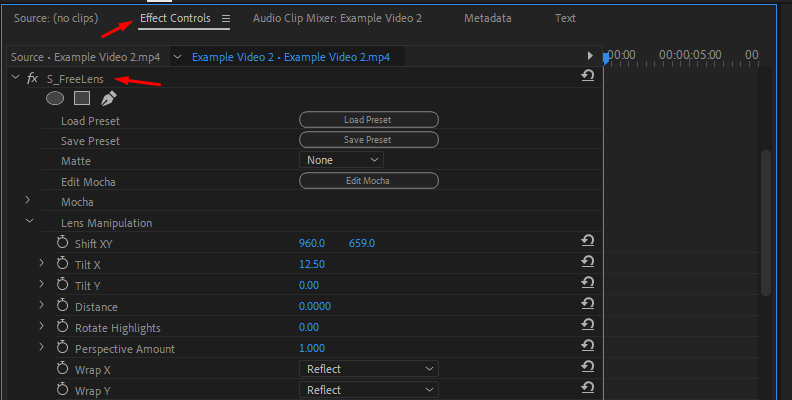
Step 4: Create your Lens Whacking Effect
S_FreeLens provides all the parameters you need to create a realistic free-lensing effect in your footage. You can enable the characteristics you want to use and disable the ones you don't.
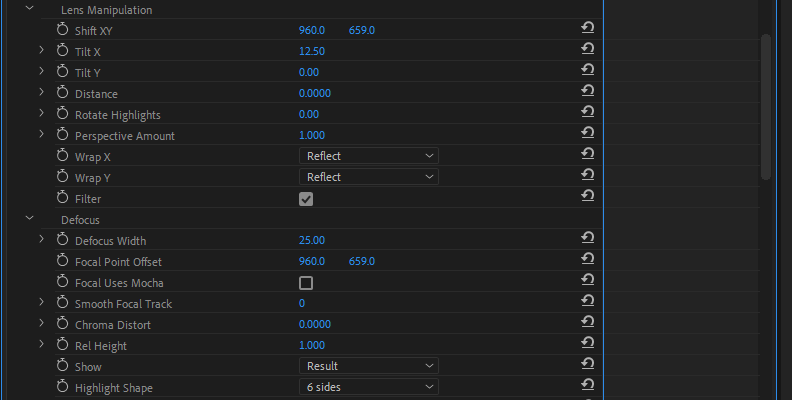
The main module is Lens Manipulation. Here, you control the virtual lens, tilt it around, and move it to affect the rest of the parameters. If your host allows it, you can use the overlay controls in the viewer.
Then, you have a group parameter to adjust the defocus, distortion, and light leaks and to add a vignette. Each group offers a wide array of options to create custom looks.
The Shake parameter group provides tools to make the effect feel more organic. You can choose between three modes: Normal, Twitchy, or Jumpy. You can also add or remove motion blur and adjust the amount of blur applied.
Experiment with different combinations to achieve creative looks with lens whacking without the risks of the technique.
Final Words
Lens whacking is an interesting technique that, when done right, can create outstanding sequences for your video and photos. It may take time to master, so you'll need to be patient while also taking extra care of your equipment. Plug-ins can be a great alternative to achieve the same looks without the risk, and you can apply the effect to more than video and photos, such as motion graphics and titles.
Start your journey with lens whacking, flares, and light leaks using S_FreeLens from Sapphire. Before purchasing, you can get a free trial to try what you just learned in your future videos.
Have fun!