Do you remember that look of old newspaper printing, where multiple tiny dots form the image? It's a standard appearance in printed magazines, posters, and comics, as well as in digital art. Today, we'll explore what this effect is and how to create one using Adobe Photoshop and the Optics plug-in by Boris FX.
Let’s dive in!
What Are Halftone Effects?
Halftone is a printing technique very common in printing materials such as newspapers and magazines. You'll recognize it because, instead of using solid colors, the images are composed of patterns of dots of different sizes and spacings between them that simulate shadows and depth.
The dots can be colored or in grayscale and are often used in digital design, too, for their aesthetic and vintage look, as well as to pay homage to classic art with their limited tones.
How to Make a Halftone Effect in Photoshop
Whether you want to achieve the halftone effect for digital art or printing material, Adobe Photoshop is your go-to software for creating halftones in professional work. We’ll analyze two methods: one for making a colored halftone effect and another for a greyscale halftone.
Color Halftone Effect
-
Step 1: Create Your Project
Start by setting up a new document and importing the image that you want to convert into halftone digital art.
Right-click on the layer and select "Convert to Smart Object."
-
Step 2: Add Pixelate Filter
Go to the Filter menu and choose Pixelate > Color Halftone.
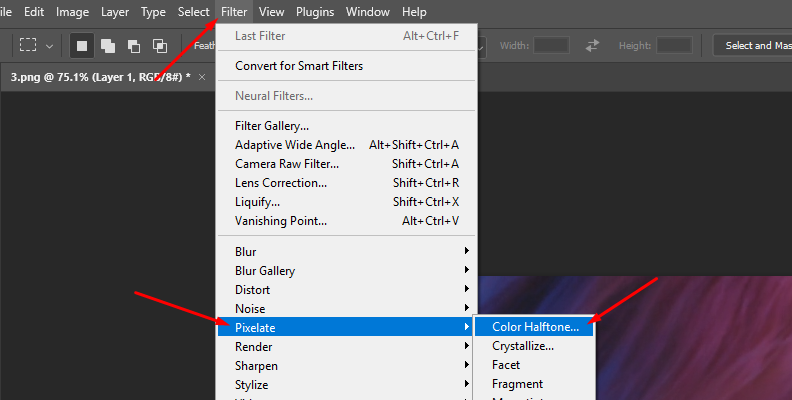
In the Color Halftone window, you have several options to adjust the halftone effect with greater precision. The Radius controls the size of the halftone dots. Adjust the radius to make the dots larger or smaller, allowing for more detail in digital designs.
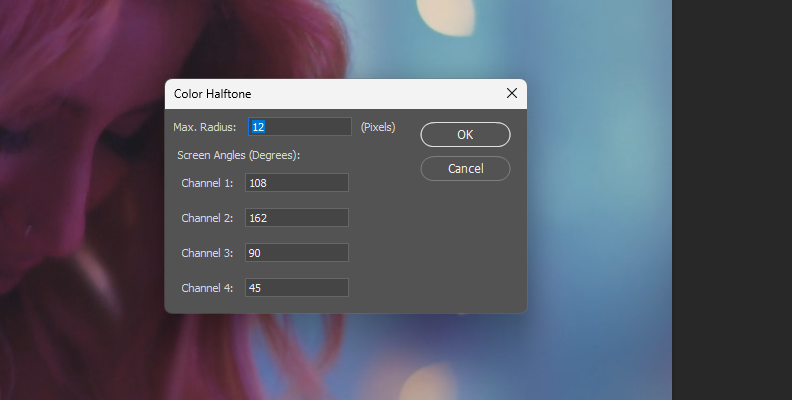
The channel parameters are divided into four, one for each cyan, magenta, yellow, and black. The values are in degrees, and they adjust the angle of the dots and how they overlap with each other. Adjust these settings and click OK to see the result. You can click the filter in the layer panel to open the settings and tweak them as needed to create unique designs and color combinations.
Halftone Screen
-
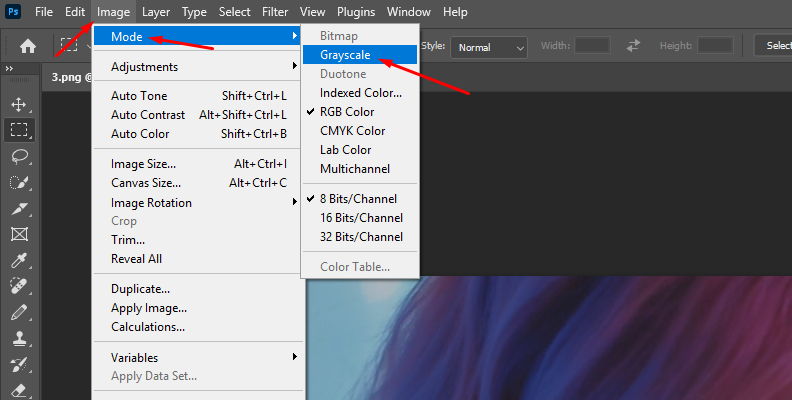
Step 1: Set Up an Adobe Photoshop Document
Set up your new document by importing the image you want to work with. Then, we’ll convert that image to black and white by going to Image > Mode and selecting the Grayscale option. If it asks you to discard color, click “Discard.”
-
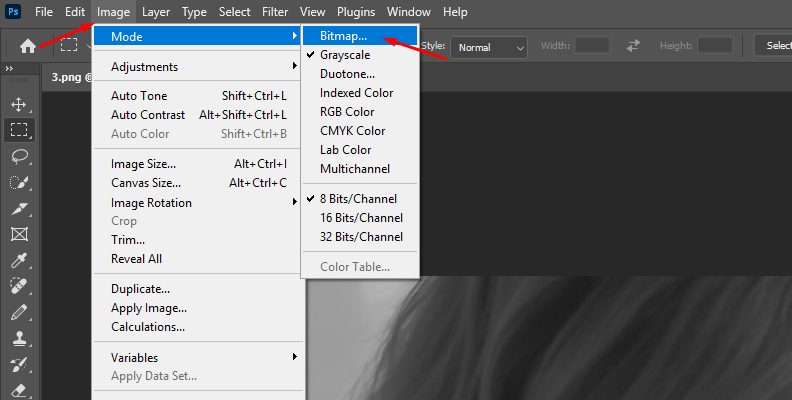
Step 2: Add Halftone Screen
Navigate to the Image > Mode > Bitmap. In the Bitmap dialog box, choose the Halftone Screen method and click OK.
A second window appears with options for the Halftone Screen. Here, you can adjust Frequency, which controls the size of the halftone dots; the Angle, which sets the direction of the halftone pattern; and the Shape, allowing you to change the dots to lines, diamonds, crosses, ellipses, or squares to create different patterns.
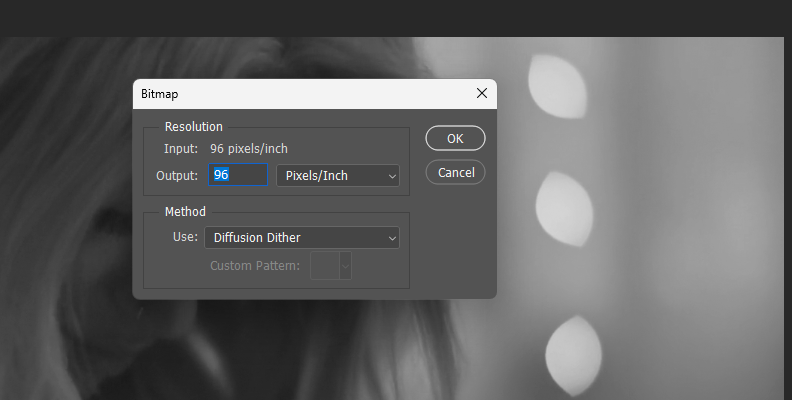
When you're done, click OK. You can click the filter from the layer panel to make adjustments to shape the halftone pattern for your image.
How to Make a Halftone Effect in Photoshop with Optics
Optics is a comprehensive tool for photo editing for professional photographers, digital artists, designers, and illustrators. It features filters and effects that can enhance your photography work, and it's compatible with Adobe Photoshop and Lightroom as a plug-in or can be used as a standalone photo editor.
If you’re new to Optics, get a free trial to follow this tutorial and explore all the capabilities that Optics opens for you.
-
Step 1: Set Up a Photoshop Document
Start a new project by importing the image into a new document. Right-click the image layer and select the option "Convert to Smart Object." It will allow you to make indestructible changes to the layer using the Optics plug-in.
-
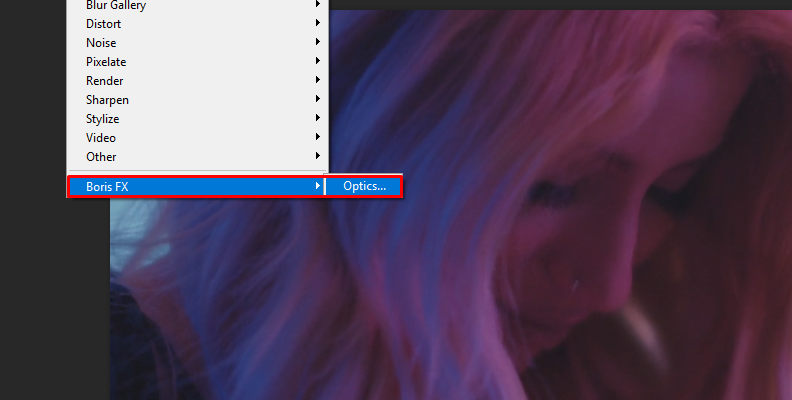
Step 2: Add the Optics Plug-in
Go to the Filter menu and find Boris FX, then click Optics. It will apply the Optics plug-in to the layer and launch the Optics user interface, automatically importing your image. Inside Optics, you have a library of filters below the preview window that you can explore and apply by selecting them from the list.
-
Step 3: Create a Color Halftone Effect
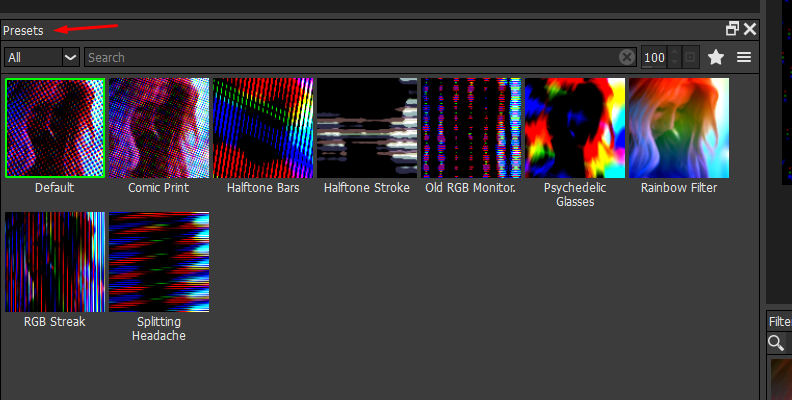
For a color halftone effect, browse in the Stylize category for the S_HalfToneColor and click on it to apply it to the current layer.

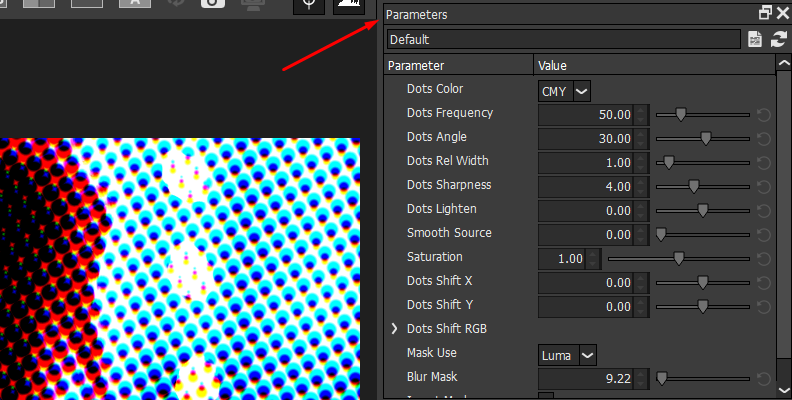
This filter creates a colored halftone pattern for your image. You can pick different presets from the preset library below the layer panel. Click one to preview it and modify it using the filter's settings in the parameters window.
In the Parameters window, choose the Dots color between CMYK (for classic cyan, magenta, and yellow) and RGB. Use the dot frequency to adjust the size of the dots and the dot angle for the direction, and change the appearance of the dots with the sharpness, lightness, smoothness, and saturation settings.
-
Step 4: Create a Grayscale Halftone Effect
If you prefer to make a grayscale halftone, pick the S_Halftone filter instead of the color filter. This filter creates a black-and-white dot pattern of your image. Just as with the previous filter, you can see the preset library and choose one to use or modify.
In the parameter windows, you can select whether you want the dots to be black over a bright background or white dots over a dark background. The remaining settings are very similar to those of S_HalfToneColor, allowing you to adjust the size and angle, as well as modify the sharpness, lightness, and smoothness of the dots.
Click Apply to close the Optics UI and return to Photoshop.
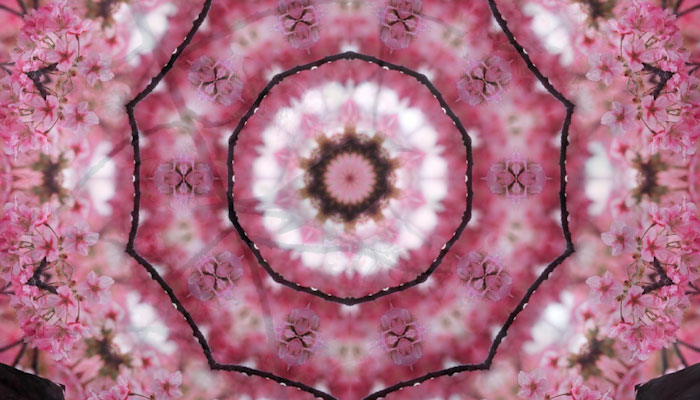
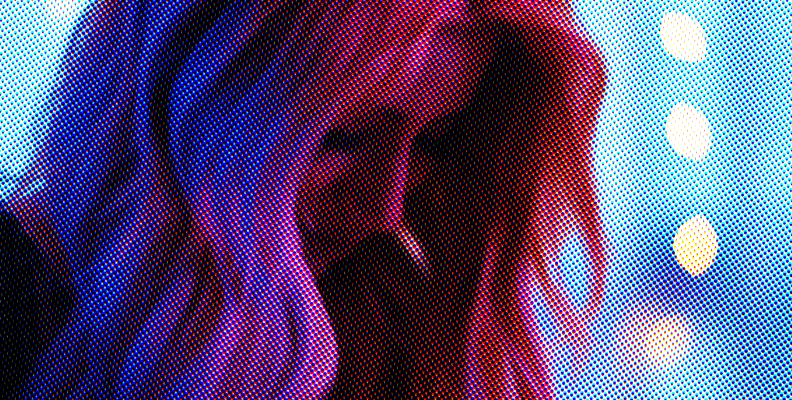
Before S_HalfToneColor:
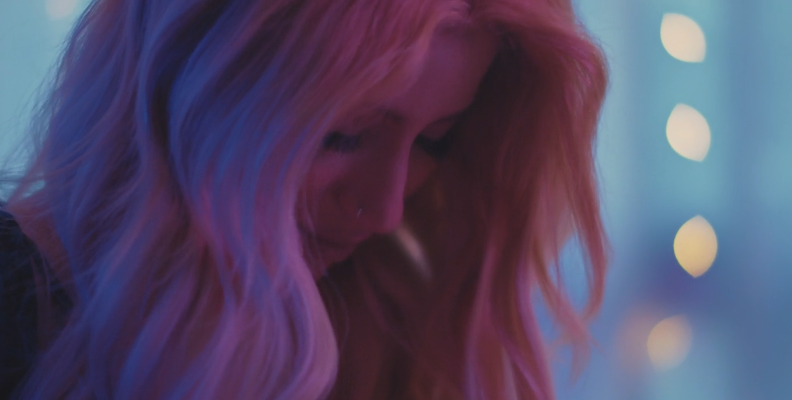
After S_HalfTone Color:
Final Words
Having the skill to create halftone effects is essential when working with printing materials because it allows you to produce digital designs that are ready for print. The halftone texture is also valuable as a creative look for photography and art. With Optics, you have the power to craft a halftone design quickly and with more accuracy.
Good luck!