


We're used to working with green or blue screens and use specialized software or background removal plug-ins to remove them, but what if you need to remove other colors? Luckily, you have a few options in Adobe After Effects, plus external plug-ins, to achieve this.
Whether you need to remove a black or white background because that’s the video you received or because you don’t have a green screen, this step-by-step guide will show you how to do it in a few simple steps.
Let’s dive in!
How to Remove White Background in After Effects

After Effects features several keying effects for removing backgrounds, including the usual green screen or any color of your choice. I'll show you a few methods for keying out white backgrounds.
Step 1: Import Footage
Import the video files with the white background you want to remove and drag it to the Timeline to create a new composition. Then import the other video you’ll use to replace the background.
Step 2: Use the Color Range Effect
We'll start with the Color Range effect. It's an easy-to-use Keying effect that lets you pick the key color to remove.
Select the layer of the image with the white background and click Effect > Keying > Color Range. Display the Effect Controls panel and use the dropper to select the white color from the image.

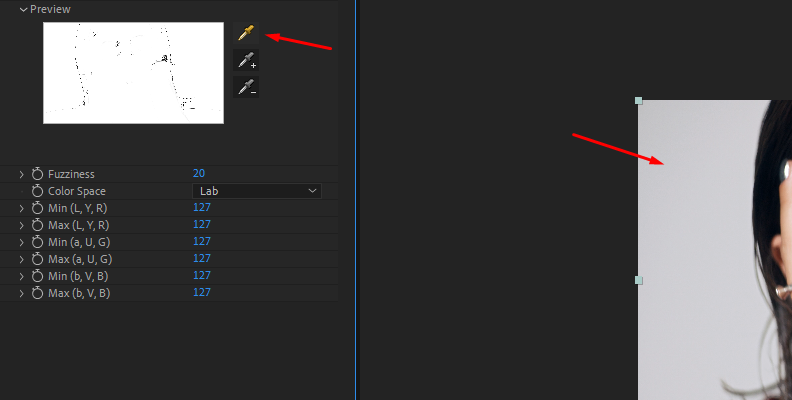
Using the dropper with the + symbol, you can add more color to the key to remove part of the white background affected by shadows or uneven lighting. Then, adjust the settings to fine-tune the keying.
Step 3: Using Keylight Effect
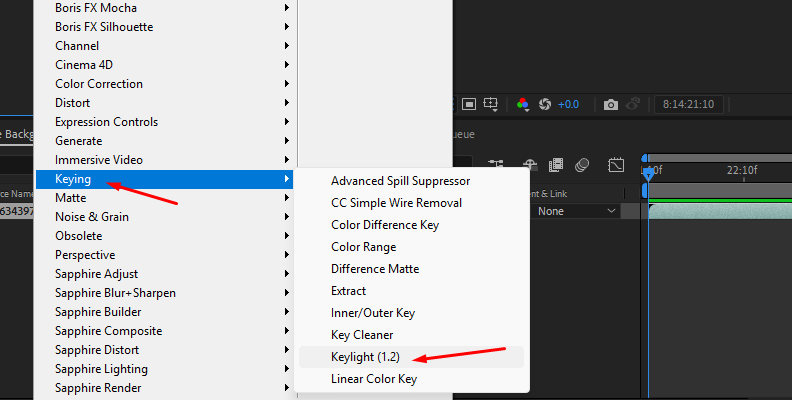
The next method is the Keylight effect. Apply Keylight to the video clip layer from Effect > Keying > Keylight.
Move to the Effects Controls panel and use the Screen Colour setting to pick the color to key out. You can use the dropper next to it to select the white color from the preview window.
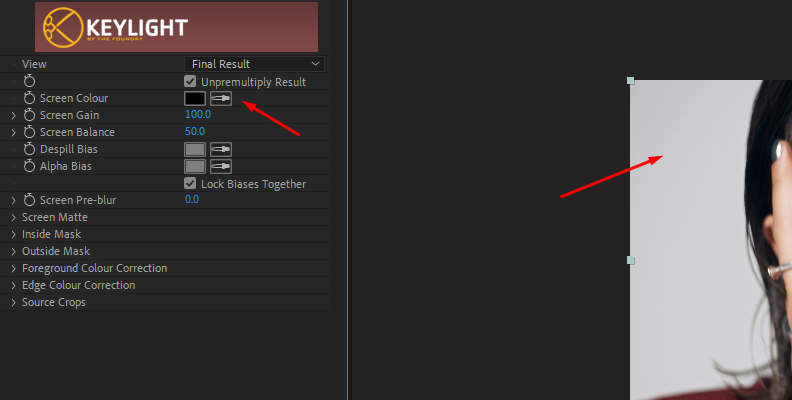
Use the Screen Gain and Screen Balance settings to fine-tune the keyer. You can adjust the matte further under the Screen Matte settings and the Inside and Outside Mask parameters.
Keylight offers color correction settings for the foreground and edges. Display the Foreground Colour Correction or Edge Colour Correction and enable the checkbox. Then, adjust the saturation, contrast, and brightness. For the edges, you can change the hardness and softness.
Preview the result to ensure the white background was removed correctly. Add a background layer or a solid to the composition to see if you need to refine the matte.
Step 4: Roto Brush Tool
When backgrounds are complex or not lit evenly, you will encounter more problems, and it will take longer to define the key color and refine the matte. A solution is to use the Roto Brush Tool and isolate the subject from the background.
Double-click the video in the layer panel and select the Roto Brush Tool in the top toolbar.
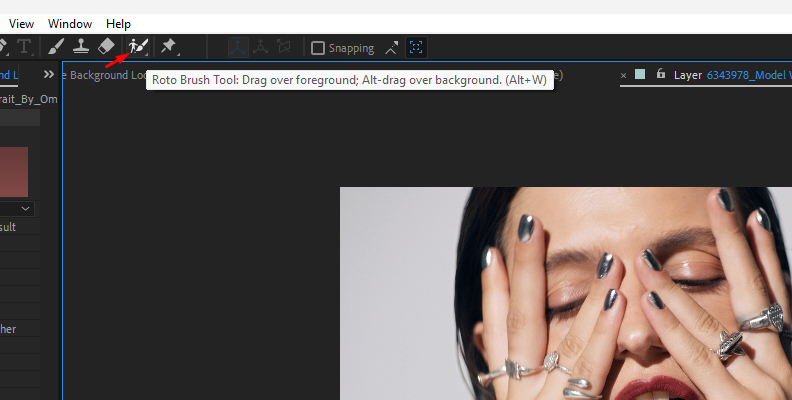
Adjust the brush size by pressing the CTRL button and dragging the cursor up or down to make the brush bigger or smaller.
Click to paint over the foreground to select your subject. After Effects will automatically define the mask with a purple outline. You can add more areas by painting or remove them by holding ALT + Click. When you hold ALT, the brush will turn red to paint over the areas you want to remove from the mask.
Click on the main composition panel and verify if the white background was removed successfully.

Then, refine the matte using the Roto Brush Matte settings if needed.
Remove White Background in After Effects Using Continuum's Primatte Studio
Primatte Studio is a Continuum chromakeying effect used for background removal. It accurately removes any green screen or background from your video, taking care of fine details such as hair and providing tools for manual cleanup to refine the matte.
The plug-in works natively within video editing and compositing software like Adobe After Effects to streamline and optimize your chroma keying workflow.
Step 1: Apply Primatte Filter
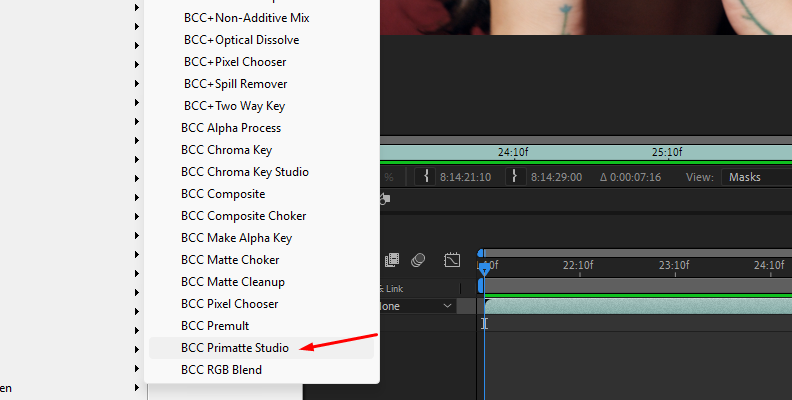
Select the video layer and go to Effects > BCC Key & Blend > BCC Primatte Studio.
The Effect Controls panel will have all the settings, but you can also use the Primatte Studio on-screen toolbar to ease and speed up your workflow.
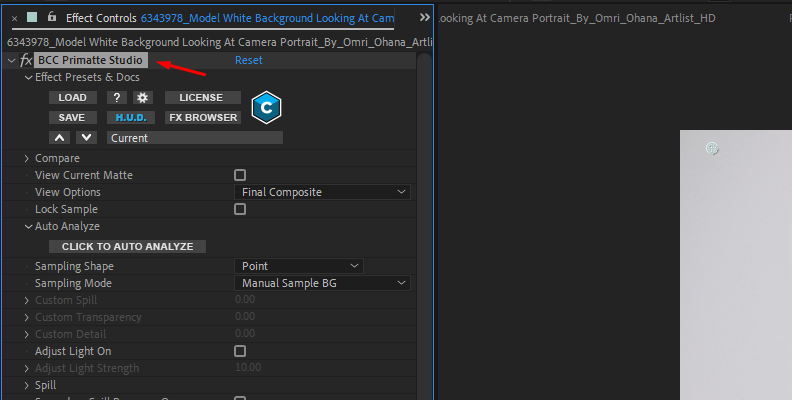
Step 2: Choose Sampling Mode
Normally, you would use the Auto Analyze button to generate the key automatically. However, since we want to remove a white background, it is best to use the Manual Sample BG option when you want to key out any color other than green or blue.
Click Manual Sample BG from the on-screen UI or set the Sampling Mode to Manual on the Effect controls panel. Then, select between the point or rectangle shape and click and drag over the background to choose the sample from the viewer.

Here are a few tips for working with complex backgrounds.
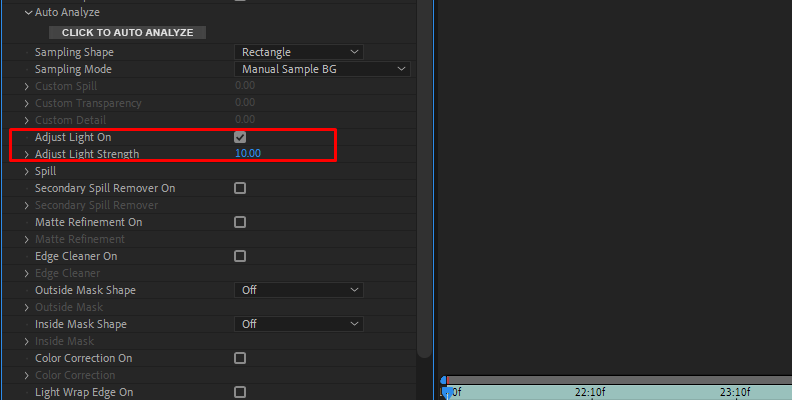
For unevenly lit backgrounds, enable the Adjust Light checkbox in the settings. This option will try to even the lighting to obtain a better key.
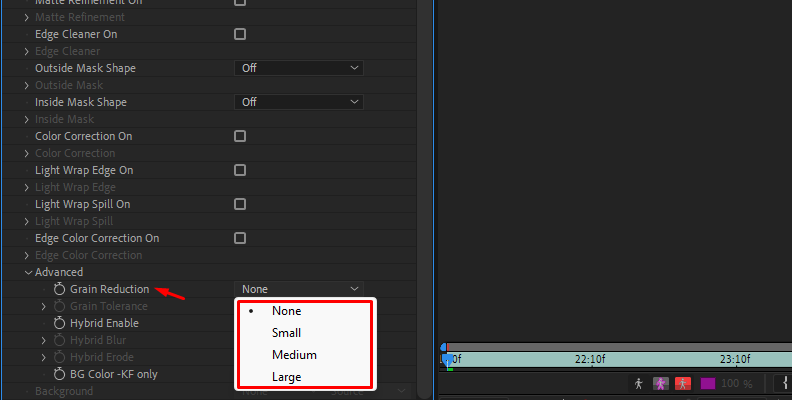
With grainy footage, go to the Advanced parameter and set a Grain Reduction option.
Step 3: Clean Up and Matte Refinement
To clean up the key, change the View Options to Matte Status.

Change the sampling mode to Clean BG Noise. Click and drag over the grey pixels to turn them into a transparent background. Once you clean the background, change the sampling mode to Clean FG Noise. If you see a section that should be in foreground and click over the grey pixels to make them white.
When cleaning, you can change the sampling shape to a rectangle to select larger areas.
If you want to keep other foreground objects, you can create a Mocha or After Effects mask to isolate them from the Primatte filter.
Step 4: Compositing the Final Result
To blend the composition with the new background, BCC Primatte Studio provides tools for color correction and lighting adjustments at the edges of the foreground. Click the checkbox for each option you need to enable the settings. In Color Correction, you can adjust temperature, tint, saturation, brightness, contrast, and gamma. In Light Wrap, you can adjust lightness, wrap color, and apply blend modes.
Final Words
You can now remove not just a green screen or black background but also key out any color. BCC Primatte Studio makes removing a background of any color easy and quick. Also, with Continuum, you get more filters and effects to take your compositions to another level, improve your work, and polish your video background removal skills.
Get Continuum today and unlock the power of Primatte Studio.
Good luck!
FAQ
How to Export Video in After Effects After Removing the Background
Once you finish your composition, go to Composition > Add to Render Queue. Double-click the Output Module and select the Output format and other settings. If you want to export the video with the transparency to use on different compositions, choose a format that supports alpha channel, like QuickTime, and select Channels RGB + Alpha. Click OK to close the window.
Select "Output To" to choose the destination folder to export the video, and click the Render button at the top right corner of the render panel.


