Mastering rotoscoping vs. masking is a crucial skill for editors who want to create dynamic animations, refine images, handle curves, and add precision to post-production tasks.
In this article, we'll break down the differences between rotoscoping and masking, explain when to use each technique, and outline the key steps for each.
What is Masking in Post-Production?
Masking is a video post-production technique that isolates, modifies, or conceals specific areas of a video frame. By creating a shape (or "mask") over a portion of an image, you can selectively apply effects without altering the entire frame.

Masks can be static or animated, depending on the complexity of the scene. Static masks define a fixed area using simple shapes, like rectangles or ellipses. Animated masks are more complex, as they adjust frame by frame to match the motion of an object. They are useful in cartoons, motion graphics, and visual effects (VFX), where elements need to move naturally within a shot.
-
When is Masking Used?
Masking is used for:
- Blurring faces or sensitive information, e.g., license plates or personal details.
- Color grading specific areas, e.g., brightening a subject while keeping the background darker, while maintaining accurate shadows and edges.
- Creating text or graphic reveals, e.g., having text appear from behind an object.
- Compositing effects, e.g., applying a vignette or removing unwanted objects by adjusting opacity and blending layers.
-
How Masking Enhances a Video
Masking gives you precise control over which areas of a frame are affected by an effect, improving the overall quality and storytelling of your video. It also helps you create smooth transitions, blend elements seamlessly, and refine complex shapes.
Masking is an essential technique in video editing. Features like the pen tool in editing software allow you to draw and refine masks for better manual control. Animated masks can also be paired with onion skinning and key frames to maintain smooth motion across multiple frames, making the process more efficient and visually appealing.
Some software, such as Adobe After Effects, offers additional masking techniques, like track matte, which provides another way to control a layer's visibility. Unlike traditional masking, where a mask is drawn directly onto a layer, a track matte uses a separate layer that is completely independent of other layers to create a precise cut-out effect. This is useful for complex or moving shapes that need to be masked accurately without manually adjusting the mask for every frame.
What are the Main Steps in Masking?
The key steps in masking are:
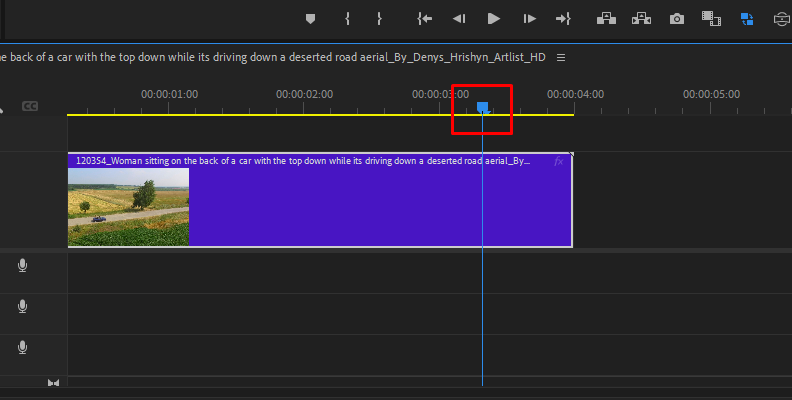
- Select the layer to mask: Identify which layer or clip in your timeline requires masking and position the playhead at the point you want to mask.
- Choose the masking tool: Most editing software includes a choice of masking tools, such as shape masks for simple shapes (e.g., rectangles or circles) or manual draw masks for custom shapes using a pen tool.
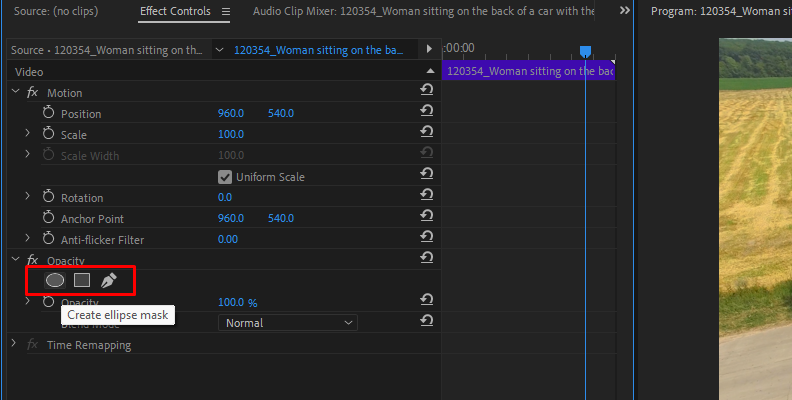
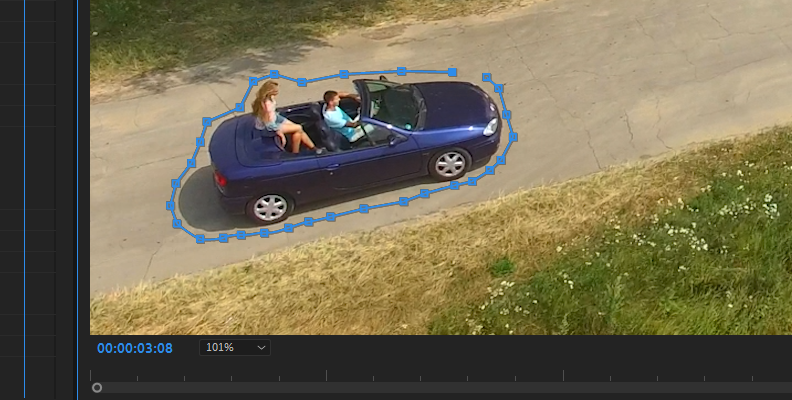
- Draw the mask over the target area: For a simple mask, position and resize a predefined shape over the area you want to mask. For custom masks, use a pen tool to draw precise points, creating a shape that follows the contours of your subject.
- Apply effects within the marked area: Once the mask is in place, you can (selectively) apply effects to the masked region, e.g., blurring a face, changing the color of the target area, or revealing text behind an object using a track matte.
- Animate the mask for moving subjects (optional): Use keyframes at different points in the timeline to adjust the mask's position, or use mask tracking (if available) to let the software automatically change the mask as the subject moves.
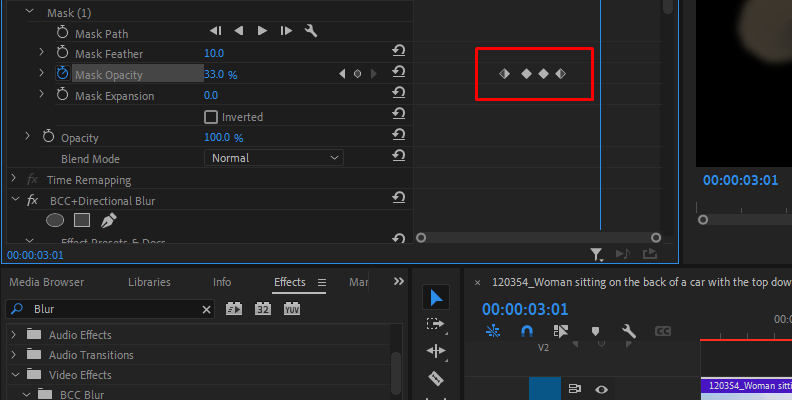
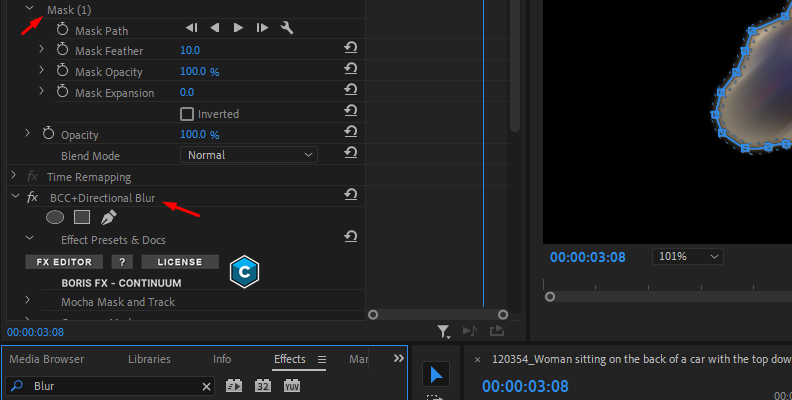
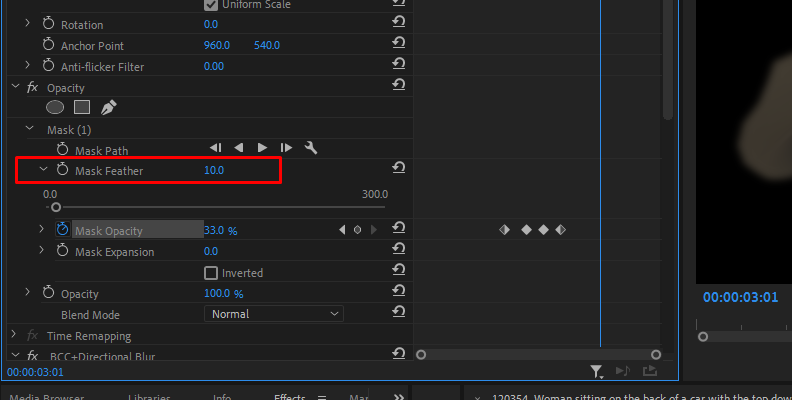
- Refine mask edges: Use feathering to soften the edges or adjust the opacity to control transparency levels.
- Review and make final adjustments.
What is Rotoscoping in Post-Production?
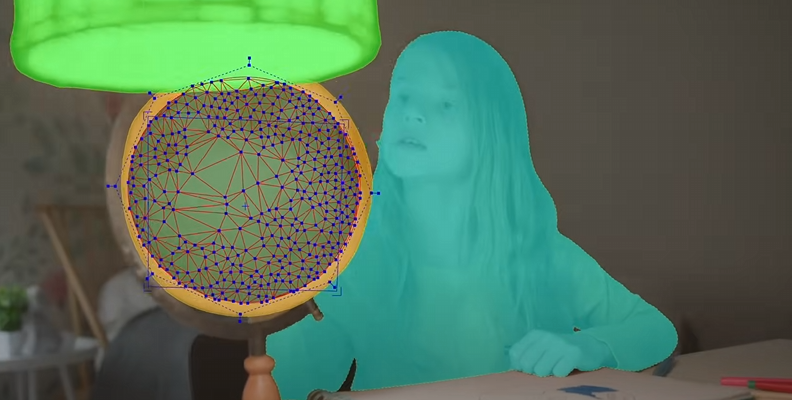
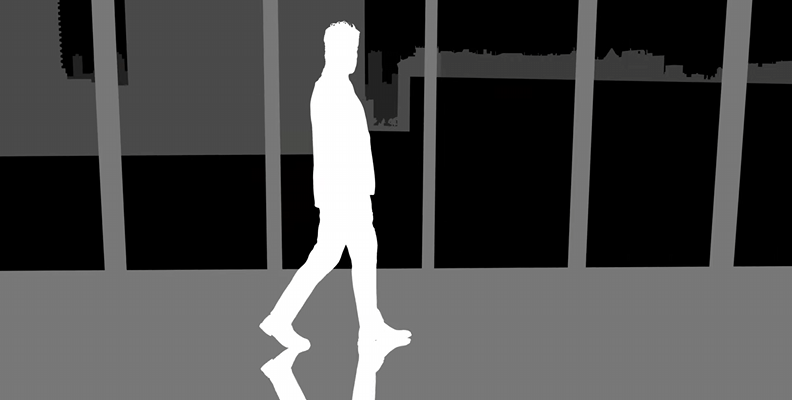
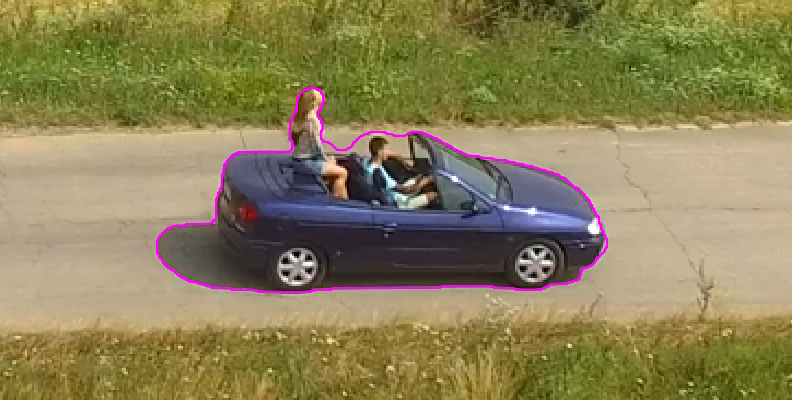
Rotoscoping is a video post-production technique that allows you to manually trace over objects in a video, frame by frame, to create an isolated cut-out. Unlike masking, which often relies on simple shapes and automatic tracking, rotoscoping is a more detailed process that follows the motion of complex shapes, such as a person's head, arms, or entire body.
Rotoscoping is essential when you need precise control over an object's edges and motion, especially in scenes where automated tracking tools struggle.
-
When is Rotoscoping Used?
Rotoscoping is used for:
- VFX, e.g., isolating a subject from the background to insert it into a different scene or to add special effects.
- Removing unwanted elements, i.e., extracting objects from a shot, such as removing boom mics, wires, or background distractions.
- Motion graphics and cartoons, i.e., creating animated masks for stylized effects, such as tracing live-action footage to generate animation (as seen in classic rotoscoped cartoons).
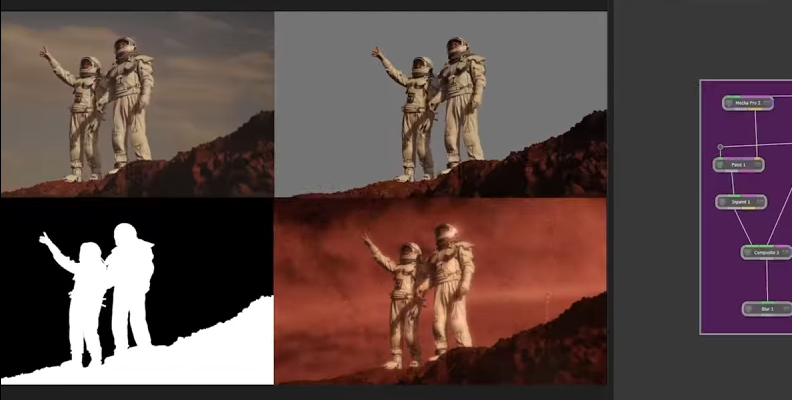
- Compositing, i.e., combining elements from other layers, such as integrating actors into CGI environments.
- VFX, e.g., isolating a subject from the background to insert it into a different scene or to add special effects.
-
How Rotoscoping Enhances a Video
Rotoscoping gives you precise control over which parts of a frame you modify, seamlessly integrating visual effects and compositing. Unlike automated masking, which can struggle with motion blur or irregular shapes, rotoscoping maintains accurate edges, even with complex movements such as hair, smoke, or transparent objects.
While rotoscoping is a powerful technique, it can be time-consuming, especially with detailed animation and intricate shapes. Software like Adobe After Effects and Mocha Pro offer advanced rotoscoping tools to streamline the task, allowing you to track movement, refine opacity, and apply matte adjustments for a more natural look.
What are the Main Steps in Rotoscoping?
The key steps in rotoscoping are:
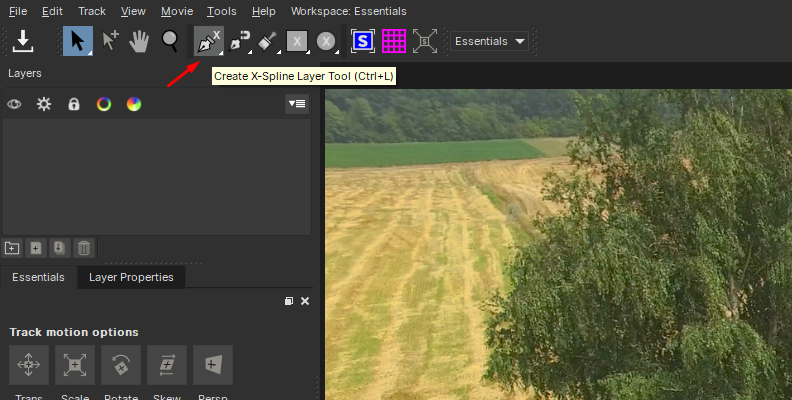
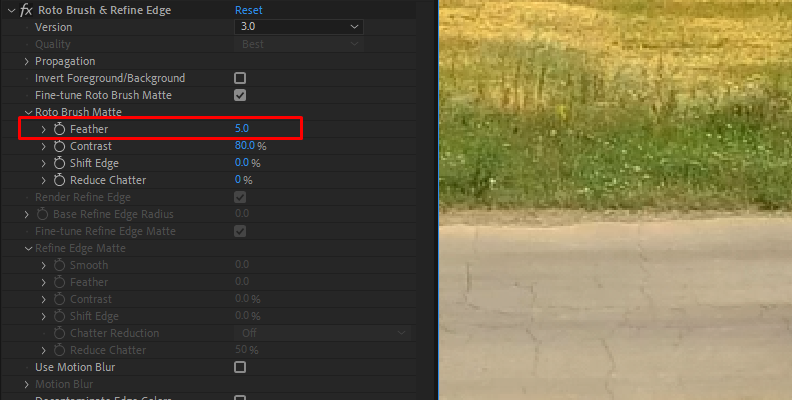
- Choose the rotoscoping tool: Depending on your VFX software, choose the tool that best fits your workflow, e.g., use the pen tool to draw a mask around an object manually, the Roto Brush (After Effects) to select a subject semi-automatically, or advanced motion and planar tracking with Mocha Pro and Nuke.
- Draw the initial mask: Focus on key features such as the head, arms, or edges, and use curves to create smooth contours. Avoid overly complex shapes at the start.
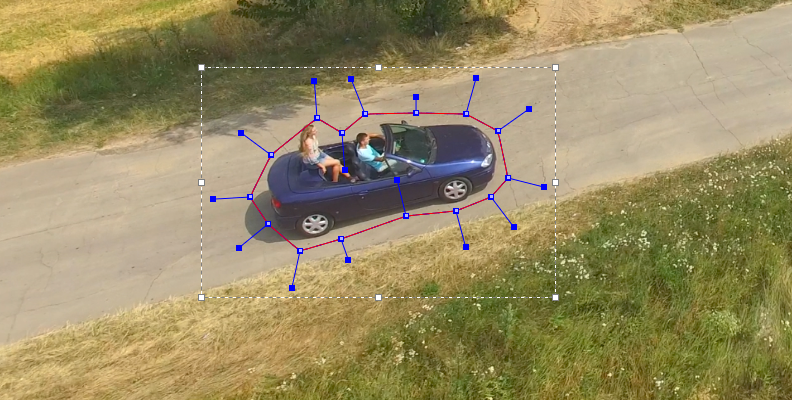
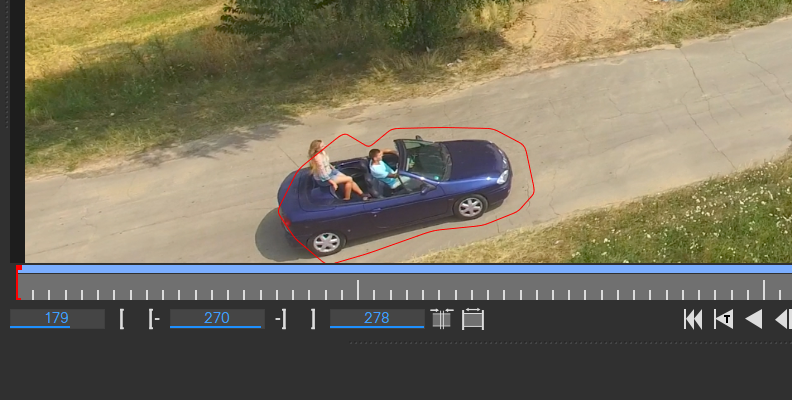
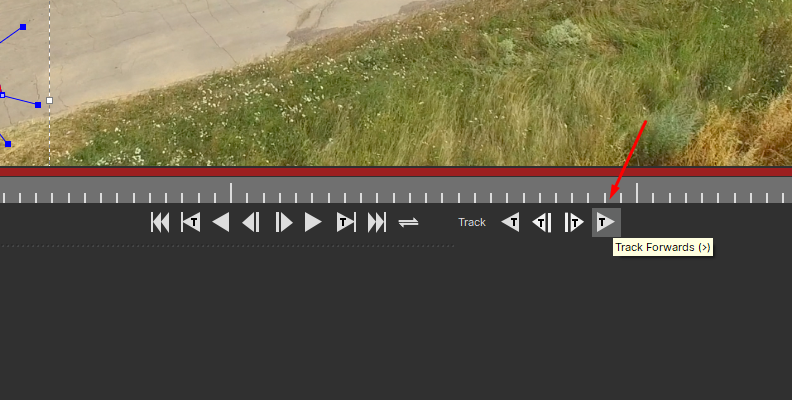
- Animate the mask: Adjust the mask frame by frame to keep it aligned with the subject. Use onion skinning (if available) to see previous and next frames, helping you maintain smooth motion.
- Refine the edges and motion: Use feathering to soften harsh edges, adjust opacity to integrate the rotoscoped element with other layers, and edge tracking to ensure smooth transitions.
- Track motion and apply adjustments: Use motion tracking software, such as Mocha Pro or After Effects, to help the mask follow movement naturally. Manually adjust if needed.
- Review and final cleanup.
Difference Between Rotoscoping and Masking in Post-Production
Both rotoscoping and masking are essential techniques for isolating, modifying, or concealing parts of a frame, but they differ in their process, complexity, and application. Masking is a quicker, shape-based approach, while rotoscoping is a manual, frame-by-frame method for handling complex motion and detailed edges.
Here are five key differences between rotoscoping and masking:
-
Process Complexity
Masking uses simple shapes, such as rectangles and ellipses, or custom-drawn masks to isolate specific parts of a video. Rotoscoping is a manual, frame-by-frame process involving drawing and adjusting masks over time to follow an object's motion precisely. It's more time-consuming but is more accurate when tracking complex shapes like hair, smoke, or moving arms.
-
Handling Motion and Animation
Masking is suited for static or simple motion, often requiring keyframes to animate adjustments. Rotoscoping allows animated masks that closely follow the movement of subjects, making it ideal for VFX compositing and motion graphics.
-
Compositing and Effects
Masking is commonly used for blurring, color grading, and reveals (e.g., text appearing from behind an object). Rotoscoping is used for cutting out moving subjects, placing them in different backgrounds, or applying detailed VFX, such as adding realistic shadows or reflections.
-
Edge Refinement and Detail Control
Unless manually refined, masking can struggle with soft edges, motion blur, or intricate details. Rotoscoping allows for precise edge refinement, often using opacity adjustments, feathering, and motion blur tools to create a seamless effect.
-
Software and Workflows
You'll find masking in general video editing software, such as Final Cut Pro, using tools like the pen tool to isolate elements. Rotoscoping is typically found in more advanced video editing software such as Adobe After Effects, Mocha Pro, and Nuke, often including features like onion skinning to track subtle frame-by-frame changes.
Final Thoughts
Understanding the difference between rotoscoping vs. masking is essential for mastering post-production techniques that involve animation, visual effects, and precise image control. Choosing the right method will give you smoother workflows, cleaner effects, and more polished videos.