Track Matte is a feature in After Effects used for image and video compositing, which allows you to create high-quality visual effects for videos. This tool may be unknown to some users, but it's super intuitive and can help you achieve stunning effects.
Today, you will learn how to use track matte in After Effects for compositing, and later, I will show you how Boris FX Matte Assist ML can accelerate your rotoscoping and matte generation process.
Let’s dive in!
What are Track Mattes in After Effects?
Track matte in After Effects is a feature that allows you to make a matte based on another image, video, or graphic layer to create compositions, fills, text reveals, collages, and other creative effects.
The track matte layer acts as a cutout for the image using the track matte data and remains independent from the other layers in the stack. The transparency values are obtained from the alpha channel or luminance of the track matte layer.
How to Use Track Matte in After Effects
I'll guide you through using the track matte in After Effects. While simple, locating the Track Matte feature among all the tools and menus can be tricky.
Step 1: Create a New Composition
Open a new project in After Effects and create a new composition. Import your image and video files, drag them to the timeline, and arrange them in your composition. For the Track Matte feature in After Effects to work, you need at least two layers in your timeline, one for the track matte layer and the second layer that uses the track matte layer.
Step 2: Create a Layer to Become the Track Matte
Right-click the layer panel, select New, and then choose to add text or a solid layer. Name the layer clearly so you can easily identify it among the other layers when selecting it as the Track Matte layer, especially when working with multiple assets.
You don't need to place the track matte layer as the top layer. Any layer in the composition can work as the track matte layer and be used on multiple layers.
Step 3: Select the Track Matte Layer
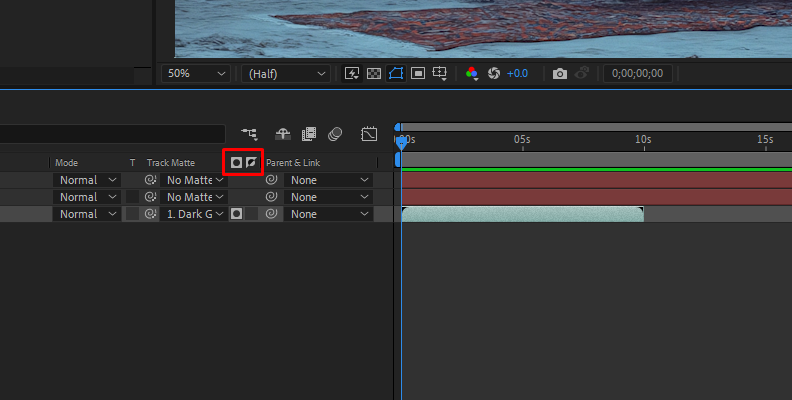
If you don’t see the Track Matte feature in After Effects, click the Toggle Switches/Modes button at the bottom of the layer panel. When the columns change, you’ll see one that reads Track Matte next to the blending modes.
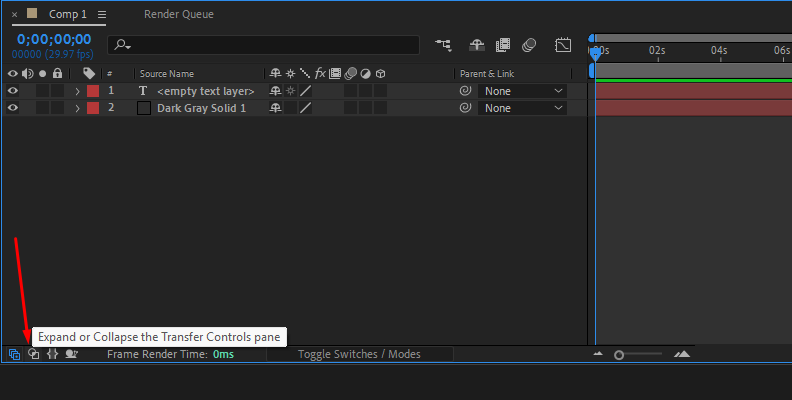
If you don't see the Toggle Switches/Modes button, right-click on the timeline header, select Columns, and enable "Modes."
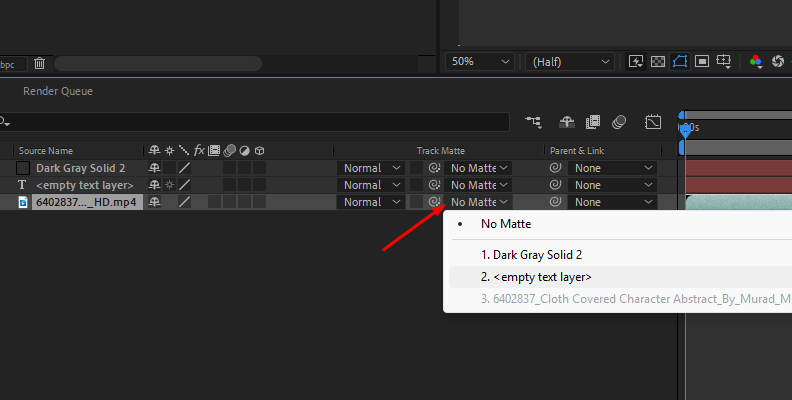
Select the layer where you want to use the Track Matte layer and click the dropdown menu under Track Matte. Select the layer you want to use as the Track Matte layer (the solid or text layer) and select it from the list. You can also use the pick whip to choose the Track Matte layer.
Step 4: Choose the Type of Matte
Adjacent to the Track Matte column, you will find two switches that activate when you select a layer as a track matte. These switches specify the matte type to use, and you can choose between Alpha matte and Luma matte to outline the transparency area and indicate whether you wish to invert the matte.
When you select the Alpha Matte option, the layer will use the image’s opacity to define the transparent areas using the information from the alpha channel. The layer will be opaque when the alpha channel pixel value is at 100%, and inverting the matte will invert the transparency of the track matte.
The Luma matte uses the luminance or brightness value from the Luma channel to define the transparency of the track matte layer. You can invert the Luma matte to explore other looks.
Play with the two matte modes to find interesting and creative effects and animations for your composition.
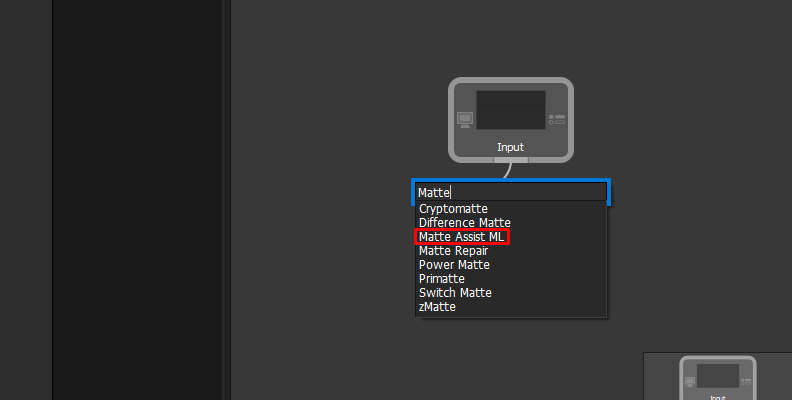
Using Silhouette's Matte Assist ML in After Effects
Matte Assist ML offers a faster method for creating mattes for compositing. It's available as a node in Silhouette and other Boris FX plug-ins, such as Mocha Pro, which utilizes the Mask ML and Matte Assist ML technologies to quickly create and track mattes generated from a single frame in the new Matte module.
We'll now learn to use Matte Assist ML in Silhouette and Mocha Pro to create and animate mattes quickly.
Matte Assist ML in Silhouette

Step 1: Create a New Project
Start a new video project, create a new composition, and import your files to the project. Drag the video and media files to the timeline panel. Ensure the video is set to full resolution in the viewer.
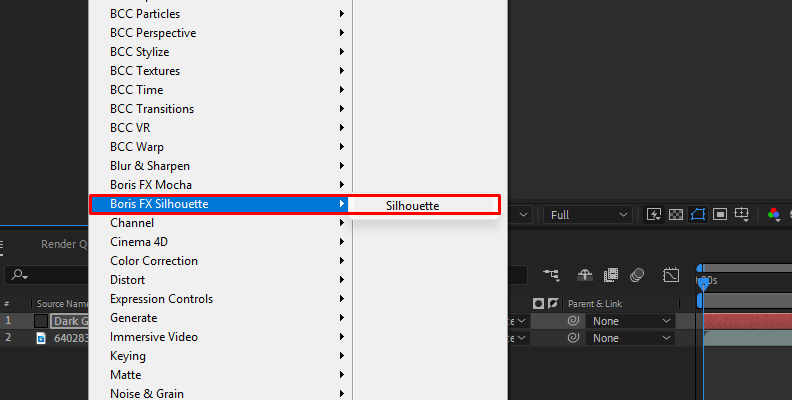
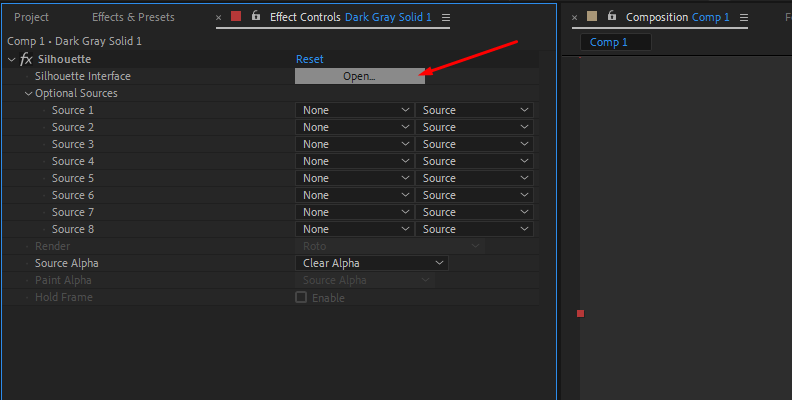
Step 2: Add the Silhouette Plug-in
Search for the Boris FX Silhouette effect and apply it to the layer you want to create a matte. In the effect controls panel, click the "Open Silhouette Interface" button to launch Silhouette. Create a new Silhouette project, leaving the default settings.
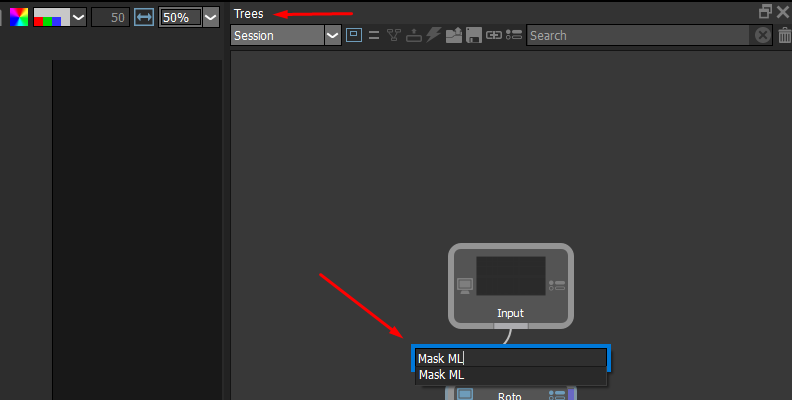
Step 3: Add the Mask ML Node
Delete the default node, click the Trees panel, press the tab to search for the Mask ML node, and add it to the project. Connect the Mask ML to the source and output nodes.
To create the matte, click the subject you want to isolate from the image. With a left click, you can add areas to the matte and remove them with a right click.
Step 4: Add the Matte Assist ML Node
Click the Trees panel and press Tab to search Matte Assist ML and add the node.
Connect it between the Mask ML node and the Output node, ensuring the Mask ML and Matte Assist ML are connected through the Input/Output and Data, so the Matte Assist ML node can receive the matte information from the Mask ML correctly.
Select the Matte Assist ML node and set Mask Source as Input Alpha. Play the sequence and wait for Matte Assist ML to automate the animation process. You can refine the matte by creating additional keyframes for the Mask ML node.
Step 5: Render
Once you have generated and animated the matte, go to File > Save Project and close the Silhouette UI. You will return to After Effects, where you can use the new matte data in your composition.
Matte Assist ML in Mocha Pro
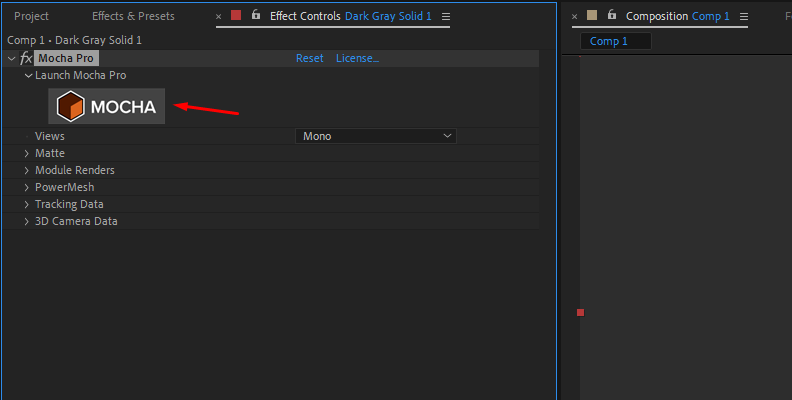
Step 1: Apply Mocha Pro Plug-in
In After Effects, search for the Boris FX Mocha Pro effect and drag it to the layer where you want to create a matte. Then, click "Launch Mocha UI" in the effect controls panel.

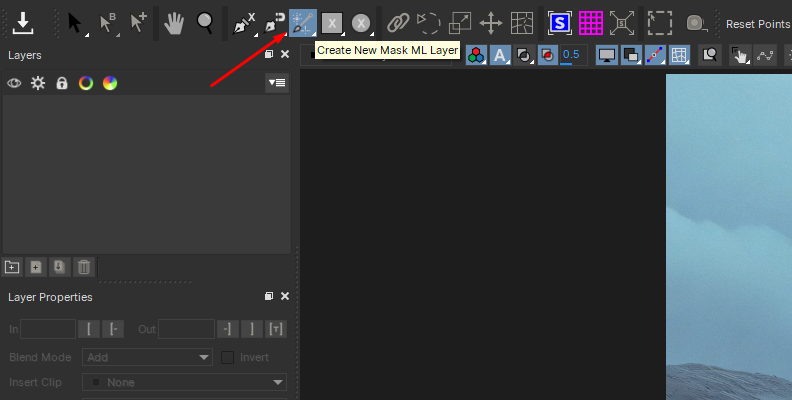
Step 2: Create a Mask Layer
Select the Brush object powered by Mask ML, and click on the subject to isolate it. Then, choose the Pick Tool to convert the mask into a spline layer.
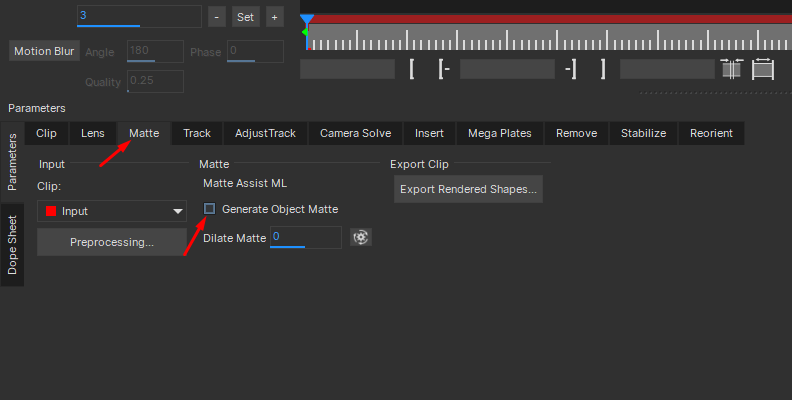
Step 3: Use Matte Assist ML
Select the Matte module (in the Classic workspace) and enable "Generate Object Matte." Then, render the video. With Matte Assist ML enabled, Mocha Pro will auto-animate the original mask throughout the video.
Save and close the Mocha Pro project to return to After Effects. In the effect controls panel, check the Apply Matte option in the Mocha Pro settings to use the matte generated in Mocha Pro.
Final Words
Boris FX Matte Assist ML makes masking and rotoscoping sessions less stressful and tedious: it helps you generate a matte from any still image or video and automates the tracking and animation process to save time.
Matte Assist ML is included in the Silhouette and Mocha Pro plug-ins for After Effects, which speed up masking and rotoscoping work.
Good luck!
FAQ
When to Use Track Mattes in After Effects
You can use track mattes in After Effects to employ an image as a cutout for another layer, using the alpha channel or luminance to define transparency. It’s especially useful when the image you want to use as a track matte does not have an alpha channel.