
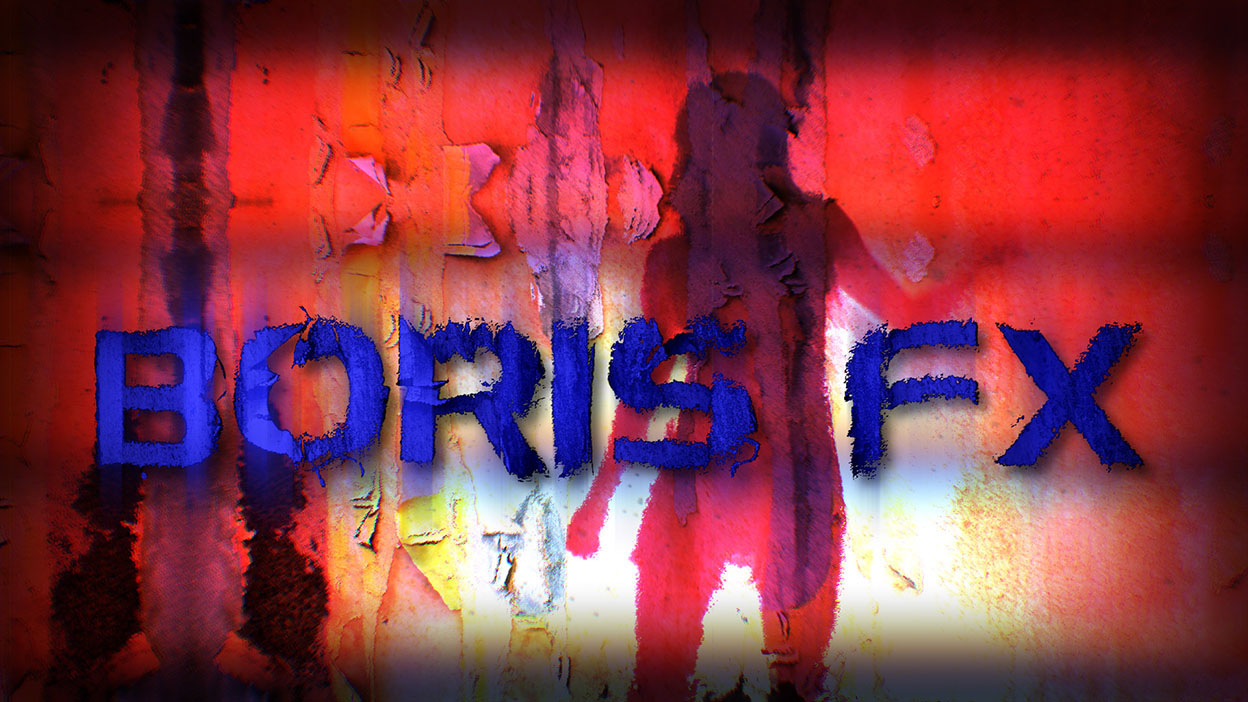
The BCC Grunge filter combines procedural algorithmic methods with real photographic image textures that can be used on titles to create unique grungy, degraded, torn-up, or melting looks. These same effects can be applied to background plates.
Function
Presets and Common Controls
BCC filters come with a library of factory installed presets plus the ability to create your own custom presets and preview them with the BCC FX Browser™.
BCC filters also include common controls that configure global effect preferences and other host-specific effect settings.
For more information about working with presets and other common controls, Click Here.
Load / Save Preset Mechanism
The built-in load save mechanism is used to access the factory installed or user generated presets.
**Use Texture:**Enable to composite a selected texture image over the input. The texture image file is selected from the Textures pop-up. When disabled the other Grunge operations are applied to the original source image instead of to the texture-source combination.
**Textures:**Pop-up menu for selecting from installed textures. This filter includes a series of factory installed photographic textures that can be used to create the grunge look. Additional texture files may be added to the filter by placing them into the following directory:
Mac : Macintosh HD/Library/Application Support/Grunge Texture/
*Win : C:\Program Files\Boris FX,Inc\Grunge Texture*
Images added to this directory will appear in the filter Textures menu the next time the host application is launched.
This filter includes textures that were created by the following photographers:
Dustin Schmieding
Caleb Kimbrough
http://lostandtaken.com/gallery
Apply Group
A built-in set of Apply modes can be used to blend the selected texture with the filtered source input. The selected apply mode can be mixed back with the normal apply mode to create unique looks.
Apply Mode: Menu containing a listing of 27 different apply modes.
Apply Mix: Specifies the amount of blending between the selected apply mode and the normal mode.
Color Group
Use to refine the basic color properties of the source+texture combination.
**Color On:**Enable/Disable the color correction features and access the feature’s parameter controls.
Brightness: Positive values brighten the image, negative values darken the image.
**Contrast:**Positive values increase contrast in the image, negative values decrease contrast.
Saturation: Positive values increase saturation in the image, negative values decrease saturation.
**Tint Color:**Set the tint color.
Tint Amount: Use to set the amount of color tinting that is applied to the image.
Transformation Group
The controls in this group modify the geometric transforms applied just to the texture and do not affect the geometry of the filtered source clip. Note that when geometric transformations cause the texture to fail to fill the clip region, the texture is seamlessly tiled to ensure the entire clip is covered.
Position XY: Use to set the position of the texture along the XY axis.
Rotation: Use to rotate the image around the Z axis.
Scale Lock to X: When checked, locks the Y scale transform to the X scale transform values.
Scale X: Use to scale the texture along the X axis (or XY if Scale Lock to X is enabled).
Scale Y: Use to scale the image along the Y axis independently of the X axis.
Opacity: Use to set the opacity of the texture.
Use Source Alpha: When checked, restricts the filter result to the confines of the image’s alpha channel.
Displacement Map Group
The controls in this group are used to distort the filter result and can, for instance, create animated ripped or torn textures. The Displacement Map distortion works by using the channel values in a map layer to specify how much to distort the matching pixel in the main layer. By default, the selected image from the Textures group is used as the reference map to distort the image, but any layer from the host can be used as the basis for image distortion.
Displacement Map on: Enable/Disable this feature and access the feature’s parameter controls.
Source: Specify which image is modified by the distortion.
- Composited: Apply to the combined source + texture result.
- Texture: Apply just to the texture.
- Source: Apply just to the original source clip.
Map: Specify which image is used as the reference map which defines the amount/direction of the distortion.
- Composited: The combined source + texture result defines the distortion map.
- Texture: The texture image alone defines the distortion map
- Source: The source clip alone defines the distortion map.
- Layer: An alternate host layer defines the distortion map.
Layer: When the Map is set to use an alternate host layer, this menu defines which host layer will be used as the distortion map.
Lock To Scale X: When checked, locks the Layer Y scale transform to the Layer X scale transform values.
Layer Scale X: Use to scale the displacement map layer along the X axis (or XY if Scale Lock to X is enabled).
Layer Scale Y: Use to scale the displacement map layer along the Y axis.
Layer Pattern: Determines how the displacement map layer edge regions are handled if the scaled map layer is smaller than the full frame.
- None: No edge handling is applied and regions outside the layer map boundaries are treated as empty.
- Tile: The layer map is tiled to fill in the empty regions.
- Mirror: The layer map is mirrored to fill in the empty regions which ensures smooth transitions along the edge boundaries.
Channel X: Specifies which channel in the displacement map is used to define the distortion amount in the X direction.
Amount X: The magnitude of the distortion in the X direction.
Channel Y: Specifies which channel in the displacement map is used to define the distortion amount in the Y direction.
Amount Y: The magnitude of the distortion in the Y direction.
Edge Type: Controls the handling of distorted regions that extend outside the main image edges.
- None: No special edge treatment is applied and regions outside the image boundary are treated as transparent.
- Repeat: Boundary pixels are repeated off the edge which can be used to ensure that transparency does not creep into the final result when applying Grunge to full frame footage (as opposed to titles or other alpha objects).
Bump Map Group
The controls in this group add a 3D bump map look to the result. The bump can be set to use the combination of the source input / texture map composite or you can use any layer from the timeline.
Bump Map on: Enable/Disable this feature and access the features parameter controls.
From Layer: When set to None the source + texture combination is used to define the bump map. When set to an alternate host layer, that layer will then define the bump map.
Lock To Scale X: When checked, locks the Layer Y scale transform to the Layer X scale transform values.
Layer Scale X: Use to scale the bum map layer along the X axis (or XY if Scale Lock to X is enabled).
Layer Scale Y: Use to scale the bump map layer along the Y axis.
Layer Pattern: Determines how the bump map layer edge regions are handled if the scaled map layer is smaller than the full frame.
- None: No edge handling is applied and regions outside the layer map boundaries are treated as empty.
- Tile: The layer map is tiled to fill in the empty regions.
- Mirror: The layer map is mirrored to fill in the empty regions which ensures smooth transitions along the edge boundaries.
Use Alpha: Enable to use the source image’s alpha channel as a mask for the filter, so the texture appears only in the opaque regions of the source. If this option is deselected, the source image’s alpha channel is ignored.
Height: Determines the height of the bump map used to create the texture of the bricks.
Smoothness: Adjusts the amount of blur applied to the bump map. Higher values produce more blur, which tends to reduce the amount of detail and noise in the filtered image.
Light Type: Determines the type of light source.
- Point: combines both focused (specular) and diffuse light. You can use this Light Type to create the appearance of a shiny surface lit by a point light source.
- Distance: creates a non-directional infinitely distant diffuse light, similar to sunlight.
- Spot: creates the look of a traditional theatrical spotlight. Spot creates a small spot of intense light whose falloff can vary.
Light XY: Controls position the light source in space by moving the light parallel to the image plane along the X and Y axes.
Light Z: Positions the depth of the light source relative to the image plane. A value of 100 places the light one source width above the image plane. Light Z can be negative, which places the light behind the image plane. If Light Z is negative, the light is seen only if the object is rotated or displaced so that all or part of it is behind the light source (that is, the light source always points in toward the object, never out at the viewer).
Light Intensity: Controls the intensity of the light.
Light Color: Controls determine the color of the light.
Spot XY: Controls set the X and Y coordinates for the point at which the spotlight is aimed. Unlike the X and Y Light controls (under the Light Type menu), adjusting the Spot parameters does not change the shape of the light.
Spotlight Angle: Sets the angle of the light. This is analogous to focusing the light. Decreasing values create a smaller, more focused light.
Spotlight Falloff: Controls the relative softness of the edges of the lit region. Leave Spotlight Falloff at its default setting if you prefer a soft edge, or decrease this value to harden the edges of the lit region. Spotlight Falloff removes light from the edges of the lit region. To maintain the size of the region while softening the edges, you need to increase Spotlight Angle accordingly.
Use Texture Color: Select to use the color values from the underlying track to which the filter is applied. Deselect this checkbox to use the luminance values only. When this checkbox is deselected, the Color control below sets the color that is used with the luminance values.
Color: When Use Texture Color is deselected, this sets the color that is used with the luminance values.
White in Specular: Increases the amount of white in the specular light. Increasing this value can create a more metallic surface effect. This parameter is only useful when Specular Intensity has a value greater than 0.
Ambient Intensity: Adjusts the total amount of diffuse light on the image. The default setting of 100 does not add or subtract ambient light from the source image. Decreasing this setting makes the image darker before the other lights are applied. Ambient light illuminates or darkens the image evenly, and is unaffected by any other lighting parameters.
Diffuse Intensity: Determines the amount of non-directional diffuse light applied to the object. Increasing Diffuse Intensity brightens the object uniformly.
Specular Intensity: Simulates lighting a glossy surface from a point source, creating a small spot of intense light whose falloff can vary. Increasing this value adds reflected light to the surface.
Shininess: Controls the rate at which the Specular light falls off from the center of the lit region. A higher Shininess value creates a more concentrated highlight, simulating a shiny, highly reflective surface. A lower Shininess value spreads light more evenly throughout the lit region, simulating a rougher, less reflective surface.
Erosion Group
The parameters in this group enable you to completely or partially erode the texture and / or shape of the source over time. The erosion pattern is defined by an erosion map layer which can be taken from the source/texture or from a separate host layer.
Erosion On: Enable/Disable this feature and access the feature’s parameter controls.
Source: Specify which image is modified by the erosion.
- Composited: Apply to the combined source + texture result.
- Texture: Apply just to the texture.
- Source: Apply just to the original source clip.
Map: Specify which image is used as the erosion pattern map.
- Composited: The combined source + texture result defines the erosion pattern.
- Texture: The texture image alone defines the erosion pattern.
- Source: The source clip alone defines the erosion pattern.
- Layer: An alternate host layer defines the erosion pattern.
Layer: When the Map is set to use an alternate host layer, this menu defines which host layer will be used as the erosion pattern map.
Lock To Scale X: When checked this locks the Layer Y scale transform to the Layer X scale transform values.
Layer Scale X: Use to scale the erosion pattern map layer along the X axis (or XY if Scale Lock to X is enabled).
Layer Scale Y: Use to scale the erosion pattern map layer along the Y axis.
Layer Pattern: Determines how the erosion pattern map layer edge regions are handled if the scaled map layer is smaller than the full frame.
- None: No edge handling is applied and regions outside the layer map boundaries are treated as empty.
- Tile: The layer map is tiled to fill in the empty regions.
- Mirror: The layer map is mirrored to fill in the empty regions which ensures smooth transitions along the edge boundaries.
Channel: Specifies which channel in the erosion pattern map is used to define the erosion amount.
Amount: The amount of erosion. It can be animated to 100 to make the image disappear completely.
Smoothness: Defines the smoothness of the transition between eroded and non-eroded regions.
Softness: Softens the erosion pattern map to create smoother and less abrupt changes in the erosion pattern across the image.
Inverse: Inverts the erosion pattern map so the erosion progresses in the opposite order – i.e. from light to dark parts of the map instead of dark to light.
Shake Group
The parameters in this group can be used to shake the texture or the composited result along the X and Y axis. The random feature can be used to create glitchy fx that apply randomized movement to the result.
Shake On: Enable/Disable this feature and access the feature’s parameter controls.
X Position: Amount of shaking in the X direction.
Y Position: Amount of shaking in the Y direction.
Speed: Controls the speed of the shaking.
Random Amount: Control the amount of randomness that appears in the shaking progression with higher values introducing more sudden, glitchy looking jumps in the image position.
Source Shake On: Control whether the source clip shakes along with the texture or whether the source remains stationary and only the texture shakes.
Source Outside: Controls the edge treatment applied to the source image.
None: No special edge handling is applied and regions outside the image boundary are treated as transparent.
Mirror: The source image is mirrored to fill in edge regions which is useful in maintaining full opacity when applied to normal video clips as opposed to text or other alpha objects.
Motion Blur On: Enable/Disable motion blur in the scene.
Shutter Angle: Specify how widely spaced the motion blur samples are in time.
Shutter Phase: Specify the time offset of the motion blur samples relative to the current frame time – trailing, centered, leading, or values in between.
Samples Per Frame: Specify the number of distinct motion blur samples per frame.
Flicker Group
The flicker feature generates luma flicker in the result. The flicker bias can be set to only brighten, only darken, or flicker both brighter and darker. The random feature can be used to create glitchy fx that apply randomized light flickering to the result.
Flicker On: Enable/Disable this feature and access the feature’s parameter controls.
Type: Controls the flicker bias.
- Brighter: The flickering will only increase the brightness of the image.
- Darker: The flickering will only decrease the brightness of the image.
- Both: The flickering will introduce both increasing and decreases the brightness of the image.
Amount: Controls the size of the luma changes introduced by the flickering.
Speed: Defines the speed of the flickering.
Random Amount: Controls the amount of randomness that appears in the shaking progression with higher values introducing more sudden, glitchy-looking jumps in the image position.
Scratches Group
The controls in the scratches group provide a way to introduce randomized scratches through the result.
Scratches On: Enable/Disable this feature and access the feature’s parameter controls
Density: Determines the number of scratches in the effect. Higher values add more scratches.
Lifetime: As the effect progresses, each scratch line moves around horizontally for a period of time, then disappears. This control sets average amount of time a scratch can will remain onscreen.
W****idth: Adjusts the thickness of the scratch lines. Higher values produce thicker, less eroded lines.
Opacity: Sets the peak opacity of the scratch lines.
Color: Sets the color of the brighter scratches.
Speed: Adjusts the rate at which scratches move horizontally. Increasing positive values move the scratches faster. Decreasing negative values slow the scratches.
Min Length: Specify the minimum length of the scratches as a percentage of the image height.
Max Length: Specify the maximum length of the scratches as a percentage of the image height.
**Random****Seed:**Determines which value is input to the random number generator used for generating the random pattern of scratches. Adjust this value when you like the overall effect but want to re-randomize the scratch lines.
Orbs Group
The orbs group is used to add randomized spots into the image, similar to the effect of water spots on the surface of a camera lens.
Orbs On: Enable/Disable this feature and access the feature’s parameter controls.
Shake On: When the main Shake group is enabled, this controls whether or not the orbs move along with the general shaking or remain stationary.
Seed: Used to set the random seed starting point of the orb position on the lens.
Shape: Used to set the shape for the orbs and offers the following 3 options:
- Circle: Generates circular orb shapes.
- Polygon: Generates polygonal orb shapes.
- Custom Layer: Overlays a custom layer texture on the orbs. The texture layer is selected in the Custom Layer pop-up.
Polygon Sides: Used to set the number of sides for the polygon shape.
Polygon Roundness: Used to control the roundness of the polygon shape. Higher values yield a more round shape.
Custom Layer: Used to select a custom layer for the orb texture overlay when Custom Layer is selected in the Shape menu.
Depth Blur: Used to set the apparent depth blur of the Orbs in z space. Higher values make the Orbs appear to be move out of focus.
Depth Blur Random: Used to randomize the depth blur sorting of the Orbs in z space. Higher values create a more randomized blurring of the Orbs.
Outline Intensity: Used to set the opacity of the orb – higher values yield a more opaque result.
Outline Thickness: Used to set the thickness of the orb outer edge – higher values yield a thicker edge.
Outline Feathering: Used to set the feathering of the orb edge – higher values yield a softer edge.
Lock to Scale X: When enabled, locks the x and y scale to the value set for scale x.
Scale X: Used to control the horizontal scale of the orb. When lock to scale x is enabled, this also controls the y scale.
Scale Y: Used to control the vertical scale of the orb. When lock to scale x is enabled, this control has no effect.
Scale Random: Randomizes the scale of the orbs across the image.
Rotation: Used to set the rotation of the orbs.
Rotation Random: Used to randomize the rotation of the orbs from each other.
Aspect: Used to control the aspect ratio of the orbs.
Count: Used to set the number of orbs that will be generated.
Color Type pop-up: Used to set color that will be used for the orbs and offers four options:
- Spectrum: Automatically fills the orb with a spectrum of color.
- Global: Fills the orb with a solid color, which is set in the main flare group.
- Custom: Fills the orb with solid color, which is set in the Color1 color chip.
- Gradient: Fills the orb with a color gradient, which is generated based on the Color1 and Color2
Color 1 Chip and Eyedropper: Used to set the color for the orb fill if custom is selected and as a start point for the gradient.
Color 2 Chip and Eyedropper: Used to set the color for the end point of the gradient.
Gradient Loop: Used to loops the gradient colors over the orbs.
Gradient Offset: Used to offset the position of the gradient on the orbs.
Reverse Gradient checkbox: When enabled, causes the gradient to be reversed.
Color Random: Used to randomize the color of the orbs.
Intensity: Used to control the opacity of the central portion of the orbs. Higher values yield a more opaque result.
Intensity Random: Used to randomize the intensity value of the central portion of the orbs from each other.
Illumination Radius: Used to control the area that is covered with orbs. Higher values will result in orbs covering more of the image.
Apply Mode: Controls how the orb colors are applied to the result.
Apply Mix: Specifies the amount of blending between the selected apply mode and the normal mode.
Dust Group
The parameters in the dust group are used to generate gritty bands or streaks of mottled dust in the result, or the appearance of random individual dust specs when used with lower densities.
Dust On: Enable/Disable this feature and access the feature’s parameter controls
Count: The number of bands of dust generated.
Length: The average length of the bands of dust. As the length increases the specs within each band spread farther apart which can be compensated for by increasing the density.
Length Variance: Controls the amount of variability in the lengths of the individual dust streaks.
Density: Controls the density of the dust specs within each band.
Scale: Controls the relative zoom amount applied to the field. Higher scales will increase the size of individual dust specs but will also cause the individual specs to appear farther apart.
Opacity: The opacity of the individual dust specs.
Disperse: Controls how widely dispersed the specs are in the individual bands. Lower values produce more distinct streaks and higher values produce more randomize, uncorrelated locations for the individual specs.
Scan Lines Group
The scan lines group is used to render horizontal scan lines into the result reminiscent of old, glitchy TV artifacts. The apply mode in this group can be used to generate a stencil effect, whereby the scan lines generate transparency in the image.
Scan Lines On: Enable/Diable this feature and access the feature’s parameter controls.
Size: Determines the vertical size of the scanlines.
Softness: Determines the softness of the edge of the scanlines.
Angle: Sets the angle along which the scanlines will roll.
Roll RGB: Explicitly set the roll amout offset added to all channels. Can be keyframed to precisely control the evolution of the parameter roll, although for simple animated rolls, the Roll RBB Speed control can be used without the need for any keyframing.
Roll****RGB Speed: Control the speed of automatically animating roll. Set to 0 for static scanlines.
R****oll R: Used to offset the red channel scanline roll.
Roll G: Used to offset the green channel scanline roll.
Roll B: Used to offset the blue channel scanline roll.
Apply Mode: Controls how the scanlines are applied to the result.
- Normal: Generate dark bands in each color channel’s scanline.
- Stencil: Scanline pattern multiplies the alpha channel to create transparency.
- Add: Scanline pattern is added to the RGB channel values to create more vivid color bands.
Apply Mix: Specifies the amount of blending between the selected apply mode and the normal mode.
Spotlight Group
The spotlight group provides a way to generate light in the grunge result. In addition to being a lighting element, when the grunge filter is used on a title, the spotlight can be used to wipe the title on or off.
Spotlight On: Enable/Disable this feature and access the feature’s parameter controls
Position XY: X and Y coordinates of the light source point.
Position Z: Z coordinate of the light source point.
Interest XY: X and Y coordinates of the light target point.
****InterestZ: Z coordinate of the light target point.
Intensity: Brightness of the light source.
Color: Color of the light source.
Cone Angle: Determines whether the spotlight is tightly focused or widely dispersed. Lower values tend to produce more focused lights.
Cone Feather: Determines how soft the edges are between the lit and unlit regions
Ambient Intensity: Controls the general ambient light levels across the full image (and thus outside the regions affected by the spotlight.
Vignette Group
The vignette feature can be used to add a colored and or blurred vignette to the result.
Vignette On: Enable/Disable this feature and access the feature’s parameter controls
Style: Controls whether the filter produces a color vignette, a blur vignette, or both.
Radius: Controls the overall size of the vignette shape.
Vignette Color: Controls the color of the vignette region.
Vignette Color Opacity: Controls the opacity of the colored vignette region. Higher opacities produce solid vignette colors as you progress to the outer regions of the vignette, whereas lower opacities allow for more subtle, partial color shifts.
Blur Offset: Controls the relative radius of the blur vignette versus the radius of the color vignette (when the Style is set to Color and Blur). At the default value of zero the color and blur vignette regions have the same size (as determined by the shared Radius control). Larger values cause the blur vignette radius to be proportionally larger than the color vignette radius, whereas negative values cause the blur vignette radius to be proportionally smaller than the color vignette radius.
Blur Amount: Defines the peak blurriness amount as you reach the outer regions of the vignette.
Use Alpha for Blur: Controls whether the blur alters or maintains the original alpha shape.
Squareness: Controls whether the vignette shape is elliptical, rectangular, or somewhere in between.
Softness: Softens the edges of the vignette shape.
Stretch: controls the relative width vs height of the vignette shape.
Rotate: Rotates the shape.
Chromatic Aberration Group
The Chromatic Aberration feature was designed to emulate the appearance of color fringing and color mis-registration at the outer edges of the image which can occur in images shot with a lower quality lens.
Chromatic Aberration On: Enable/Disable this feature and access the feature’s parameter controls.
Intensity: Controls the strength of the effect. Higher values produce brighter color changes.
Shift Amount: Controls the size of the aberration offset with higher values producing wider bands of aberrant colors.
Smoothness: Adds softness to the aberration shift yielding for more subtle, blurred aberrations.
Edge Effect On: Controls whether the aberration is restricted to just the region around the image edge.
Edge Distance: Controls how wide a region around the image edge is affected when the Edge Effect option is enabled.
Edge Falloff: Controls how sharp the transition is between affected and unaffected regions when the Edge Effect option is enabled.
Edge Offset: Controls the offset from the image edge for where the transition occurs between affected and unaffected regions when the Edge Effect option is enabled.
Use Alpha: Controls whether the aberration alters or maintains the original alpha shape.
Noise Group
The type of noise that is produced by this feature resembles the static interference noise that one might see on an analog TV set.
Noise On: Enable/Disable this feature and access the feature’s parameter controls
Amount: The strength or intensity of the random noise.
Size: The physical size of the noise spikes.
Static: Determines if the noise pattern is static or evolving over time.
Monochrome: Determine if the noise pattern is different in each color channel (producing colored looking noise) or whether the noise pattern is the same in each channel (producing monochromatic noise which tends to shift brightness but not color tone).
Use Alpha: Controls whether the noise alters or maintains the original alpha shape.
Grain Group
This feature uses procedural methods to emulate film grain.
Grain On: Enable/Disable this feature and access the feature’s parameter controls.
Monochrome: Determine if the grain pattern is different in each color channel (producing colored looking grain) or whether the noise pattern is the same in each channel (producing monochromatic grain which tends to shift brightness but not color tone).
Red Amount: The strength or intensity of the grain in the red channel.
Green Amount: The strength or intensity of the grain in the green channel.
Blue Amount: The strength or intensity of the grain in the blue channel.
Red Size: The physical size of the grain elements in the red channel.
Green Size: The physical size of the grain elements in the blue channel.
Blue Size: The physical size of the grain elements in the green channel.
Blur Group
Use the blur group to apply a soft, out-of-focus feel to the result.
Blur On: Enable/Disable this feature and access the feature’s parameter controls
Lock Blur: Specify whether the vertical blur amount can be changed independently from the horizontal amount or whether it is locked to the same value as the horizontal blur.
Horizontal: Width of the blur in the horizontal direction.
Vertical: Width of the blur in the vertical direction.
Use Alpha: Controls whether the blur alters or maintains the original alpha shape.
Glow Group
This feature can be used to add a soft colored glow to the result.
Glow On: Enable/Disable this feature and access the feature’s parameter controls.
Intensity: Defines the strength of the glow.
Color: Defines the glow color.
Radius: Defines the radius of the glow.
Threshold: Specifies the threshold for determining which pixels contribute to the glow. Only pixels whose brightness exceeds the threshold will generate contributions to the glow.
X Width: Independently scale the glow radius in the X direction.
Y Width: Independently scale the glow radius in the Y direction.
Use Alpha: Controls whether the glow alters or maintains the original alpha shape.
Mix With Original: Controls a blend with the original image allowing the overall intensity of the effect to be uniformly moderated.
PixelChooser
The BCC PixelChooser provides simple, built-in masking of the effect result. The PixelChooser is generally used to select a portion of the image and restrict an effect to just the selected area while maintaining the original image content in unselected regions. The selection can be based on geometric shapes or on the image’s luma/color properties.
For more information on the PixelChooser, Click Here.