
 |
 |
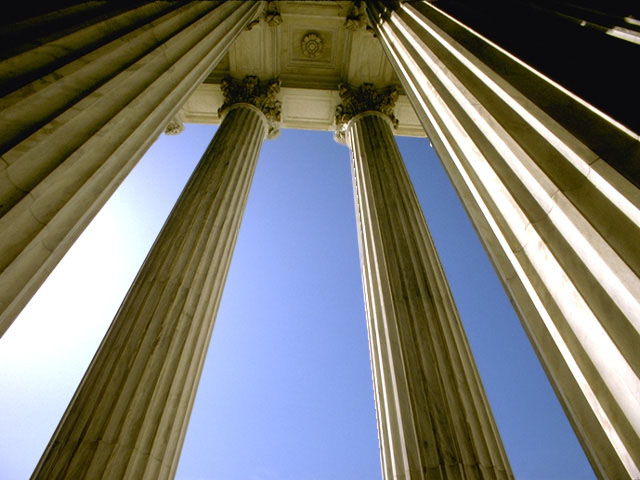
| Source image | Filtered image |
Overview
Trails creates motion trails, video echoes, and video feedback effects which can be combined in a variety of ways.
Function
Presets and Common Controls
BCC filters come with a library of factory installed presets plus the ability to create your own custom presets and preview them with the BCC FX Browser™.
BCC filters also include common controls that configure global effect preferences and other host-specific effect settings.
For more information about working with presets and other common controls, Click Here.
The Source Layer menu sets the clip used to create the effect.
Source Geometry Parameter Group
The Source Geometry parameters adjust the source’s size and position and rotate the source around the X, Y, and Z axis.
Scale X Source and Scale Y Source adjust the size of the source along the X and Y axis respectively. These parameters are scaled as percentages of the source’s original width or height. Thus, a Scale X setting of 200 produces a source twice as wide as the original source. Select the Lock to Scale X checkbox to keep the Scale X and Y values in proportion.
Position XY Source sets the X and Y coordinates of the center point of the source.
Position Z Source adjusts the apparent depth of the source. Decreasing negative values move the source closer to the viewer, while increasing positive values move the source farther away from the viewer.
Tumble Source, Spin Source, and Rotate Source move the source around the X, Y, and Z axis, respectively. Tumble, Spin, and Rotate can be animated over values greater than 360° in order to make the source complete more than one full revolution.
When the Pivot Source checkbox is selected, the source tumbles, spins, and rotates around its own center. If this option is deselected, you can set an external pivot point around which to tumble, spin, and rotate the source. The BCC Trails Basic does not include this parameter.
Pivot XY Source and Pivot Z Source set the X, Y, and Z coordinates of the pivot point. If the Pivot Source checkbox is selected, moving the pivot point has no affect. The BCC Trails Basic filter does not include these parameters.
Trails Parameter Group
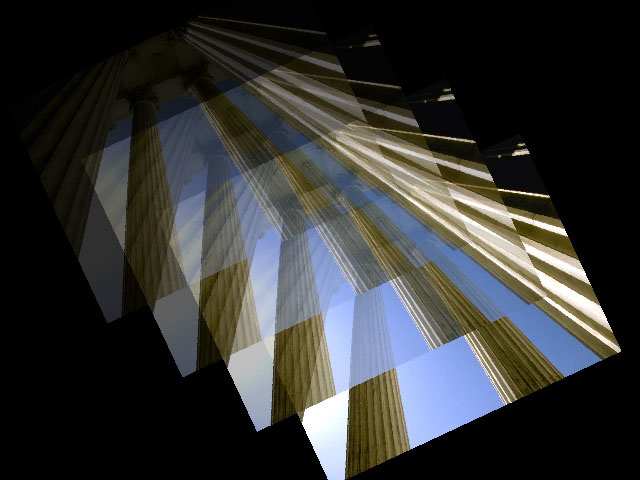
The Trails parameters add motion trails to the effect and provide a variety of options for adjusting the trails’ behavior and appearance.
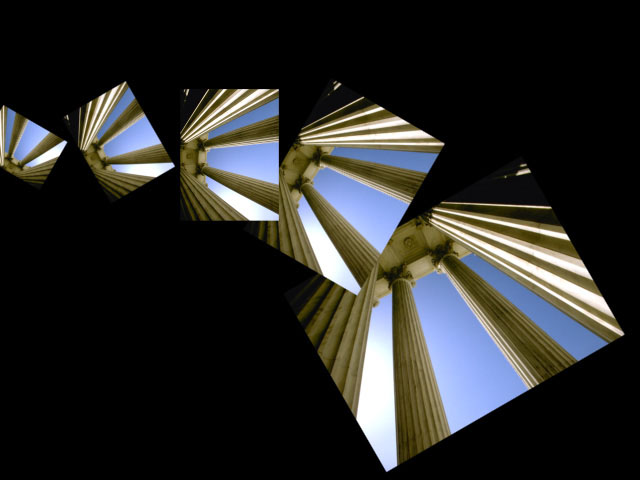
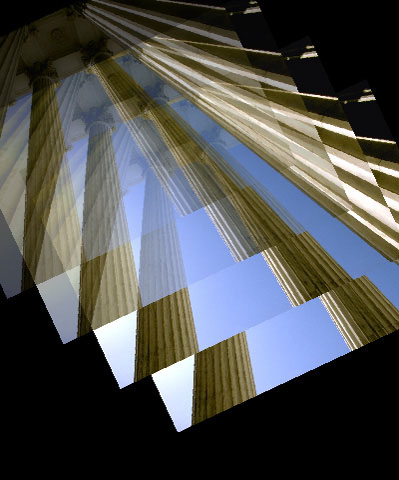
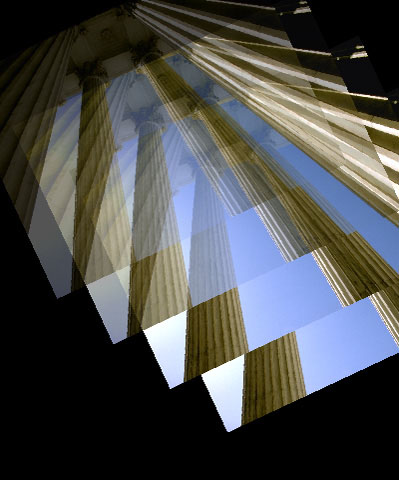
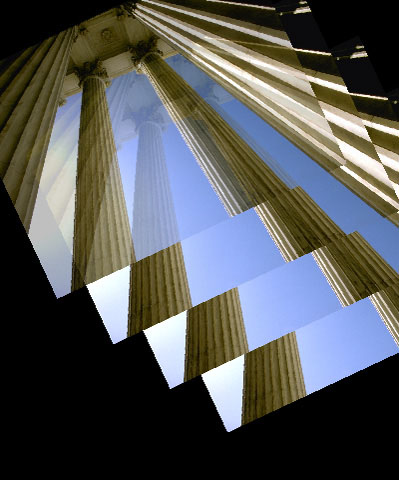
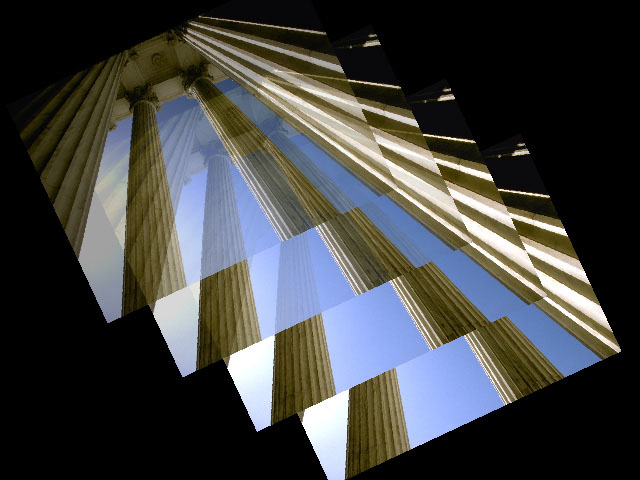
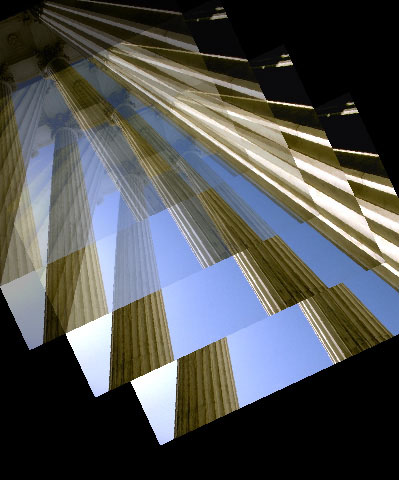
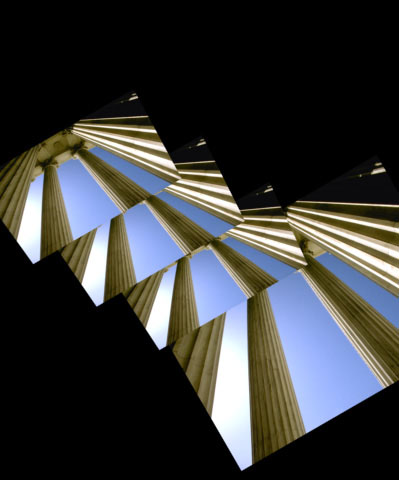
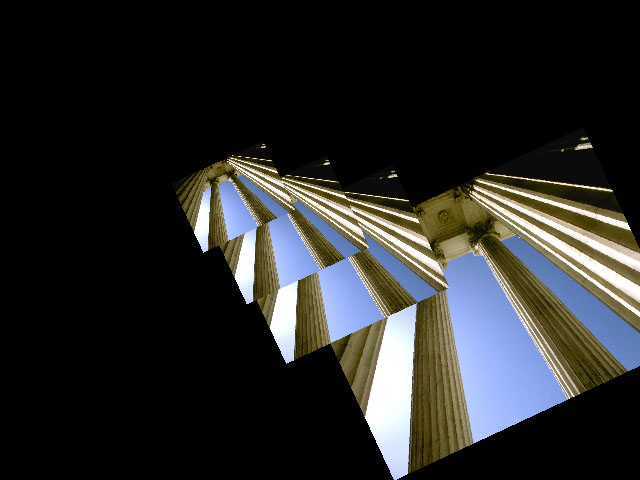
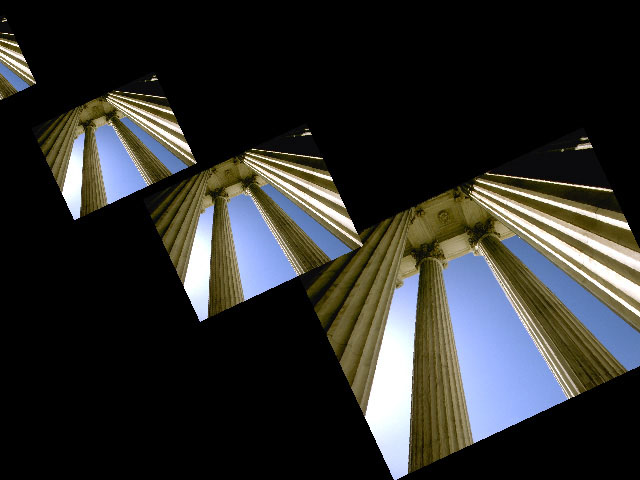
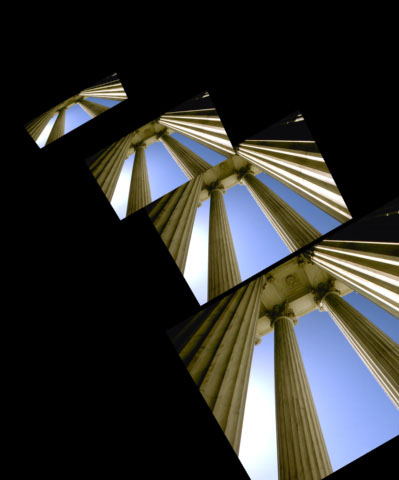
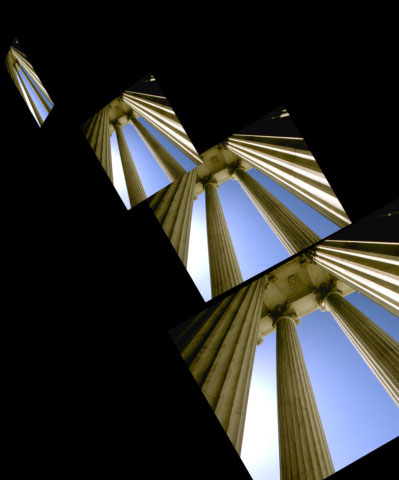
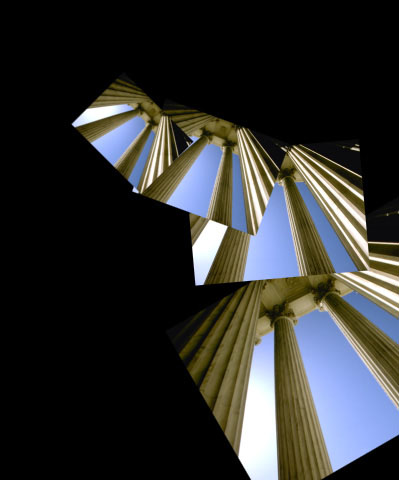
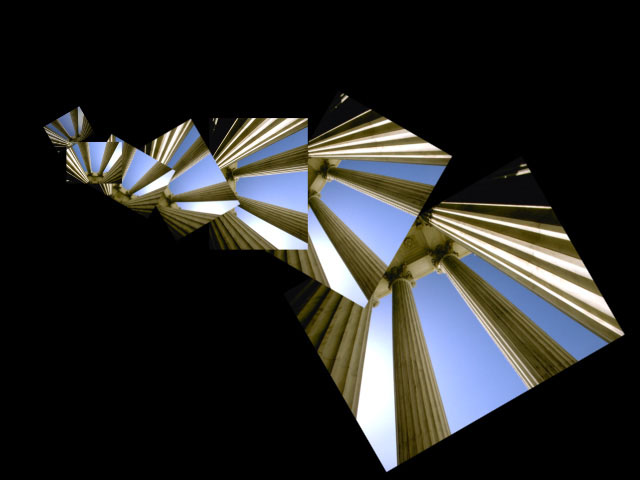
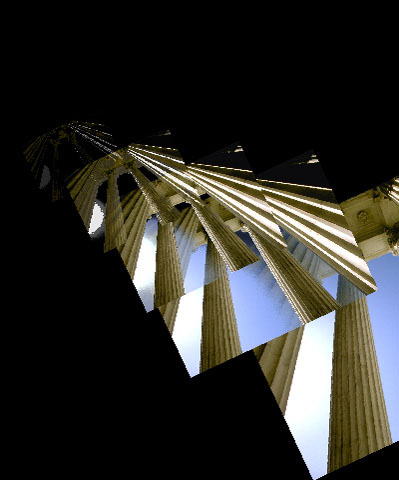
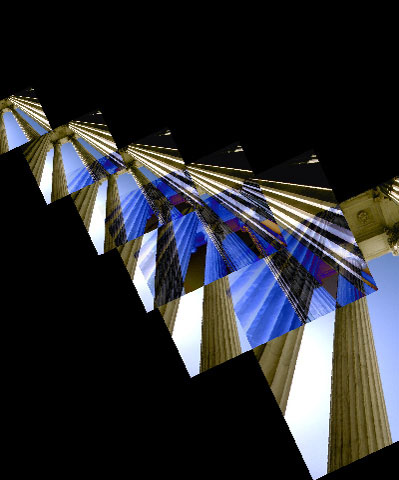
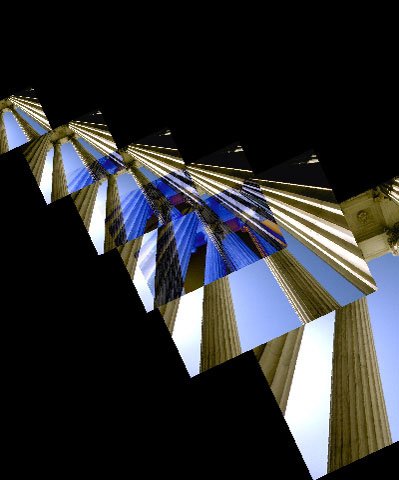
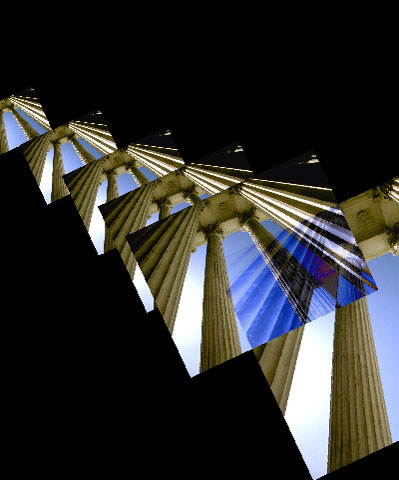
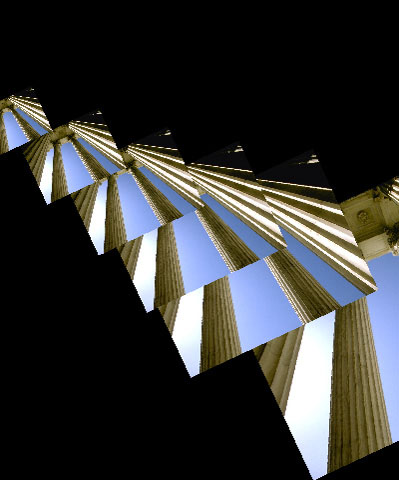
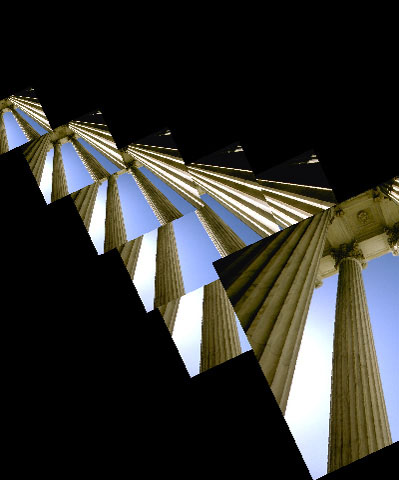
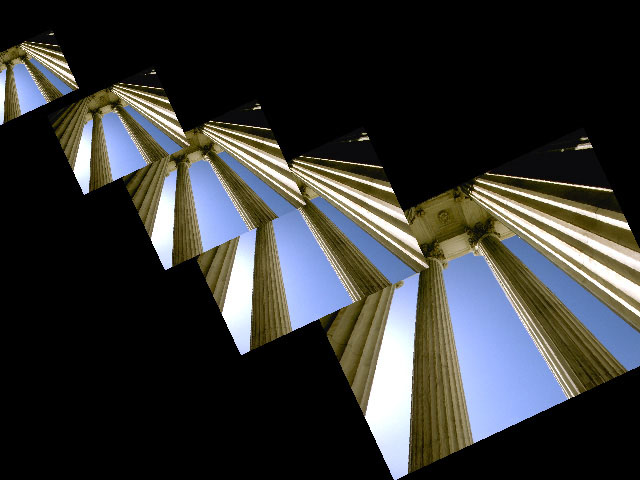
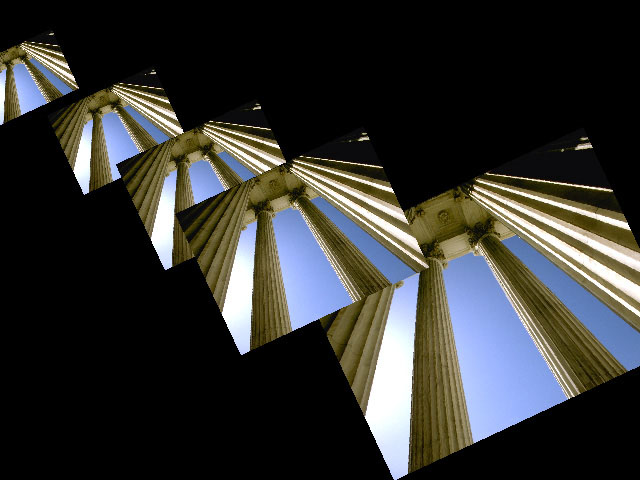
Frame Separation sets the distance between each motion trail and the adjacent trail and/or source image. This value measures the number of frames between each trail and the frame from which the trail is created. For example, if Frame Separation is 2, the current time is frame 10 (Time 00:00:00:10), and there are 3 trails in the effect, the first motion trail is created from frame 8, the second from frame 6, and the third from frame 4. Increasing this value spreads the trails further apart, while decreasing this value moves them closer together.
 |
 |
 |
| Frame Separation=2 | Frame Separation=4 | Frame Separation=8 |
Trail Count determines the number of trails that are visible in the effect.
Trails Before Start determines whether or not the effect displays trail frames that are created before the first frame of the source layer. When Off is chosen, no trails display until after the first frame in the source layer. When On is chosen, the first frame in the source layer is used as the trail image for trails created before the first frame in the source layer.
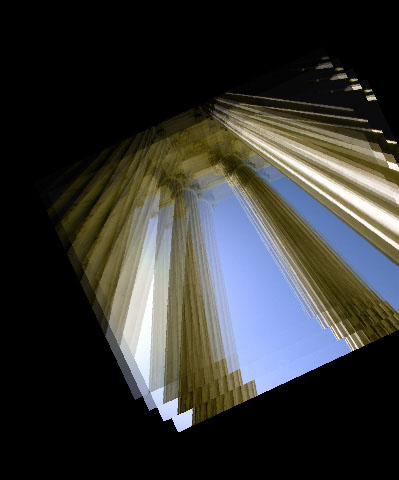
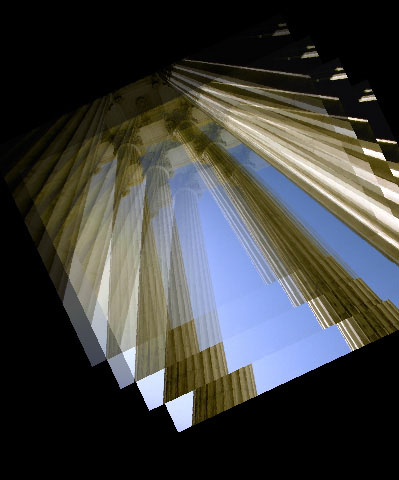
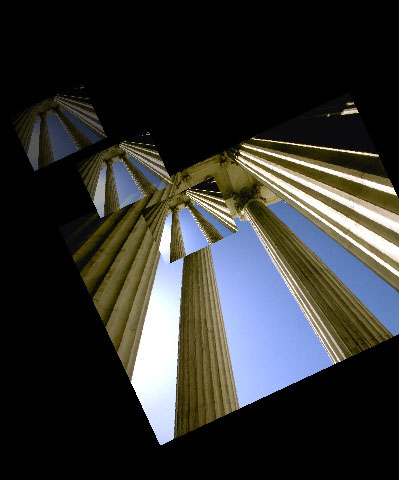
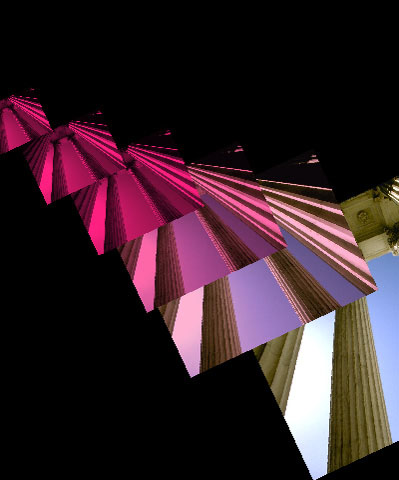
Trail Intensity adjusts the opacity of the trails. At a value of 100, the first trail is completely opaque. At a value of 0, the first trail is completely transparent. The first trail is always the most opaque, but you can increase the number of fully opaque trails by using Trail Intensity values greater than 100.
 |
 |
 |
| Trail Intensity=50 | Trail Intensity=100 | Trail Intensity=150 |
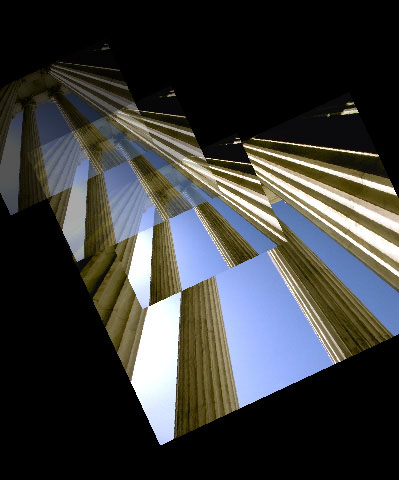
When the Auto Fade checkbox is selected, the trails automatically fade evenly so that the first trail is entirely opaque and the last trail is almost entirely transparent.
When AutoFade is deselected, Manual Fade sets the ratio of the opacity of each trail to the opacity of the following trail.
 |
 |
| Manual Fade=50 | Manual Fade=75 |
The Animation menu sets how the trails animate in relation to the animation of the source. The BCC Trails Basic filter does not include this menu.
- When Source Time is chosen, each trail animates according to its source frame.For example, suppose Frame Separation is 2 and the current time is 00:00:00:08 (frame 8). When the Animation menu is set to Source Time, the first trail in the effect corresponds to frame 6 in the source clip, the second trail to frame 4, and so on.
- When Current Time is selected, each trail animates according to the parameter values at the current frame. For example, suppose Frame Separation is 2 and the current time is 00:00:00:08 (frame 8). If Animation is Current Time, all trails correspond to frame 8 in the source clip.
Trails Geometry Parameter Group
The Trails Geometry parameters allow you to manipulate the trails independently from the source layer. These parameters affect all of the trails equally.
Each of the parameters in this section adjust the trails in relation to the source clip as manipulated by the controls in the Source parameter group, not in relation to the original source image. For example, if you decrease the Scale Source, the scale of all trails also decreases. Decreasing the Scale Trails value further reduces the size of the trails, but does not affect the scale of the source layer. The BCC Trails Basic filter does not include this parameter group.
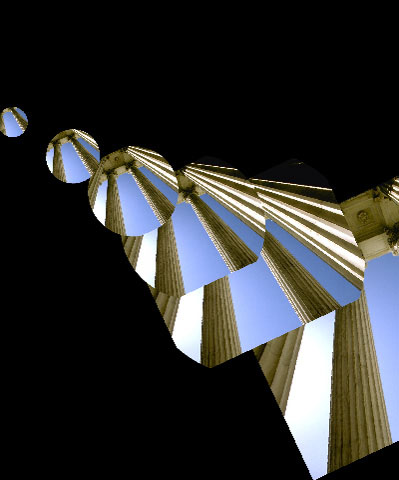
Scale Trails controls the size of the trails in relation to the size of the source layer.
 |
 |
 |
| Scale Trails=25 | Scale Trails=50 | Scale Trails=100 |
Position XY Trails sets the X and Y position of the trails.
Tumble Trails, Spin Trails, and Rotate Trails rotate the trails around the X, Y, and Z axis respectively.
 |
 |
 |
| Tumble Trails | Spin Trails | Rotate Trails |
When Pivot X Offset Trails, Pivot Y Offset Trails, and Pivot Z Offset Trails are all 0 (the default settings), the trails tumble, spin, and rotate around their own centers. Changing these values displaces the trails’ centers of rotation along the X, Y, and Z axis, respectively.
Trail Feedback Parameter Group
These controls produce feedback effects and are applied recursively to each successive trail—once to the first trail, twice to the second trail, three times to the third, and so on.
- Note: The Feedback, Geometry, and Source Parameters have a cumulative effect on the trails. For example, if Source Rotation is 5, Rotate Trails is 30, and Rotate Feedback is 10 degrees, the source rotates 5 degrees, the first trail rotates 45 degrees [5 + 30 + (1 x 10)], the second trail 50 degrees [5 + 30 + (2 x 10)] and so on.
Scale Feedback adjusts the sizes of the trails. Increasing this value creates successively larger trails, while decreasing this value creates successively smaller trails.
Displacement Feedback affects the XY position of the trails. Increasing this value moves the trails away from their original positions along the chosen Displacement Angle Feedback.
 |
 |
| Displacement Feedback=0 | Displacement Feedback=15 |
Position Z Feedback displaces the trails along the Z axis. Increasing positive values move successive trails further away from the viewer. Decreasing negative values move successive trails closer to the viewer.
Tumble Feedback, Spin Feedback, and Rotate Feedback rotate the trails around the X, Y, and Z axis respectively.
 |
 |
 |
| Tumble Feedback | Spin Feedback | Rotate Feedback |
When Pivot X Offset Trails Feedback, Pivot Y Offset Trails Feedback, and Pivot Z Offset Trails Feedback are all 0 (the default settings), the trails tumble, spin, and rotate around their own centers. Changing these values displaces the successive trails’ centers of rotation along the X, Y, and Z axis, respectively.
 |
|
| Pivot X Offset Feedback=0 | Pivot X Offset Feedback= -0.02 |
Acceleration Parameter Group
These controls produce acceleration effects and are applied increasingly to each successive trail according to an acceleration pattern. For example, if Source Rotation is 0, Rotate Trails is 0, Rotate Feedback is 0 degrees, and Rotate Acceleration is 10, the source clip rotates 0 degrees, the first trail rotates 0 degrees, the second trail 10 degrees [0 + (10 x 1)], the third trail 30 degrees [10 + (10 x 2)], the fourth trail 60 degrees [30 + (10 x 3)], the fifth trail 100 degrees [60 + (10 x 4)] and so on. The BCC Trails Basic filter does not include this parameter group.
Like the Trails Feedback parameters, the Acceleration parameters have a cumulative effect on the trails.
- Note: The parameters in this section work in the same way as the corresponding Trail Feedback parameters, except for the way they affect successive trails. For descriptions of these controls, see the previous section.
Scale Acceleration affects the rate of change at which the scale magnifies, making the motion exponentially faster as the film clip progresses.
Displacement Accelerationaffects the rate of change at which the film is displaced, making the motion exponentially faster as the film clip progresses.
Displacement Angle Accelerationaffects the rate of change at which the displacement angle moves, making the motion exponentially faster as the film clip progresses.
Tumble Acceleration affects the rate of change at which the film tumbles, making the motion exponentially faster as the film clip progresses.
Spin Acceleration affects the rate of change at which the film clip spins, making the motion exponentially faster as the film clip progresses**.**
Rotation Accelerationaffects the rate of change at which the film clip rotates, making the motion exponentially faster as the film clip progresses**.**
Insert 1-3 Parameters
The parameters in these groups apply up to three of a variety of simple effects to one or more of the trails. The BCC Trails Basic filter does not include this parameter group.
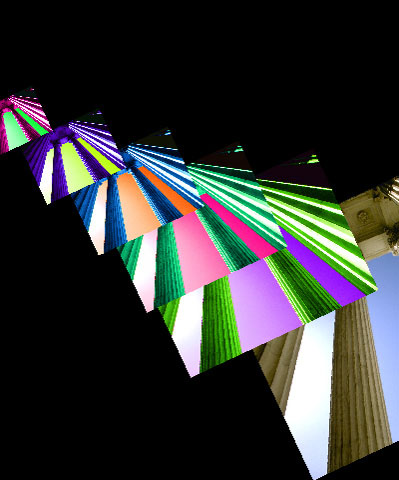
The Effect Insert menu sets which effect is inserted in the trail. Each effect is adjusted with the Amount and Parameter controls. Several effects use a Color parameter as well. These controls behave differently depending on this menu setting.
- When Effect is set to Off, no affect is applied and none of the other parameters in this section have any affect.
- Brightness allows you to adjust the brightness and contrast of the trail. When Brightness is chosen, Amount adjusts brightness; Parameter adjusts contrast.
- Contrast allows you to adjust the contrast and brightness of the trail. When Contrast is selected, Amount adjusts contrast, and Parameter adjusts brightness.
- Hue changes the hue and saturation of the trail. Amount adjusts the hue angle, and Parameter adjusts the saturation.
- Saturation changes the saturation and hue of the trail. Amount controls the saturation, and Parameter adjusts the hue angle.
- Black & White mixes the trail image with a black and white copy of itself. Amount controls the mix of the images. Increasing Amount replaces the colored image with the black and white copy; at a value of 100, the trail is completely black and white. Negative Amount values have no affect. Parameter has no affect.
- Black & Color mixes the trail image with a copy of itself that is tinted black and the chosen Color. Amount controls the mix of the images. Increasing Amount replaces the original trail image with the tinted copy; at a value of 100, the trail is completely tinted. Negative Amount values have no affect. Parameter has no affect.
- Color & White mixes the trail image with a copy of itself that is tinted the chosen Color and white. Amount controls the mix of the trail images. Increasing Amount replaces the original trail image with the tinted copy; at a value of 100, the trail is completely tinted. Negative Amount values have no affect. Parameter has no affect.
- Colorize mixes the trail image with a solid of the chosen Color. Amount controls the mix of the trail and the colored solid. Increasing Amount replaces the original trail image with the colored solid; at a value of 100, the trail is entirely replaced by the solid. Negative Amount values have no affect. Parameter has no affect.
- Invert inverts the trail image. When Invert is chosen, neither Amount nor Parameter have an affect. If Status is Recursive (see the Status Insert menu description on page 39), only the odd-numbered trails invert.
- Blur applies a blur to the trail. Amount sets the amount of blur. Negative Amount values have no affect. Parameter sets the blur direction. Increasing positive Parameter values increase the horizontal blur, while decreasing negative values increase the vertical blur. When Parameter is 0, the image blurs equally in both directions.
- Choke shrinks or expands the opaque areas in the trail image’s alpha channel. Increasing positive Amount values increase the size of the opaque regions, while decreasing negative values decrease the opaque regions. Parameter has no affect.
- Radial Wipe creates a wipe which keys out a portion of the trail image. The image keys outside a circle whose diameter is controlled by Amount. When Amount is 0, the image is unchanged. Increasing Amount decreases the diameter of the circular opaque region, removing more of the image. At a value of 100, the entire trail image keys out. Negative Amount values have no affect. Parameter softens the edges of the opaque region. When Parameter is 0, the edges are hard. Increasing Parameter increasingly blends the edges with the background. Negative values have no affect.
- Key Out Dark keys out the darker pixels in the trail image, making them transparent. Amount controls the key threshold. Increasing this value raises the threshold, increasing the range of luminosities that key out. Increasing Parameter softens the edges of the opaque regions in the image. Negative Parameter values have no affect.
- Key Out Light keys out the lighter pixels in the trail image, making them transparent. Amount controls the key threshold. Increasing this value lowers the threshold, increasing the range of luminosities that key out. Increasing Parameter softens the edges of the opaque regions in the image. Negative Parameter values have no affect.
- Key Out Color keys out pixels whose channel values are similar to those of the chosen Color. Amount controls the width of the range of similar values that key out. As Amount increases, a wider range of colors similar to the Color key out. Increasing Parameter softens the edges of the opaque regions in the image. Negative Parameter values have no affect.
- Key In Color keys out pixels whose channel values are dissimilar to those of the chosen Color. Amount controls the width of the range of dissimilar values that key out. As Amount increases, a wider range of colors dissimilar to the Color key out. Increasing Insert 1 Parameter softens the edges of the opaque regions in the image. Negative Parameter values have no affect.
 |
 |
 |
| Brightness | Hue | Black and Color |
 |
 |
 |
| Blur | Radial Wipe | Key Out Color |
The Start Insert menu determines on which trail the Insert effect begins. Choose Source to begin the effect on the source or choose the appropriate Trail.
The End Insert menu determines on which trail the Insert effect ends. Choose Never to apply the effect to the Start trail and all subsequent trails. Choose Source to end the effect on the source or choose the appropriate Trail.
The Status Insert menu determines how the effect is applied to the trails in the range specified by Start and End.
- When Status is Off, the effect is not applied and the Insert parameters have no affect.
- Single applies the effect equally to each trail in the range.
- Recursive applies the effect to each trail in the range and increases the intensity of the effect on each successive trail by increasing the Amount value. The Parameter value is applied equally to all the trails and is not affected by the recursive progression.
Jitter Curves Parameter Group
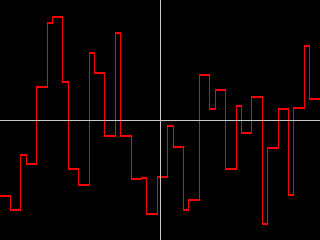
The Jitter parameters enable you to vary up to six different attributes of the effect. Use these parameters to view the jitter curves as you adjust them. These curves plot the values of the jittered parameters over time.
The Curve View menu determines how the jitter curves are represented on the graph. When you use the Draft Only options, the curves are not visible in the rendered effect. However, you must preview in Draft mode for these options to display. When you use the Render options, the curves appear in the rendered effect.
- Off displays the effect without any curves.
- Curves: Draft Only and Curves: Render display curves showing the amount of jitter at each frame or at selected frames of the effect.
- Curves Over Layer: Draft Only and Curves Over Layer: Render display the jitter curves over the rendered layer. This allows you to simultaneously preview the jitter curves and the rendered output, which can be useful for making adjustments to the effect.
- Curves Over Comp: Draft Only and Curves Over Comp: Render display the jitter curves over all other layers in the composition.
You can use the Curve View menu options to displays a graph of the effect of the jitter over time. If one of the Jitter Shape controls is set to Off, that jitter is inactive and its curve does not appear on the graph.
 |
The vertical axis on the graph represents the current time in the composition. The horizontal axis represents the base parameter value (set by the Source or Insert parameter values) before it is jittered. The red curve represents Jitter 1, the green curve represents Jitter 2, and the blue curve represents Jitter 3.
The Time View menu controls the time range shown on the graph. Full Effect displays the jitter curves from the start to the end of the effect. 16 Seconds, 8 Seconds, 4 Seconds, and 2 Seconds display the curves for the given number of seconds after the frame specified by Scroll Curves.
Scroll Curves selects the first frame in the effect that is displayed when Time View is set to 16 Seconds, 8 Seconds, 4 Seconds, or 2 Seconds. This parameter has no affect if Time View is set to Full Effect.
Jitter 1 and Jitter 2 Parameter Groups
The Jitter 1 and 2 parameters allow you to create two different jitter curves, each of which can be applied to up to three parameters. The Jitter 2 parameters function similarly to the Jitter 1 parameters, which are described in this section.
- Note: The only difference between the two Jitter parameter sections is that Jitter 2 can be applied to the Jitter 1 parameters.
The Shape Jitter menu sets the shape of the jitter curve. The best way to understand how these shapes affect the jittered parameters is to use the Curve View menu setting to see the shape of the curve over time. The curves can be modified in various ways using the Timing Jitter and/or Master Jitter settings.
- Off turns off the jitter.
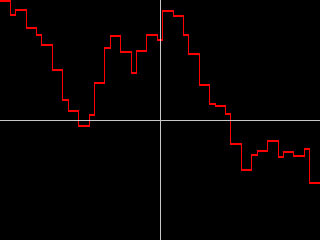
- Noise Jumps causes the noise to jump to a new value in increments set by the Timing Jitter setting.
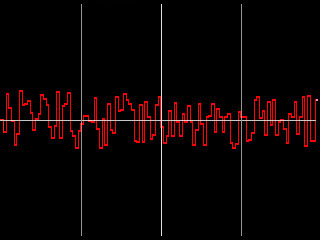
 |
- Random Walk causes the noise to start at 0, then add a new random number in increments set by the Timing Jitter setting.
 |
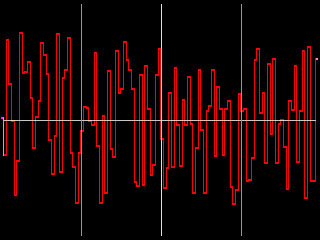
- Smooth Noise creates a new noise value every frame, then smooths the curve that is created. Timing Jitter adjusts the width of the curve smoothness.
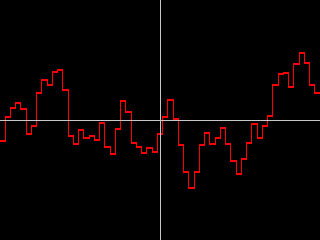 |
- Smooth Walk creates a Random Walk curve, then smooths the result. Timing Jitter adjusts the width of the curve smoothness.
 |
- Constant adds the Amount Jitter value to the base parameter value, creating a static effect.
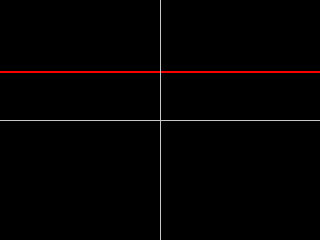 |
- The remaining choices all produce regular waves of varying shapes. Most of these choices have fairly descriptive names. The Spectrum choices are all variations on the sine wave (the curve at right is an example of a Spectrum wave). For each of these choices, Timing Jitter adjusts the frequency of the wave, and Amount Jitter adjusts the amplitude (height) of the wave.
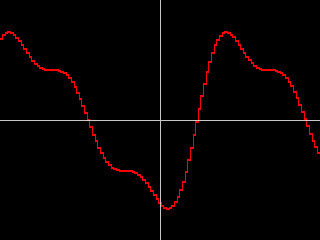 |
- Note: Try using the Constant shape to manipulate a trail or sequence of trails without affecting the other trails. Using Constant will not jitter the parameter value for the trail, but allows you to adjust any parameter of the trail up or down.
Master****Jitteradjusts the intensity of the jitter by scaling all the other jitter parameters. For this reason, each Shape Jitter 1curve responds slightly differently to Master Jitter. When Master Jitter is 0, no jitter is created.
 |
 |
| Master Jitter 1=25 | Master Jitter 1=75 |
Softness Jitter controls the softness applied to the jitter.
Random Seed Jittersets the value that is input to the random number generator used to generate noise. Adjust this value when you like the overall effect but want to adjust the random configuration of the jitter curve.
Frame Offset Jitteroffsets the position of the jitter curve by the specified number of frames. Adjusting this value allows you to control which point on the curve corresponds to a given frame.
The Start Jittermenu determines on which trail Jitter begins. Choose Source to begin the jitter on the source or choose the appropriate Trail.
TheEnd Jitter menu determines on which trail Jitter ends. Choose Never to apply the effect to the Start Jitter trail and each subsequent trail. Choose Source to end the jitter on the source or choose the appropriate Trail.
The Mode Jittermenu sets how Jitter is applied to the trails in the range specified by Start Jitter and End Jitter.
- When Mode Jitter is Off, Jitter is not applied and the other Jitter parameters have no affect.
- Constant applies Jitter equally to each trail in the range.
- Fade Up applies Jitter to each trail in the range and increases the intensity of the Jitter on each successive trail.
- Fade Down applies Jitter to each trail in the range and decreases the intensity of the Jitter on each successive trail.
- Fade Up-Down applies Jitter to each trail in the range and increases the intensity of the Jitter on each successive trail until the middle trail is reached, then decreases the intensity to the end of the range.
The Destination 1 Jitter 1menu selects which parameter is affected by Jitter 1. The Destination 2 Jitter 1 and Destination 3 Jitter 1 menus allow you to choose two more parameters to jitter.
- When Off is chosen, the corresponding destination is not used.
- Scale affects both the X and Y Scale values. Scale X only affects the Scale X; Scale Y only affects the Scale Y.
- Position X, Y Z affect the X,Y and Z position, respectively.
- Insert 1 Red, Insert 1 Green, and Insert 1 Blue affect the corresponding color channel in the chosen Insert 1 Color. The Insert 2 and Insert 3 Red, Green, and Blue choices function in the same way but affect the Insert 2 and Insert 3 Colors, respectively.
- The remaining choices affect the parameter of the same name.
Amount 1Jitter 1, Amount 2Jitter 1, and Amount 3****Jitter 1adjust the intensity of the three jitters by scaling all the other jitter parameters. For this reason, each Shape curve responds slightly differently to Amount. When Jitter Amount 1 is 0, no jitter is created for the Jitter 1 Destination 1.
|
|
| Jitter 1 Destination 1=25 | Jitter 1 Destination 1=75 |
Composite Parameters
These parameters provide options for controlling how the effect is composited.
The Apply Mode menu setting determines how the trails and source layer are composited over objects below them in the timeline. For descriptions of all the Apply Modes, Click Here.
Apply Mix blends the Apply Mode setting with the Apply Mix From setting. The resulting mixed mode is used to composite the effect. For example, if Apply Mode is set to Lighten, and Apply Mix From is set to Normal, then Apply Mix blends the Lighten and Normal apply modes. In this case, an Apply Mix setting of 0 produces the Normal apply mode, and an Apply Mix setting of 100 produces the Lighten apply mode. An Apply Mix setting of 50 blends the two apply modes equally.
- Note: Use Apply Mix to soften the effect of a given apply mode, or animate Apply Mix to blend from one apply mode to another over time.
The Use Apply Settings menu determines which elements are affected by the Apply Mode and Apply Mix settings.
- Trails and Composite applies the settings to both the trails and the source layer.
- Trails Only applies the settings to the trails only, leaving the source layer unaffected.
- Composite Only applies the settings to the source layer only.
- Ignore disregards the settings and applies the effect normally to both the trails and the source layer.
 |
 |
 |
| Trails and Composite | Trails Only | Composite Only |
The Composite Trails menu controls how the trails overlap the source in the filtered output.
- In Front composites the trails in front of the source layer.
- Behind composites the trails behind the source layer.
- Trails Only composites the trails only, removing the source layer from the effect.
 |
 |
 |
| In Front | Behind | Trails Only |
The Render Order menu determines how the trails overlap each other in the filtered output.
- Choose Oldest in Front to place each successive trail in front of the previous trail.
- Choose Youngest in Front to place each successive trail behind the previous trail.
 |
 |
| Oldest in Front | Youngest in Front |
Source Opacity sets the opacity of the source layer in the filtered output and does not affect the trails. A value of 100 leaves the image opaque; a value of 0 makes the image transparent.