
 |
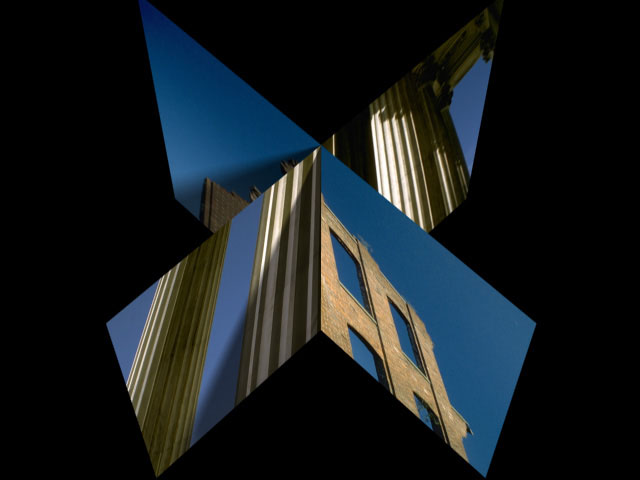 |
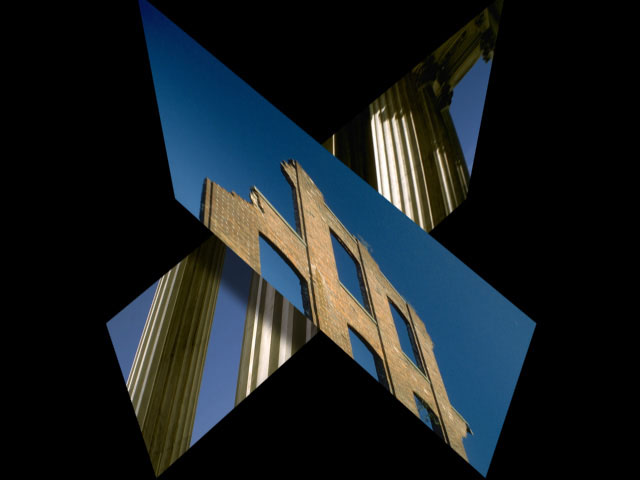
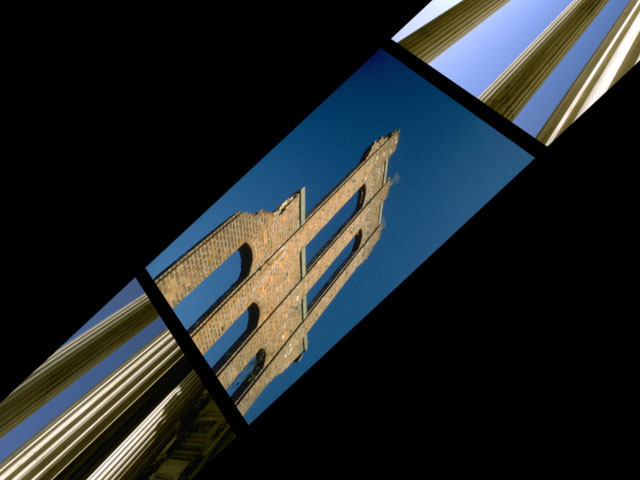
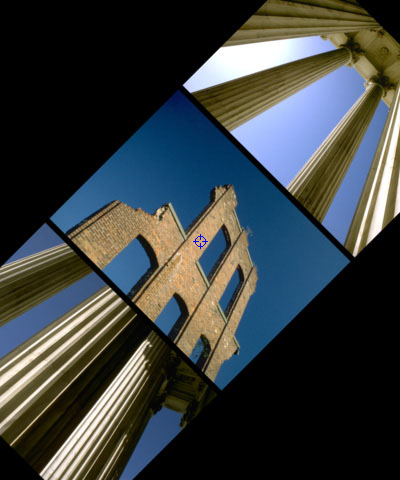
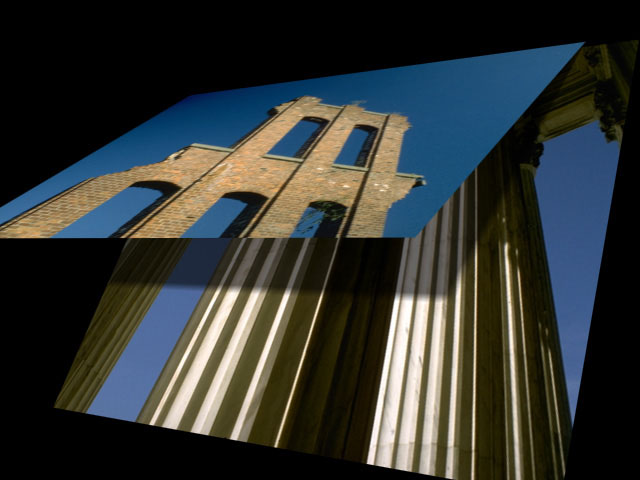
| Normal DVE planes | DVE planes in Z Space |
Overview
Normally, if you create an effect with multiple DVE layers, each layer is rendered separately. The layer that is topmost in the timeline overlaps all other layers, no matter how the layers move or rotate. The Z Space filters allow you to create effects using multiple DVE layers (Z planes) and/or sphere layers which can interact and intersect in 3D space. In a Z Space effect, each plane or sphere’s apparent depth, or position on the Z axis, determines how the plane interacts with other planes and spheres. The plane closest to the viewer in Z space covers planes and spheres that are farther away, regardless of the order in the timeline.
Parameter Controls
Presets and Common Controls
BCC filters come with a library of factory installed presets plus the ability to create your own custom presets and preview them with the BCC FX Browser™.
BCC filters also include common controls that configure global effect preferences and other host-specific effect settings.
For more information about working with presets and other common controls, Click Here.
The View menu determines which portion of the effect displays in the Effect Preview monitor. Choose Effect to view the entire effect. The other View menu choices vary depending on the Z Space filter. In Z-Space III, you can choose to view Plane 1, Plane 2, Sphere 1, or Sphere 2.
- Note: If View is set to a Plane or Sphere which does not have a source layer assigned to it, the Effect Preview monitor displays a transparent layer.
Container Parameter Group
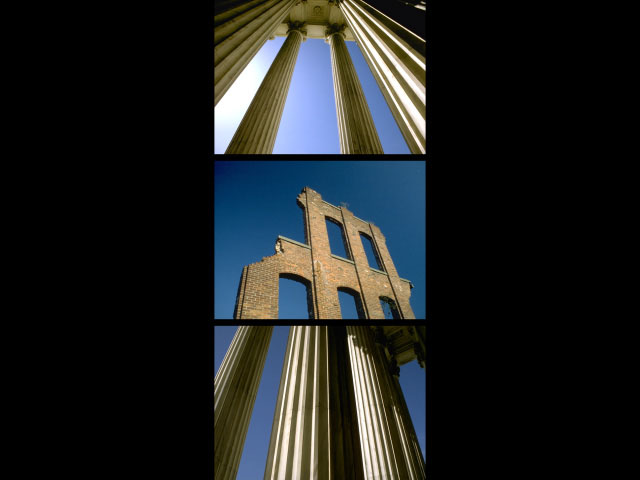
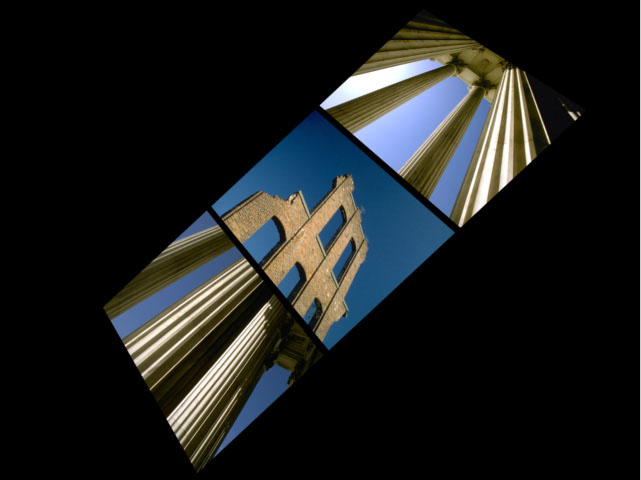
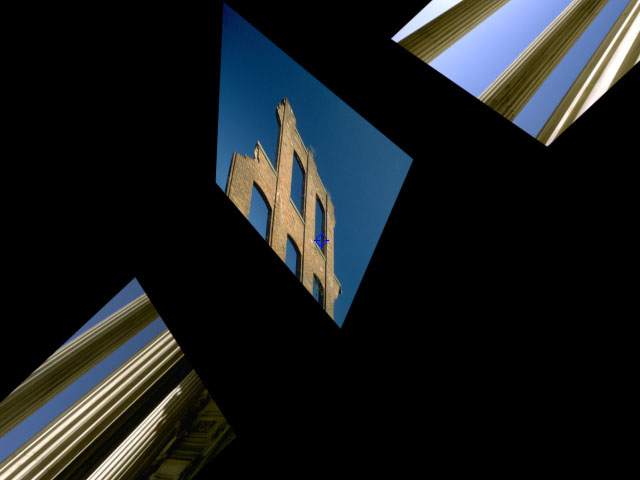
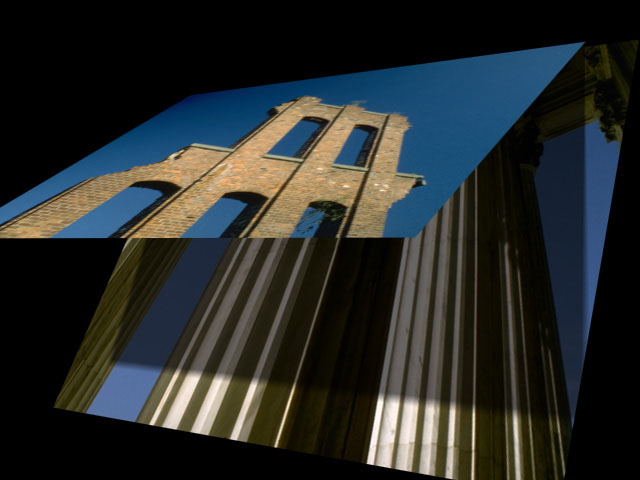
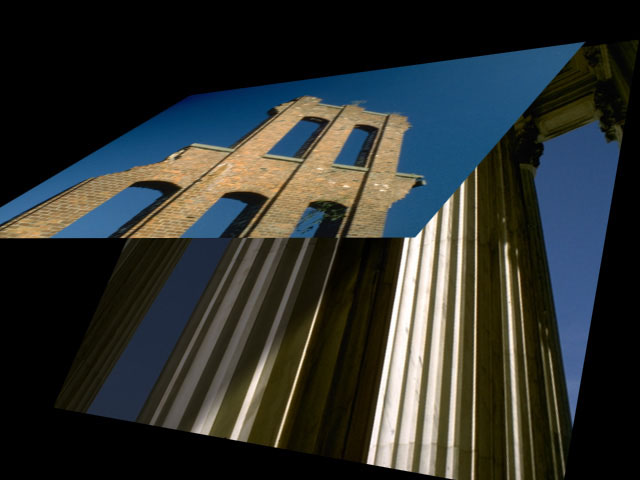
The Z Space filters use a container to group and arrange Z planes and spheres in 3D space. When you add planes and spheres to a container, you can animate each plane and sphere independently (using the Plane and Sphere parameters), then apply parameters and animations globally to all the planes and spheres within the container (using the Container parameters). The container preserves the spatial relationship between the objects within it as you reposition and rotate the container.
The illustration at right shows three Z planes in a 3D container. Each plane is scaled and positioned independently.
 |
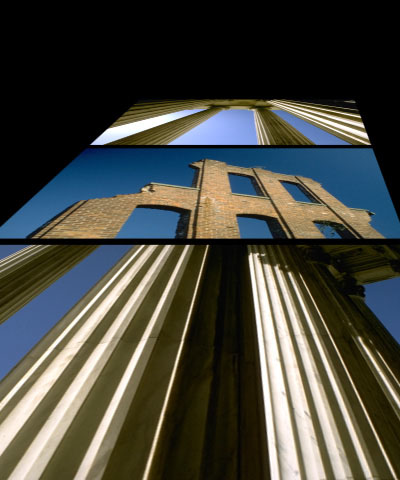
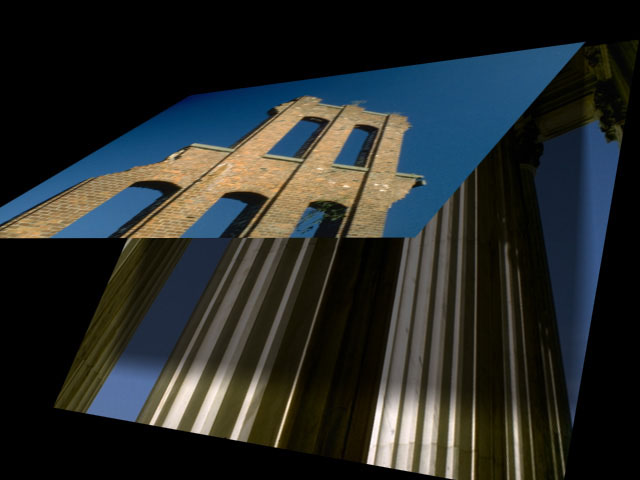
When you scale or rotate the container, all three planes scale and rotate as well, yet the spatial relationship between the three tracks remains constant.
 |
 |
| Container Rotated | Container Rotated and Stretched |
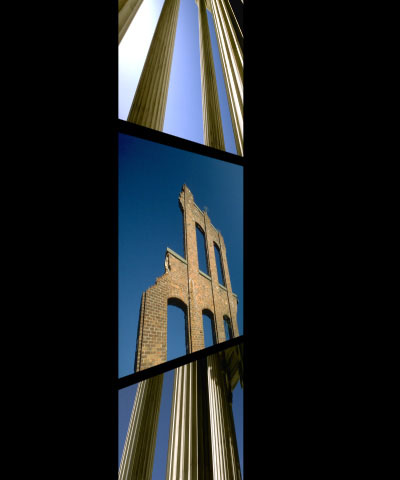
You can still adjust any individual Z plane by making changes to the corresponding group of Plane parameters. In the example at right, Plane 2 (the facade) is tumbled forward.
- Note: You can control which planes are in the container using the Link menu in each Plane parameter group. You can also choose whether the background plane is inside the container using the Link menu in the Background parameter group.
 |
Scale X Container and Scale Y Container adjust the size of the container along the X and Y axis respectively. These parameters are scaled as percentages of the container’s original width and height. Thus, a Scale X setting of 200 produces a container twice as wide as the original. Select the Lock Scale checkbox to keep these values in proportion, or deselect this option to adjust the Scale X and Y independently.
Position X and Position Y Container sets the horizontal and vertical location of the container.
Position Z Container sets the apparent depth of the container. Decreasing negative values move the container closer to the viewer; increasing positive values move the container away. Very low Position Z values move the container behind the viewer, making it invisible.
Tumble Container, Spin Container, and Rotate Container move the container around the X, Y, and Z axis, respectively. Tumble, Spin, and Rotate can animate over values greater than 360° to make the container undergo more than one full revolution.
 |
 |
 |
| Container Tumbled | Container Spun | Container Rotated |
Shadows Parameter Group
Parameters in this section enable you to add true 3D cast shadows to the Z Space effect. These shadows are more realistic than simple drop shadows because the cast shadows change as the objects casting or receiving the shadows are transformed. In the following examples, notice that the shadow falls differently on the background plane as the plane rotates in 3D space.
 |
 |
- Note: Each plane and sphere parameter group has a Shadows control that determines whether that plane casts and receives shadows. For example, if you want a sphere track to cast shadows on all other planes, but do not want the sphere shadowed by other planes, you can set the sphere track to cast but not receive shadows.
The Shadows menu turns shadows on and off and adjusts the quality of the shadows. Off turns off the shadows. The remaining three choices turn on shadows and provide three different rendering algorithms.
-
Faster #1 and Faster #2 render shadows more quickly but a lower quality. Experiment with these two settings to find the algorithm that looks better for your effect.
-
Better increases rendering time, but produces a better-looking shadow.
-
Note: If Shadow Softness is 0, Faster #1, Faster #2, and Better all produce the same quality.
Shadow Intensity controls the opacity of the shadows. A Shadow Intensity value of 100 creates completely opaque shadows, and a Shadow Intensity value of 0 makes the shadows completely transparent.
Shadow Color sets the color of the shadows.
Shadow Elevation sets the elevation of the synthetic light source used to produce shadows. A high elevation value produces a shadow that falls directly behind the plane casting the shadow. Decrease Shadow Elevation to offset the shadow farther from the plane casting the shadow. Negative Shadow Elevation values cause the plane to cast a shadow in front of itself in Z space so that the plane is partially covered by its own shadow.
 |
 |
| Shadow Elevation=60 | Shadow Elevation=25 |
Shadow Direction sets the angle between the beam of light and the horizontal axis. The plane casts a shadow in the direction opposite that of the of the light beam. For example, if the light hits the plane from the right, the plane casts a shadow to the left.
|
 |
| Shadow Direction= -135 | Shadow Direction= -45 |
Shadow Softness controls the softness of the shadow edges. A setting of 0 produces a sharply defined shadow with hard edges. Increasing Shadow Softness produces shadows with softer edges.
|
 |
| Shadow Softness=15 | Shadow Softness=50 |
Plane 1, 2, and 3 Parameter Groups
These parameters apply geometric transformations to the corresponding Z plane.
The Plane menu sets which layer in the timeline is used as the source for the corresponding Z plane. Choose None to remove the plane from the effect.
The Link menu determines how the plane is grouped with the other elements of the effect.
- Free places the plane outside the container.
- In Container places the plane inside the container.
Scale X and Scale Y Plane adjust the size of the plane along the X and Y axis respectively. These parameters are scaled as percentages of the plane’s original width and height. Thus, a Scale X setting of 200 produces a plane twice as wide as the original plane. Select the Lock to Scale X checkbox to keep the X and Y Scale values in proportion.
Opacity Plane scales the opacity of the Z plane. When Opacity is 100, the plane is completely opaque. As Opacity decreases, the plane becomes increasingly transparent, and at value of 0, the plane is completely transparent.
Position X and Position Y Planesets the X and Y coordinates of the center point of the plane.
Position Z Planeadjusts the apparent depth of the plane. Decreasing negative values move the plane closer to the viewer, while increasing positive values move the plane farther from the viewer. Very low Position Z values move the plane behind the viewer, making it invisible.
Tumble, Spin, and Rotate Plane move the plane around the X, Y, and Z axis, respectively. Tumble, Spin, and Rotate can animate over values greater than 360° to make the plane complete more than one full revolution.
When the Lock Pivot to Position checkbox is selected, the plane tumbles, spins, and rotates around its own center. If this option is deselected, you can set an external pivot point around which to tumble, spin, or rotate the plane.
Pivot X, Pivot Y and Pivot Z Plane set the X, Y, and Z coordinates of the pivot point. If Pivot to Position is selected, moving the pivot point has no affect.
The Crop controls crop the edges of the plane. The X and Y position controls set the Top-Left and Bottom-Right corners of a rectangle that defines the borders of the cropped area.
The Shadows menu determines whether the plane casts and/or receives shadows.
- Cast Only causes the plane to cast shadows on other objects but not to receive them.
- Receive Only causes the plane to receive shadows cast by other objects but not to cast any.
- Cast and Receive causes the plane to both cast and receive shadows.
- Off causes the plane to neither cast nor receive shadows.
Ambient Light Plane adjusts the brightness of the plane. The default setting of 100 does not add or subtract ambient light from the image. Decreasing this setting darkens the plane before any other light is applied. Ambient light illuminates or darkens the plane evenly, and is unaffected by any other lighting parameters.
The Apply Mode menu controls how the plane is composited with the source image. For descriptions of all the possible Apply Modes, Click Here.
Apply Mix Plane controls the mix of the specified Apply Mode with the Normal apply mode. If the L 1 Apply Mode is Normal, Apply Mix has no affect. If Apply Mix is 0, Apply Mode has no affect. Increase Apply Mix to blend the Apply Mode setting with the Normal apply mode.
Sphere Parameters Group
These parameters apply geometric transformations to the corresponding sphere.
- Note: Many of the Sphere parameters are identical to the corresponding Plane controls. See the Plane parameter group controls above.
Scale Sphere adjusts the size of the sphere. This parameters is scaled as percentages of the sphere’s original size. A Scale setting of 200 produces a sphere twice as big as the original sphere.
Wrap Percentage sets the extent that the image wraps around the sphere. As the value approaches 0, the shape becomes less spherical and closer to the original flat image. A Wrap Percentage of 100 wraps the image completely around the sphere. As you reduce the value, four things happen to the physical model: the radius gets larger, the image is mapped on a smaller section of the 3D shape, the viewer’s eye moves away, and the aspect ratio is adjusted toward the original aspect ratio of the source. The overall effect is a gradual flattening of the image as the sphere unwraps.
The Wrapping menu determines how the source image wraps around the sphere.
- Around wraps the image completely around the shape. This is the most likely choice to use to place media on the shape and spin or tumble it. If the image is fully wrapped, wrapping Around only shows roughly half the source at any given time. This is not always the best choice if you do not spin or tumble your sphere. As you unwrap the sphere using the Around setting, the source covers a smaller part of the modeled shape, and the uncovered area becomes transparent.
- One Way Repeat renders two copies of the source image, one on the front and one on the back. You can see the seam between the two images if you spin the sphere 90° or 270°. Unwrapping the sphere using One Way Repeat causes multiple copies of the source (as many as required to fill the shape) to wrap horizontally around the shape.
- Back & Forth Repeat also renders two copies of the source, but the back copy is a mirror image. This causes the corresponding sides to line up and mirror each other at the seams. This setting unwraps in the same manner as the One Way Repeat setting.
- Front maps the image onto the front of the sphere and leaves the back transparent. This creates a semi-sphere, visible if you spin or tumble the object.
- Tile is similar to One Way Repeat, but it also repeats the image vertically as it unwraps. You can create a tiled sphere by reducing Scale and Wrap Percentage.
The Faces menu determines which faces of the sphere are visible.
- Choose Front to map the chosen Sphere Source to the outside of the sphere.
- Back maps the Sphere Source layer to the inside of the sphere.
- Front and Back maps the Sphere Source layer to the inside and outside of the sphere.
Select the Casts Shadows checkbox to have the sphere cast shadows on other objects.
Select the Light On checkbox to apply a light to the object. Deselect this option to leave the object unlit.
Light Parameter Group
The Light Type menu sets the type of light.
- Diffuse-Specular combines both focused (specular) and diffuse light. You can use this Light Type to create the appearance of a shiny surface lit by a point light source.
- Spotlight simulates the look of a traditional theatrical spotlight.
- Light Sweep creates a linear band of light that sweeps across the layer.
 |
 |
 |
| Diffuse-Specular | Spotlight | Light Sweep |
- Note: Each of the three light types is controlled by slightly different parameters. The shared parameters are described below.
The Source menu chooses the method used to position the light source in space.
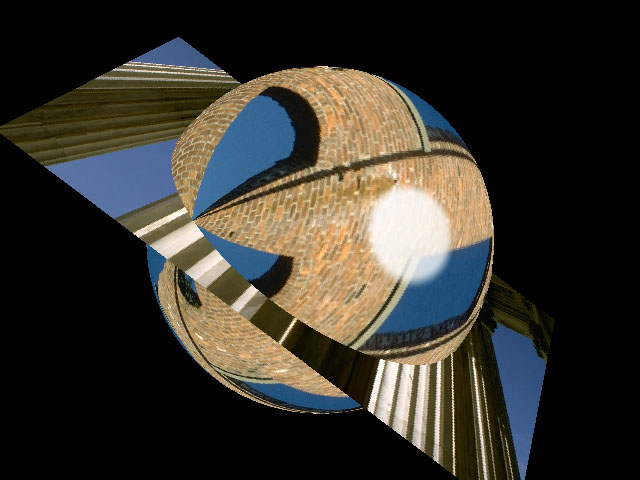
- XYZ allows you to position the light source by specifying X and Y coordinates and the distance between the light source and the image. When XYZ is chosen, Light Source XY sets the location of the light source on the horizontal and vertical axis. The Light Distance Z setting allows you to focus the light or to spread it over a larger area by adjusting the distance between the light source and the image. Decreasing the Light Distance moves the light closer to the image, while increasing this value moves the light further away.
- Directional moves the light around the shape along an arc. When Directional is chosen, Light Distance controls the distance between the light source and shape. Light Elevation and Light Direction control the position of the light source. If you imagine the light source is located on the surface of a sphere (whose radius is controlled by the Light Distance parameter) with the light pointing inward toward the object, Light Elevation sets the latitude of the light source point, and Light Direction sets the longitude of the light source point.
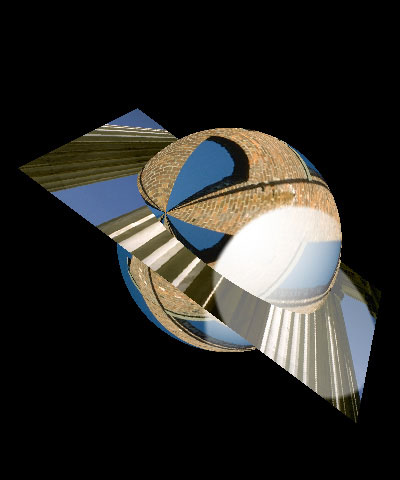
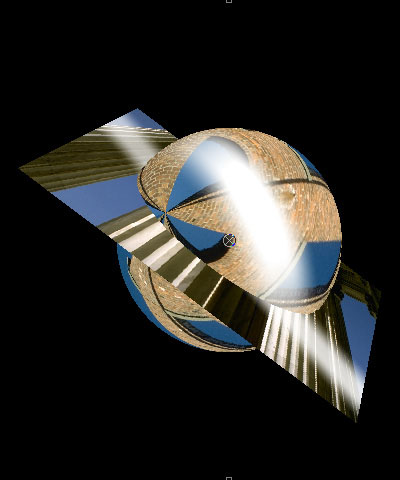
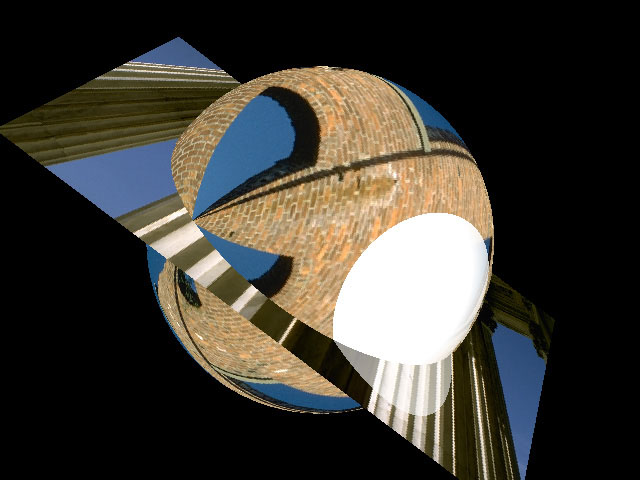
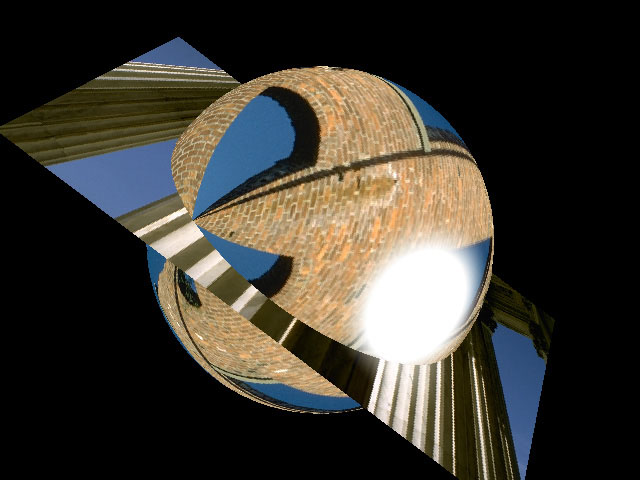
 |
 |
| Light Casts Shadows Off | Light Casts Shadows On |
Light Distance Z controls the distance between the light source and the image plane. Decreasing this value moves the light source farther from the image, while increasing this value moves the light closer to the image. Changing the Light Distance Z setting allows you to focus the light or to spread it out over a larger area.
 |
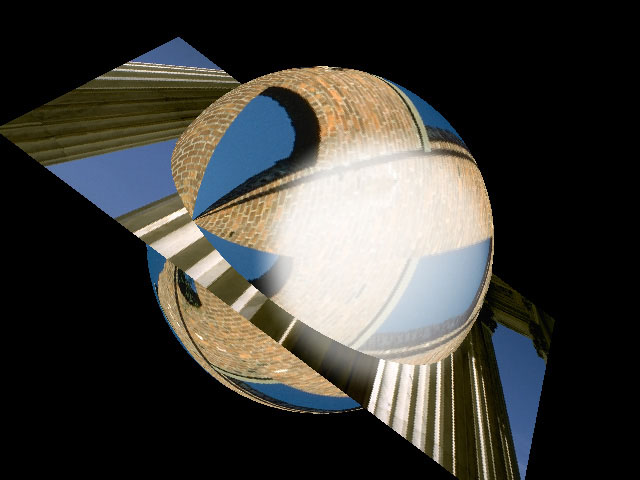 |
| Light Distance Z=2 | Light Distance Z=5 |
Target sets the X and Y coordinates for the point at which the light is aimed.
The remaining parameters in this section vary according to the chosen Light Type. The following chart indicates which parameters are used by each light type.
| Parameter Name | Diffuse-Specular | Spotlight | Light Sweep |
| Cone Width | — | X | — |
| Sweep Width | — | — | X |
| Sweep Angle | — | — | X |
| Intensity | — | X | X |
| Parameter Name | Diffuse-Specular | Spotlight | Light Sweep |
| Diffuse Light | X | — | — |
| Specular Light | X | — | — |
| Light Color | X | X | X |
| Falloff | — | X | X |
| Specular Falloff | X | — | — |
Cone Width controls the width (in degrees) of the cone that defines the edge of the light as it spreads from the light source in three dimensions. Changing the Cone Width is analogous to altering the placement of a physical spotlight within its enclosure.
Sweep Width sets the width, in pixels, of the light beam.
Sweep Angle sets the angle between the beam of light and the horizontal axis.
Intensity sets the intensity of the light source. Increasing this value creates a brighter light.
Diffuse Light determines the amount of non-directional diffuse light applied to the object. Increasing Diffuse Light brightens the object uniformly.
Specular Light determines the amount of specular light applied to the image. Increasing this value increases the amount of light at the center of the lit region.
The following examples show the affect of adjusting Diffuse Light and Specular Light.
 |
 |
 |
| Diffuse=50, Specular=0 | Diffuse =0, Specular=400 | Diffuse=50, Specular=400 |
Light Color sets the color of the applied light.
Falloff adjusts the amount of falloff on the edges of the lit region. Increasing this value adds more falloff, softening the edges of the lit region. Decreasing this value reduces the amount of falloff, creating harder edges on the lit region.
 |
 |
| Falloff=0 | Falloff=50 |
Specular Falloff adjusts the amount of falloff on the edges of the region lit by the specular light. Increasing this value adds more falloff, softening the edges of the lit region. Decreasing this value reduces the amount of falloff, creating harder edges on the lit region.
The Apply Mode menu controls how the light is composited with the source image. For descriptions of all the possible Apply Modes, Click Here.
Apply Mix controls the mix of the specified Apply Mode with the Normal apply mode. If the L 1 Apply Mode is Normal, Apply Mix has no affect. If Apply Mix is 0, Apply Mode has no affect. Increase Apply Mix to blend the Apply Mode setting with the Normal apply mode.
Select the Light Casts Shadows checkbox if you want the applied light to create cast shadows on other objects.
Shadow Softness adjusts the softness of the cast shadows created by the applied light. This parameter has no affect if Light Casts Shadows is not selected.