
The BCC+ Vignette filter generates a popular photographic effect where the photo gradually fades into the background, usually in a circular or rectangular shape. The vignette can be any color as well as thrown out of focus.
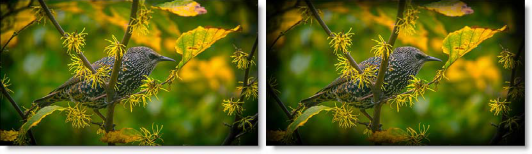
Before and After
Presets and the FX Editor
The FX Editor provides a convenient way to store and retrieve factory installed and/or user generated filter presets. To select a preset, open the FX Editor interface and pick one from the Presets panel. Click the apply button in the FX Editor to return to the host user interface.
To save a custom preset, click the “Create Custom Preset” icon in the top right corner of the parameter list, next to the filter name, set a name for the new custom preset in the dialog that appears and click done.
Filter Parameters
Mocha Mask and Track provides a way for the user to select and track which pixels in the filtered source are actually going to be affected by the filter, via the generation of image based mattes, gradient mattes and vector shape masks. Mocha planar tracking and vector shape masking options are included in the PixelChooser, which allows for the generation of motion-tracked mask shapes as a hold-back mask.
For more information on the Mocha Masking and Tracking, Click Here.
Compare Mode
The BCC Compare Mode provides a convenient mechanism to compare the effect result with the original source layer. It provides several variations on basic split-screen views with the filtered clip placed next to the unedited original.
For more information on the Compare Mode,Click Here.
View: Used to determine the view output from the filter.
- Output: displays the vignette effect over the source image.
- Shape: displays a matte of the vignette shape.
Vignette
Color: The Color parameter sets the color of the vignette through the use of a standard color picker. The default color is black.
Opacity: Sets the opacity of the colored vignette. For defocused vignettes, you may want to turn down the Opacity so you can see the defocused effect.
Blur X: Sets the softness of the image in the area of the vignette along the X axis.
Blur Y: Sets the softness of the image in the area of the vignette along the Y axis.
Blur-Gang: When enabled, it links the Blur X and Blur Y parameters. Adjustments to one will translate to the other as well.
Shape
Position: Sets the position of the vignette shape along the X/Y axis.
Roundness: Sets the roundness of the vignette. The vignette can either be circular or square or anywhere in between.
Size: Sets the size of the vignette.
Aspect Ratio: Changes the aspect ratio of the vignette. A value of -100 would be wider, and 100 would be taller.
Rotation: Rotates the vignette.
Distortion: Distorts the edge of the vignette.
Distortion Size: Sets the size of the distortion.
Randomize: Randomizes the distortion.
Softness X: The softness parameters control the softness of the vignette edge along the X axis.
Softness Y: The softness parameters control the softness of the vignette edge along the Y axis.
Softness-Gang: When enabled, it links the Softness X and Softness Y parameters. Adjustments to one will translate to the other as well.
Blend Mode: Used to determine how the the filtered output is applied to the source image. Blend Modes control the blending of the two images, giving the effect many additional creative possibilities. A complete breakdown of each of the 24 available blending modes is available here.
PixelChooser: The BCC PixelChooser provides a way for the user to select which pixels in the filtered source are actually going to be affected by the filter, via the generation of image based mattes, gradient mattes and vector shape masks. Mocha planar tracking and vector shape masking options are included in the PixelChooser, which allows for the generation of motion-tracked mask shapes as a hold-back mask.
For more information on the PixelChooser, Click Here.
Working with The Filter
- Apply BCC+ Vignette from the BCC Lens unit category.
- Click the BCC FX Editor button from the Effects and Presets banner. The FX Editor user interface opens and consists of Presets, Parameters and Viewer windows.
- Try out some of the presets.
- Adjust the Shape > Roundness to make the vignette either circular or rectangular and use Shape > Softness to control the softness of the vignette’s edge.
- To give the vignette’s edge a random shape, use the Distortion, Distortion Size and Randomize controls.
- Set the Vignette > Color and Opacity.The vignette can be either colored or defocused or a combination of the two.
- Turn down the Vignette > Opacity if you would like to see only a blurred vignette.
- Turn up the Vignette > Horizontal and Vertical Blur to your liking.
- Click the Apply button to return to the host application.